Camera Block Integration
This application note shows how to integrate the Camera Block with your installation using a user script.

Installation and First Use
First follow this general setup. Use this PIXILAB-Blocks-root, which contains all you need for this application note.
Once that is done, follow these steps:
- Start Blocks.
- Open the editor using the Admin button.
- Log in using the name admin and the password pixi.
- Connect three PIXILAB Players to the server. Alternatively, open separate browser windows pointed at the Blocks server, acting as Display Spots. To create multiple spots using the same browser, append "?display=X" to the URL's.
- Locate the spots "LatestPhoto", "PhotoGrid" and "Station" and reassign them to the IDs of the newly connected spots in the previous step.
- Connect to the visitor spot from your phone using the address "http://YOUR_BLOCKS_IP/spot?mobile=Visitor"
- Take photos from either the visitor spot using your phone, or from a web camera connected to the "Station" spot
- Watch the photos appear on the spots "LatestPhoto" and "PhotoGrid".
Use the script on your own Server
If you want to incorporate this capability in your own Blocks server, follow the below steps to get started.
- Copy script/user/PhotoManager.ts|js, script/lib/ListOfImages.ts|js and script/lib/IndexedPropertyPersistor.ts|js from the root folder of this application note to the corresponding directory on your Blocks server.
- Adjust the static variable CAMERA_SPOTS at the top of the PhotoManager class to specify what spots you'd like to take your photos on.
- Recompile PhotoManager.ts using tsc for the changes to take effect (see Development Tools and Code if you're not familiar with how this works).
- (1*) Bind the indexed property photoStream of the PhotoManager script to a child replicator capable block (grid, book, slideshow or scroller etc).
- (2*) Create a child block of type Media URL inside of that replicator block, and select Relative > path as the binding.
- Try out the results.
| Reference | Image |
|---|---|
| 1* | 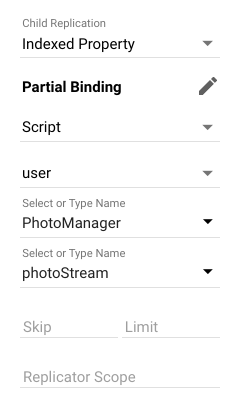 |
| 2* | 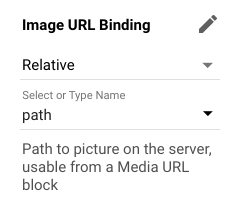 |