 IMPORTANT: This document is obsolete and describes an older version of our linux server.
Advanced Server Configuration (Ubuntu 18)
The setup procedure outlined in "First Start" gets you up and running with a working and secure server. However, accessing the server by its IP address, and having to manually assign a fixed IP address to all devices on the network, isn't particularly practical. These issues can be overcome using two other network services:
- A DHCP server handing out dynamically assigned addresses to network devices, thus removing the need to specifying hard-coded IP addresses everywhere.
- A DNS server, providing name lookups, allowing you to access the BLOCK Server by name rather than by IP address.
The last point is particularly important if you want to allow guests to access your system using their own mobile devices, e.g. to create a Mobile Guide system.
If your BLOCKS Server will be part of an already existing network infrastructure, the services mentioned above may already be present on your network. In that case, all you need to do is adding a name for the internal BLOCK Server to your DNS. Contact your system administrator for help with any necessary configuration of an existing network.
However, if you're setting up a new network for use by BLOCKS, displays and other clients, you may want the server running BLOCKS to also perform the DHCP and DNS functions. To facilitate this, those functions are already installed and pre-configured in the Linux OS image. This article describes how to enable those services, and where to find their configurations, if you need to make any changes.
Introducing Webmin
Most services on a Linux server are at their core enabled and configured using various text files. As those can be hard to find, and even harder to modify in the proper way, a web based graphical user interface is provided, called Webmin. This is already installed in the Linux server image (dated 17-11-24 or later).
The Webmin user interface can be accessed remotely, over the network, using a web browser. However, enabling webmin requires local access through a terminal window. So you may want to do this as part of your initial setup, while you have a keyboard connected to the server. Once this first step has been done, remaining configurations can all be done through the browser-based user interface.
If webmin has been disabled and you wish to enable webmin, first switch to the pixi-admin user through the menu in the top right hand corner of the screen.

When requested, type in the password you assigned to the pixi-admin user in "First Start". Once you've switched to the pixi-admin user, open the Terminal using the button in the left hand panel.
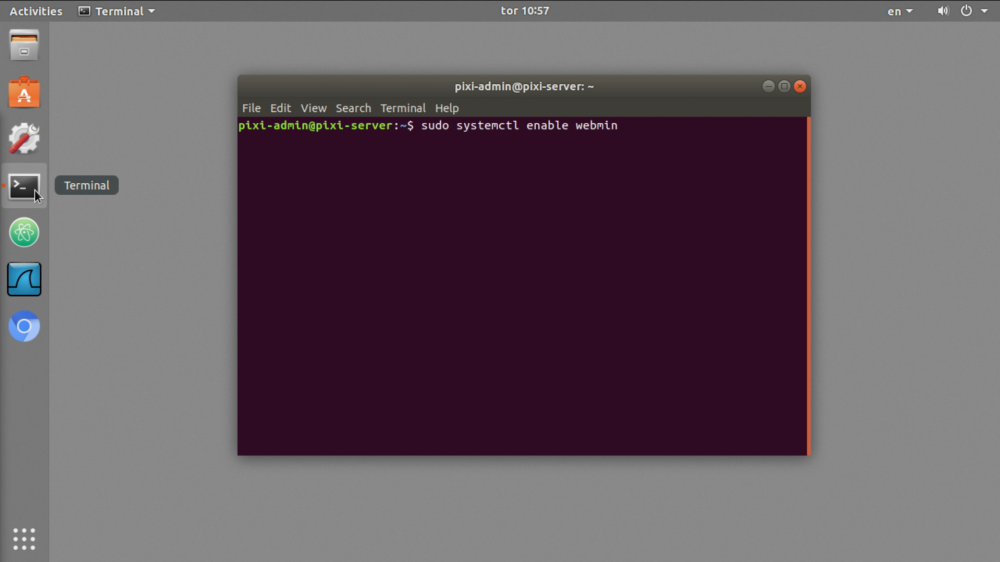
Type the following two commands into the terminal window, one by one
sudo systemctl enable webmin
sudo systemctl start webmin
When asked for your password, type the password assigned to the pixi-admin user (the one you used when switching to this user). Nothing will appear on screen as you type the password into the Terminal window, but the password still takes effect. The first of the two commands enables webmin for future server starts. The second command starts it now, so you can use webmin right away without having to restart the server.
Using another computer, connected to the same network, open a web browser and type in the IP address of your BLOCKS Server, followed by a colon and the number 10000. You may also access webmin from a brower started on the server by typing https://localhost:10000 in the address bar.
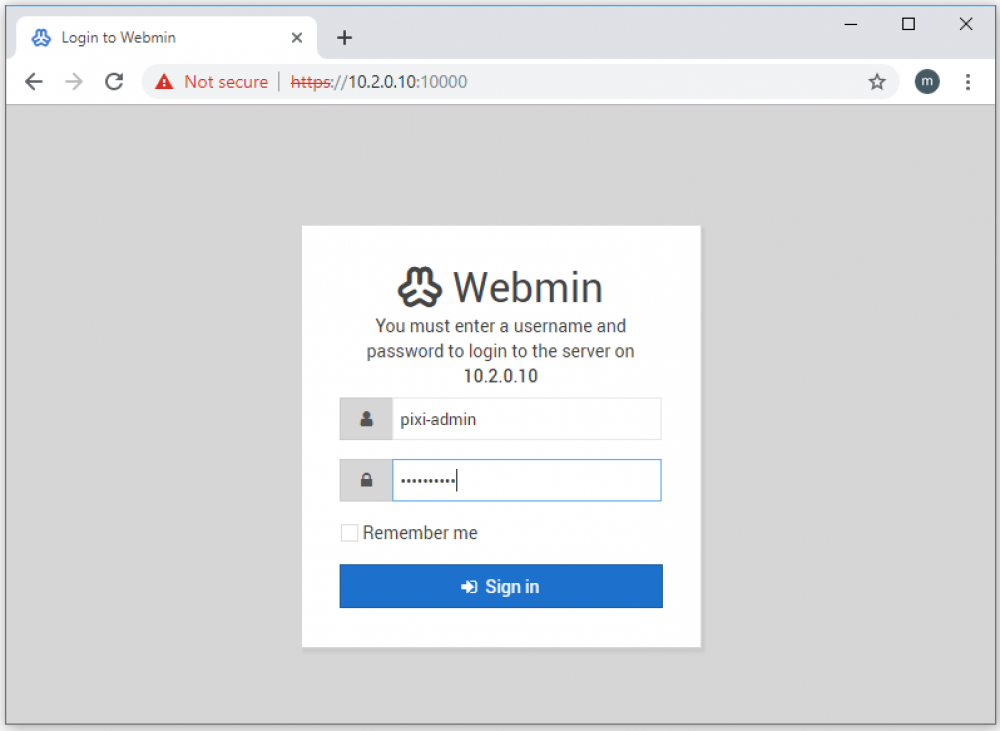
You may see a warning message when first accessing webmin. This warning is caused by the kind of certificate used by webmin to encrypt the communication. You need to convince your web browser that this is normal, asking it to store a certificate exception for this server, thereby avoiding this warning in the future.
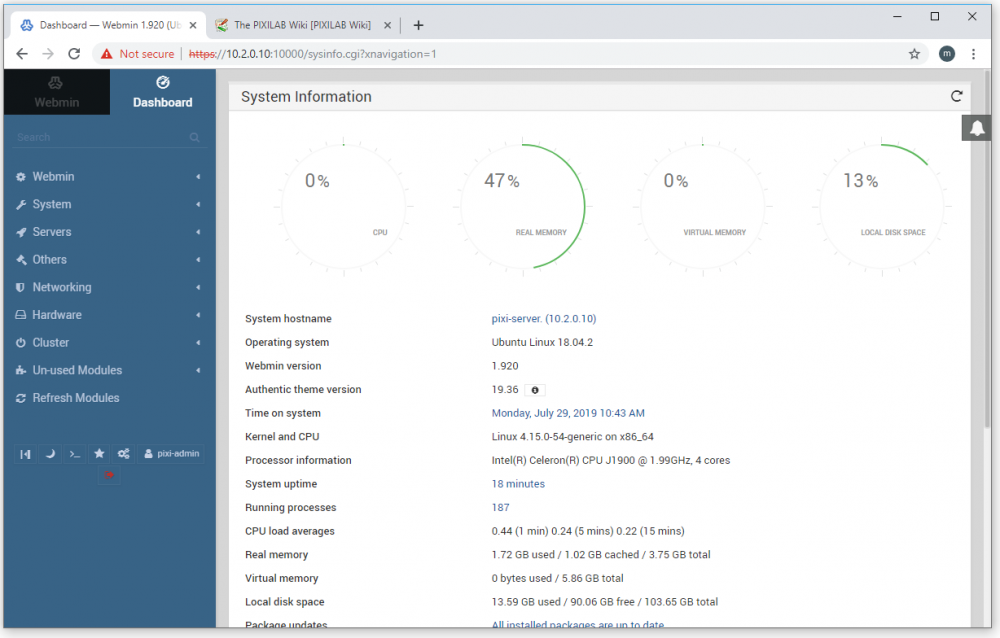
The start screen of webmin shows some basic information about your server.
DHCP Server
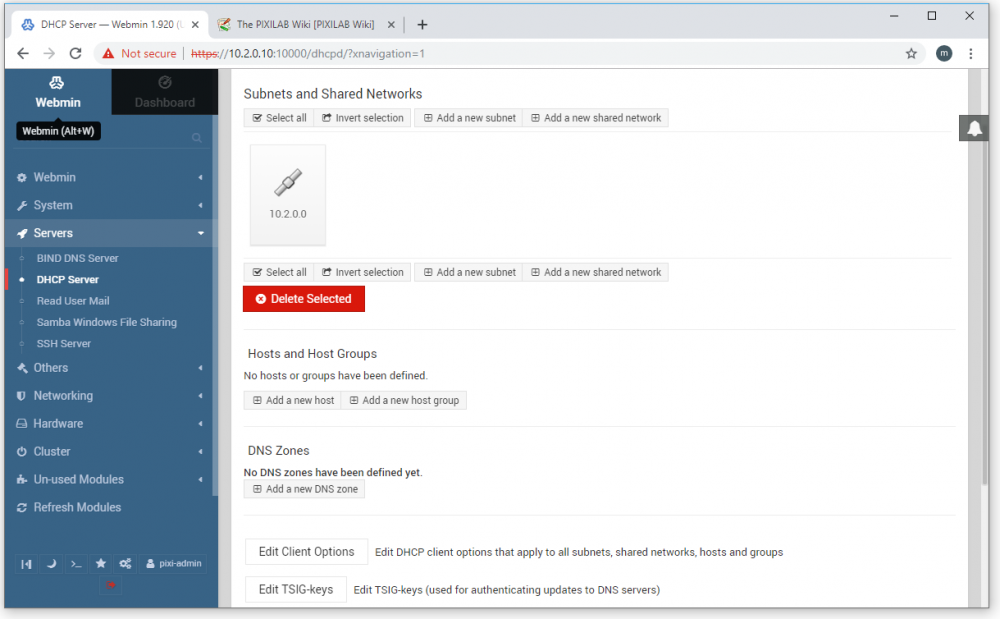
The DHCP server configuration is found under Servers/DHCP Server in the menu shown on the left hand side. Click that item to open the "DHCP Server" panel.
Scroll down a bit and click the "Edit Network Interface" button. In the list that appears, make sure that your Ethernet interface is selected, then click Save.
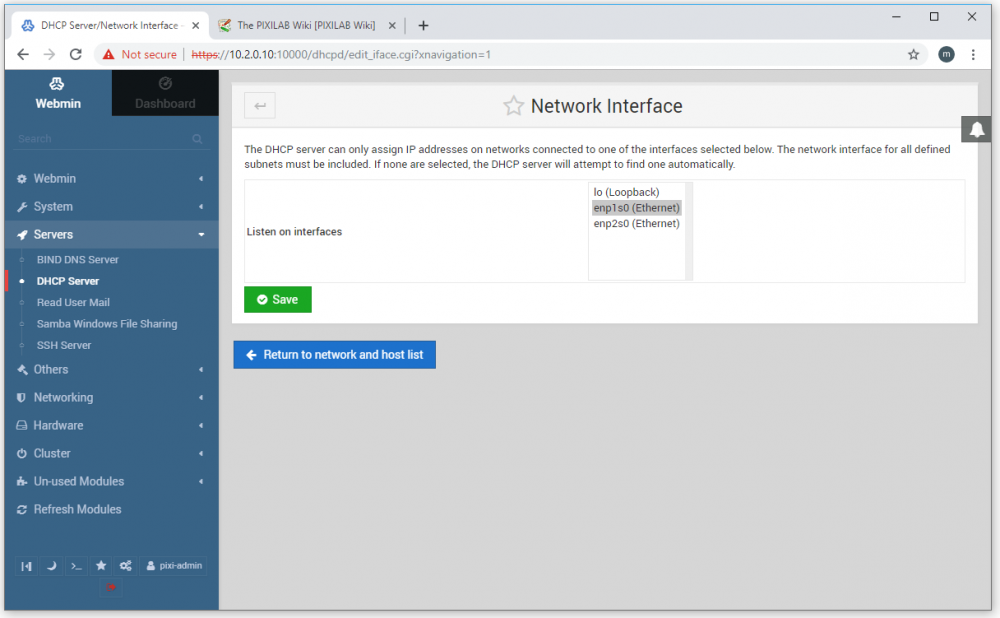
The exact name shown for your Ethernet interface (in the illustration above "enp2s0") may vary. If you have multiple ethernet interfaces, you may need to revisit Networking menu to learn about the proper network interface name.
Return to the "DHCP Server" page and click the small, red pen symbol in the top right hand corner of the rectangle with the 10.2.0.0 IP address. This opens the configuration for this subnet.

As you may recall from the "Network Configuration" section of the First Start article, we gave the server the IP address "10.2.0.10", with a netmask of "255.255.0.0" (or "16" as this is sometimes called). Hence, the BLOCKS server is in the "10.2.0.0" subnet, which is the subnet about to be managed by this DHCP server. If you gave the server another IP address for some reason, you need to adjust the subnet address managed by the DHCP server accordingly, which is done in the "Network address" field.
Here, you also specify the range of addresses allocated to dynamic clients. You typically want a small number of addresses reserved for network devices that need a fixed IP address (such as the BLOCKS Server itself). In this example, we're allowing the DHCP server to dynamically allocate address in the 10.2.5.1 through 10.2.16.254 range, giving us loads of dynamic adresses, while all addresses below 10.2.5.1 can be used for fixed IP address, as those are off limits for the DHCP server. You can adjust those numbers as you see fit. Click the green "Save" button at the bottom of the window if you make any changes.
Client Options
In addition to merely handing out dynamically assigned IP addresses to clients, a DHCP server can also inform clients of other important pieces of information. Those are called "Client Options". To review those options, first return to the top level "DHCP Server" view, then click the "Edit Client Options" button.
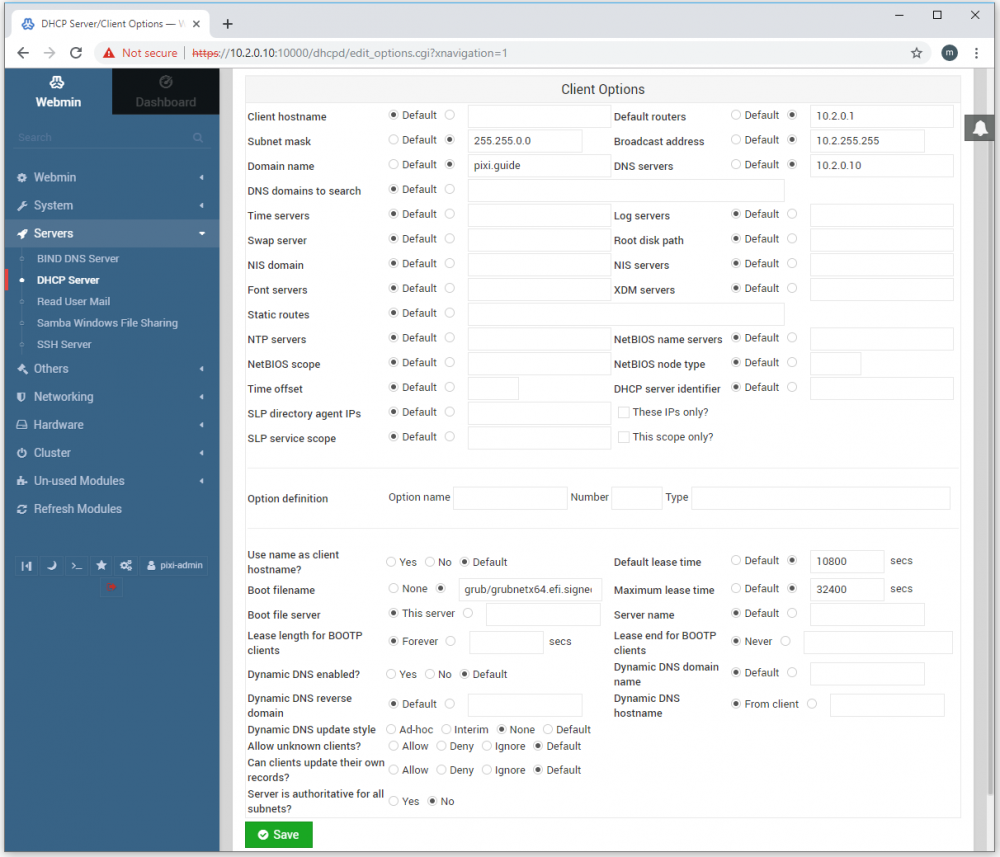
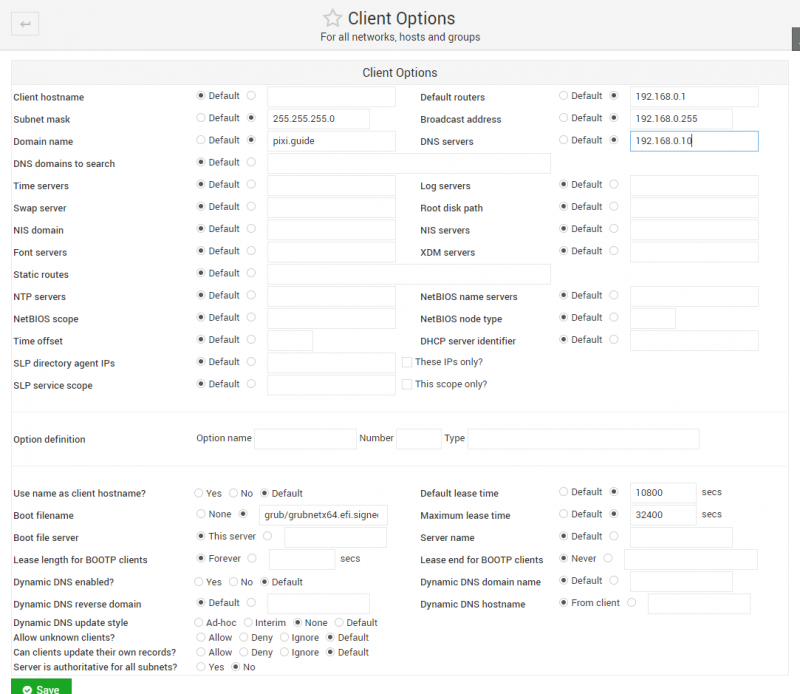
The following options have been specified here. Again, you may need to adjust those as appropriate if you change the server's address or other network-related options.
- Subnet mask. Specifies the type of subnet being used (in this case a B-class).
- Domain name. Informs clients about the default domain name, which in this case refers to the name to be given to the BLOCK Server.
- Broadcast address. Consists of the base network address with 255 in the last segment, and is used for some specialized network functions.
- DNS server. The IP address of the DNS to be used by DHCP clients. The address shown here is the address of the BLOCKS Server itself, which we'll configure to use as a DNS later in this article. Leave empty if you don't want to use a DHS server, or modify as appropriate if you prefer to use another DNS server already available to you.
- Default router. Enter the router address to be used by clients if you want them to have access to the internet or other "outer" network. The router is a separate piece of hardware, sitting between the BLOCKS Server's network and another, outer network (possibly the Internet). The router typically has an address ending in ".1". Remove this field if you don't want to provide access to any outside network.
- Boot filename. Set to "grub/grubnetx64.efi.signed " as shown above and select this radiobutton instead of None. This option supports network (PXE) booting of PIXILAB Player with Blocks 3.
Click the green "Save" button at the bottom of the window if you make any changes.
If your DHCP server is already up and running, you need to click the green "Start Server" button at the bottom of the the top level "DHCP Server" window to activate those changes. Existing clients may need to disconnect and then re-connect to the network to pick up any changes.
Enabling and Starting the DHCP Server
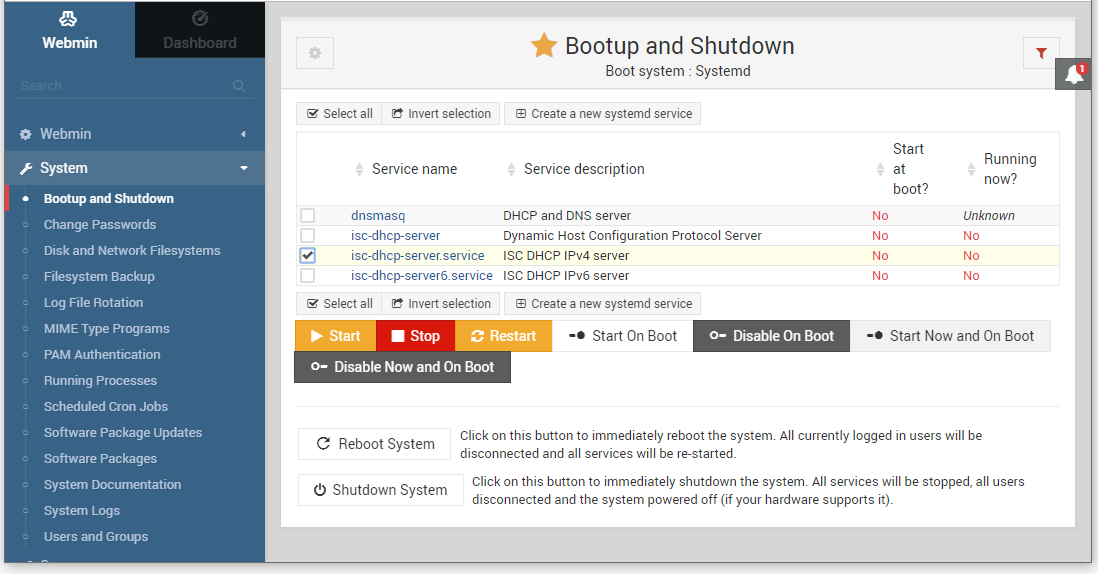
To start your DHCP server, and to make sure that it will start automatically if the server is restarted, select "Bootup and Shutdown" under System in the menu on the left hand side. Once the list of services appear, type dhcp into the filter field in the top right hand corner to see only relevant services. Put a checkmark next to "ics-dhcp-server.service" as shown below, then click "Start Now and on Boot". Return to this page, filter on dhcp again, and verify that both the "Start at boot" and "Running now" columns read "Yes" for the service you just enabled. The service will automaticly start the "ics-dhcp-server".
Verify Operation of the DHCP Server
Once the DHCP server is properly configured and started, connect another computer to the same network, and set it to use "Automatic" or "DHCP" addressing mode. This will cause it to look for a DHCP server on the network, obtaining its address and other settings from there. Here we're using a Mac set to "Automatic". Once it connects to the network (indicated by the green circle next to the interface name), the settings obtained from the DHCP server appear as "IP Address", "Subnet Mask", "Router" and "DNS Server". The values indicated here should match your DHCP server settings, as described above.

If you don't get any values in those fields, here are some points to check
- Check that the DHCP server is indeed running (see above).
- Ensure that your separate computer is connected to the same network as the server (open a terminal window and type "ping 10.2.0.10" to verify that it reaches the server).
- If you just made changes to your separate computer's network settings, make sure you've clicked any "Apply" button to make those changes take effect.
Macs may take 1-2 minutes to connect properly to DHCP (showing a "green light" in the settings) if no internet connection can be found, which will be the case here since we're on a small local test network.
DNS Server
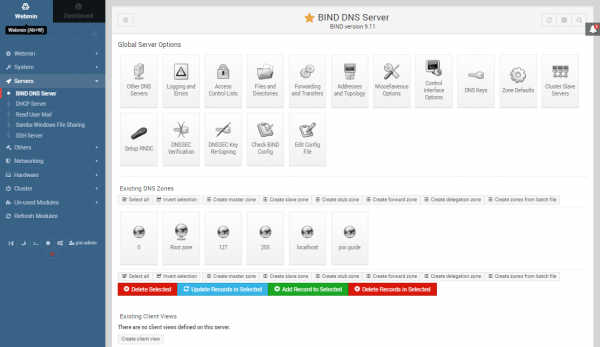
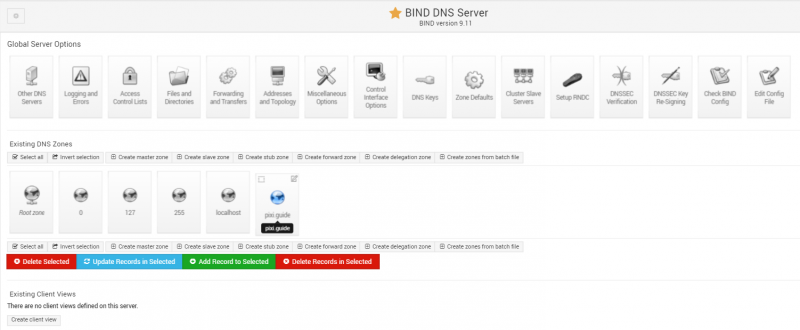
The procedure for configuring and enabling the DNS server is similar to the one used for the DHCP server above. Start by selecting "BIND DNS Server" under "Servers" in the list on the left hand side. This displays a window with a number of buttons at the top. Scroll down a bit a locate the rectangle named "pixi.guide".
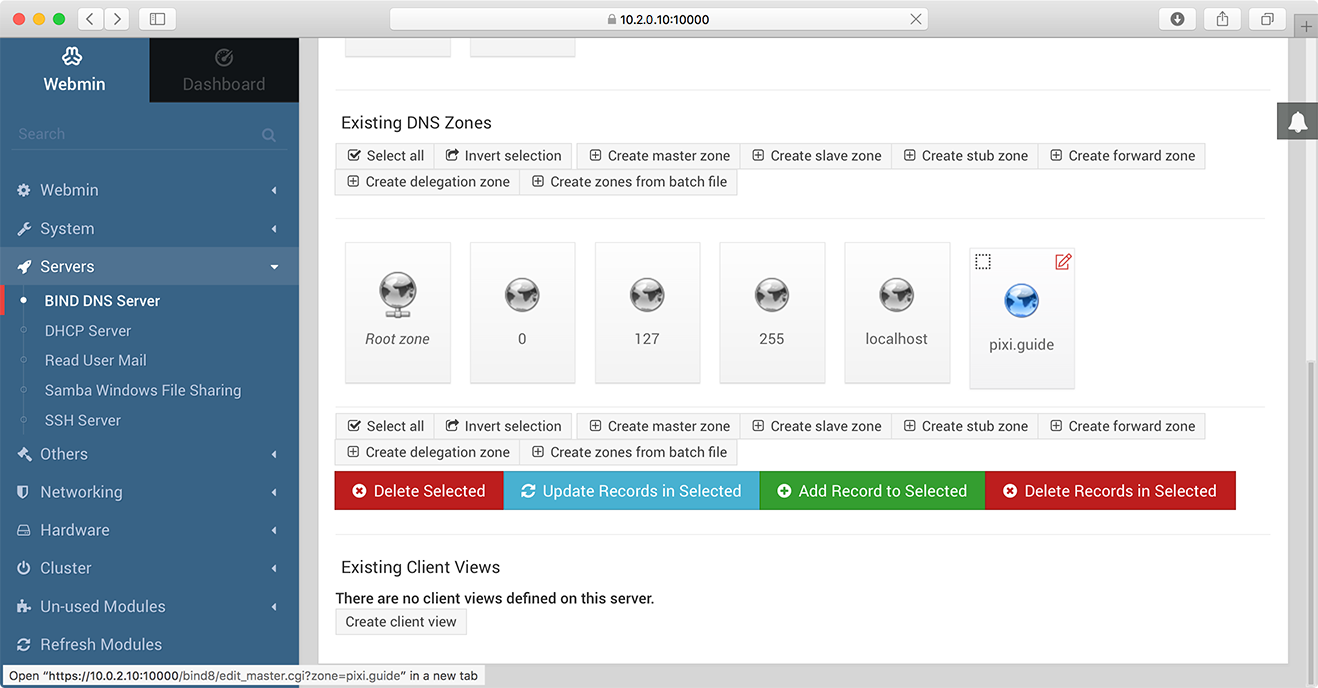
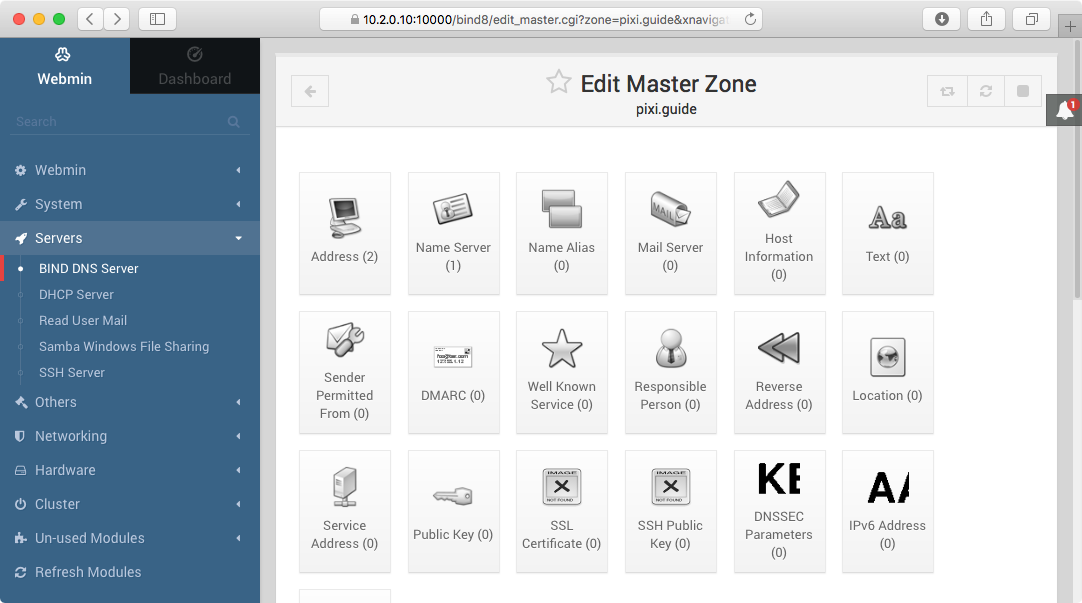
Click the red pen symbol in the top right hand corner of this rectangle. This opens the "Edit Master Zone" window shown below. Here, click the "Addresses" button.
The next window lists all name-to-address bindings.
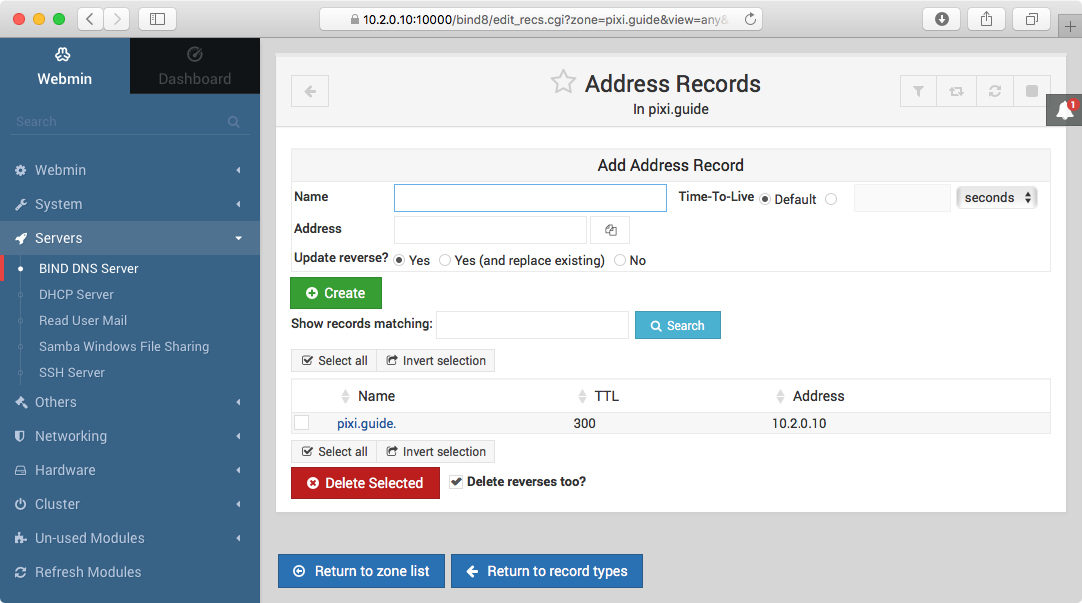
The name "pixi.guide" is pre-configured pointing to the IP address of the BLOCKS server (here assuming that the server is configured as set up in the First Start article). If you use a different address for the server on your network, it must be changed accordingly here.
There's also an alias (CNAME) record named "int.pixi.guide" that points back to "pixi.guide", which is used in some cases and should be left in place.
As a side note, the name given to the server (here "pixi.guide") is somewhat arbitrary. Since this DNS server applies only to your internal network, and isn't visible on the Internet, you can choose any valid domain name you want. However, PIXILAB recommends that you go with the "pixi.guide" name for the following reasons:
- It's the name we will use for any services and applications that need to access the server on your local network.
- It exists also as a real domain on the Internet, informing any visitors that they need to select your local wifi before they can access your mobile guide.
The second point above is important if you provide guide functionality for your visitors using their own mobile devices. Such guide functionality is then typically accessed by first choosing your local wifi network provided for this purpose, then accessing the server using an easy-to-remember name (here "pixi.guide"). If your visitors overlook the need to first choose your local wifi network, and just enter the name into their browser, they may only get a cryptic error message if there's nothing responding to that name. By also having an Internet server responding to the name, your visitors will instead get a meaningful message, telling them what to do.
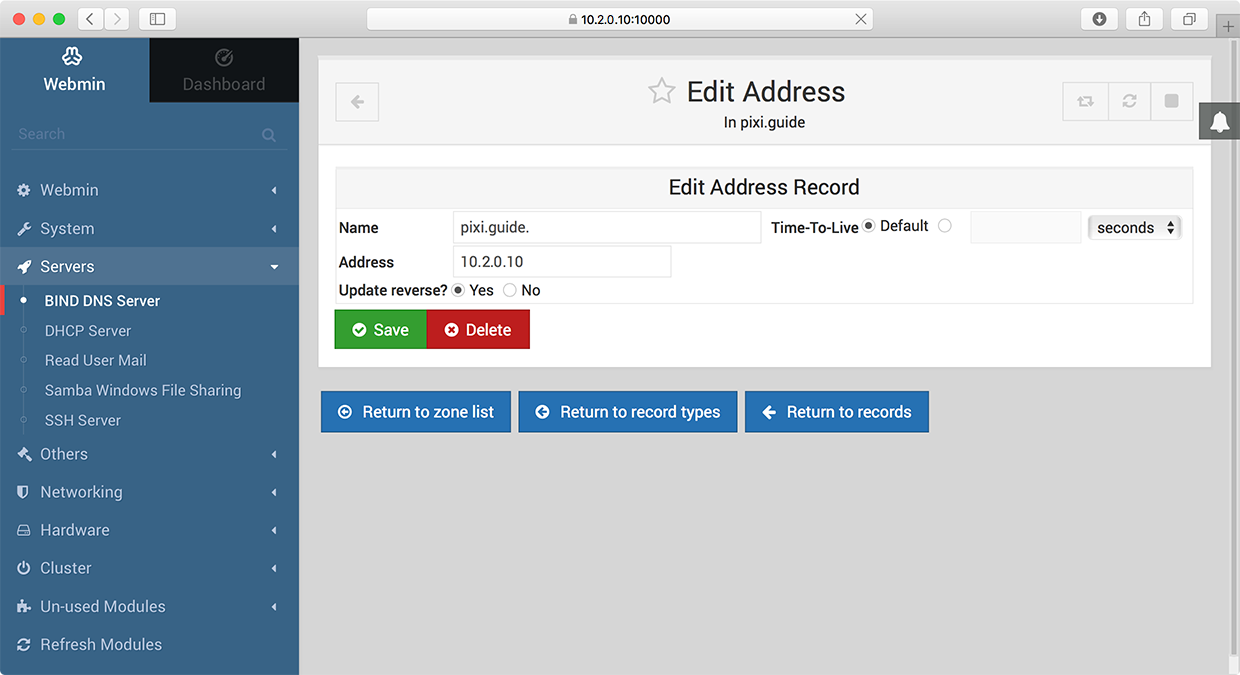
If you need to change the addess of the server, click the server name (shown in blue on the previous illustration). This opens the window shown below. Here, change the address as appropriate and click Save.
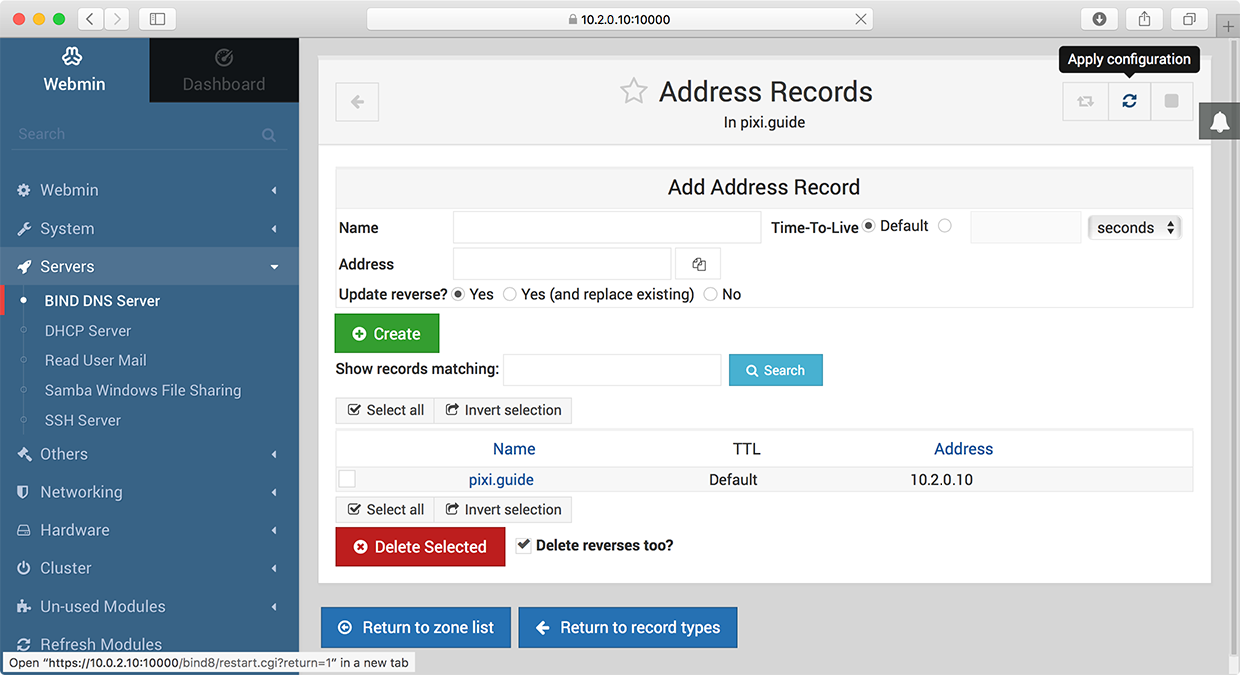
If you make any changes to the DNS server while it is running, click the "Apply Configuration" button shown in the top, right hand corner.
Enabling and Starting the DNS Server
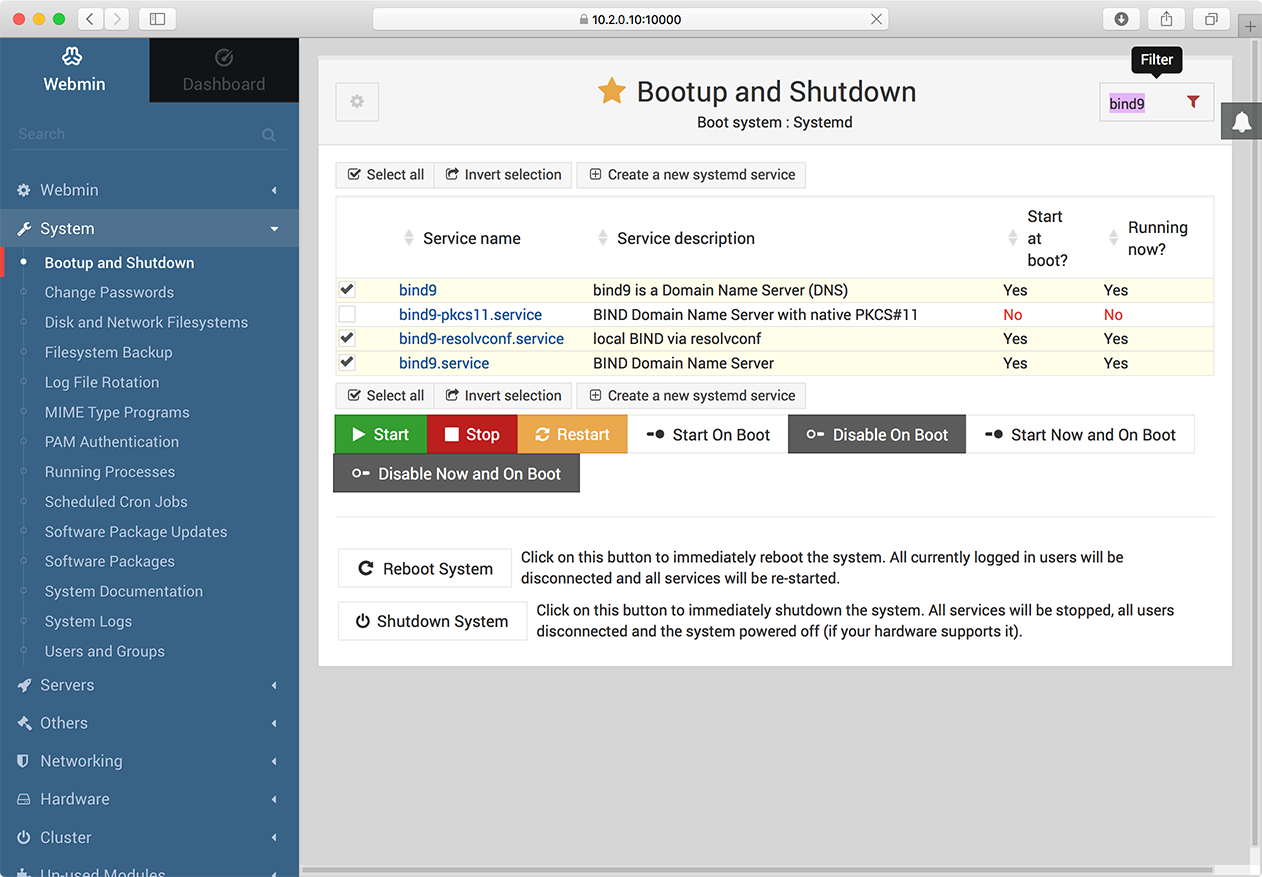
To start your DNS server, and to make sure that it will start automatically if the server is restarted, select "Bootup and Shutdown" under System in the menu on the left hand side. Once the list of services appear, type bind9 into the filter field in the top right hand corner to see only relevant services. Put a checkmark next to "bind9", "bind9-resolveconf.service" and "bind9.service", as shown below, then click "Start Now and on Boot". Return to this page, filter on bind9 again, and verify that both the "Start at boot" and "Running now" columns read "Yes" for the services you just enabled.
Create a new DNS Zone Master Record
This article is related to a general network topic outside the scope of blocks. We always recommend to have a network professional at hand when setting up an optimal network infrastructure.
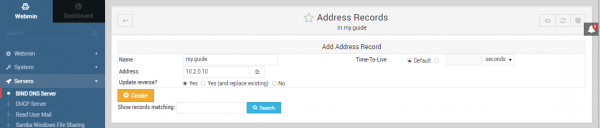
If you wish to use a custom domain name that fits the purpose of your installation better, it is possible to add a Zone Master Record for your domain name. If your domain name will be used in installations where visitors can use their own devices you should always use a domain name that you own. That way you can publish instructions over the internet that advises the visitor to log on to the local wifi if they are still on the internet. On installations where you have full control over the devices this is not necessary as long as you don´t want to use ssl connections. I will describe the steps to ad another record “my.guide” that will work in parallel with the default pixi.guide domain. Log in to webmin, ([your servers IP address]:10000 should take you there. Log in as pixi-admin. Select Servers/BIND DNS Server in the left-hand menu.
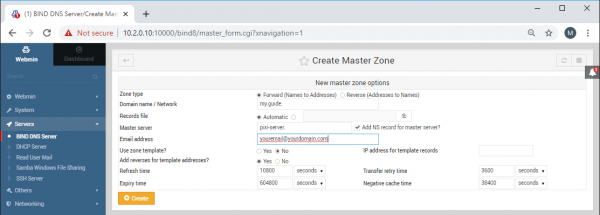
Click the Create master zone button. Enter your domain name, the server address and an email address.
Click Create. You have now created a Master Zone, now we need to add a A-record to the zone. This is done by clicking the new Master Zone Records icon, then click the Address button.
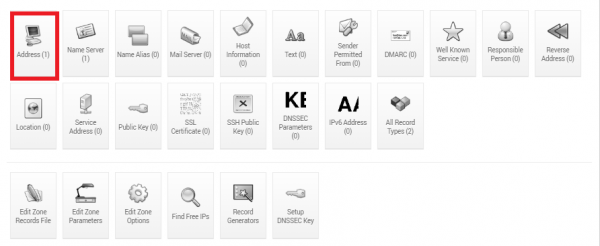
Enter your domain name and the IP address of your server and click create.
Finally, restart the DNS-server or the computer. (This can be done in webmin, System/Bootup and shutdown, search for bind, select bind9 and click the restart button).
Verify Operation of the DNS Server
To verify that the DNS server is running and response properly, open a terminal window on a separate computer on the same network, and type
nslookup pixi.guide
This will attempt to look up the name given to the server. If your other computer is indeed using your newly configured DNS server, it should look up the name there, and give you a result like this.
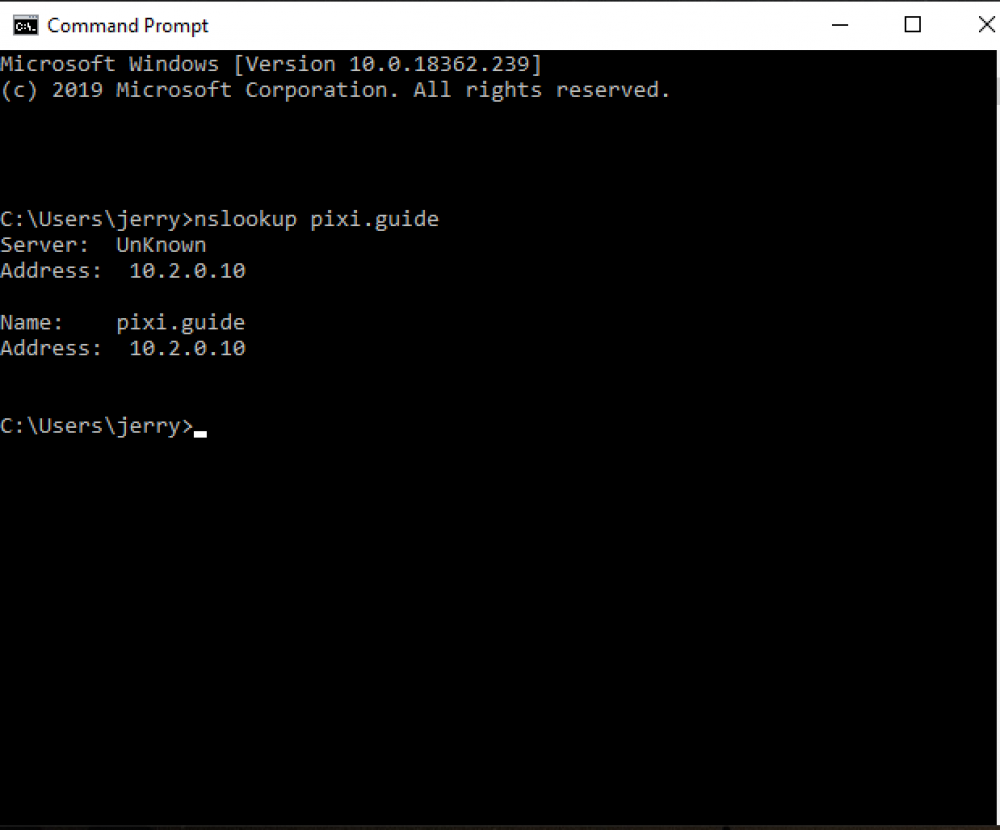
This response provides you with the following information:
- The server being used is at address 10.2.0.10 (which is the address of the BLOCKS server, now also acting as a DNS server).
- The adress being resolved for the name "pixi.guide" is 10.2.0.10 (again, the address of the BLOCKS server).
Here are some things to check if you don't get the expected response:
- Ensure that your separate computer is connected to the same network as the server (open a terminal window and type "ping 10.2.0.10" to verify that it reaches the server).
- Are you using the BLOCKS Server as the DHCP server, as described earlier in this article? If so, it should provide your separate computer with its own IP address as the DNS adress. See under Verify Operation of the DHCP Server above.
- Are there other enabled network interfaces on your separate computer? If so, that network can specify another DNS which may take precedence. This will be indicated by the Server address shown not being the IP address of the local BLOCKS server. If so, disconnect that network and try again.
Advanced IP configurations using Netplan
Webmin is a very good remote tool to administrate a Linux server. However, it has it's built in limitations. Some advanced setups is simply not possible to do via the Webmin interface. One examle is VLAN. In those cases you may want to use Netplan and it's configuration files to set up the network.
Change IP address directly in Netplan. Change the IP address is pretty basic in Netplan. You will have to log in as pixi-admin. Edit the file /etc/netplan/[interface}.yaml where [interface] normally is the systems interface name ie eno1 but can be anything. Using this method is recommended for any advanced network setup such as vlan etc.
This code shows an example of the Blocks default IP setting. network:
  ethernets:
      eno1:
          addresses: ['10.2.0.10/16']
          gateway4: 10.2.0.1
You must adhere to a correct code indent for each line of the block. In other words, the prefix number of spaces for each line is important. A tip is to a code editor with a yaml plugin enabled.
All you need to do is to change the IP address stored with the tag addresses: to you desired IP address and netmask. More information how to configure the more complex network setups with examples can be found here (https://netplan.io/examples). If you are running a DHCP and DNS, the records and subnets must be updated accordingly.
Change the default IP and subnet of a Blocks server
This guide shows what to do if you want to change the server IP address and move the server to a different subnet. If you are using the same computer for Blocks, DNS-server and DHCP-server you must do all steps. In the case you just want to change the IP of a Blocks server not running DHCP and DNS just do the steps for changeing the IP address.
Keep in mind that changing the servers IP remotely may prevent you to reconnect to the server again via Webmin. It is recommended to do the IP settings from Webmin from the local computers browser using the http://localhost:10000.
Change the servers IP.
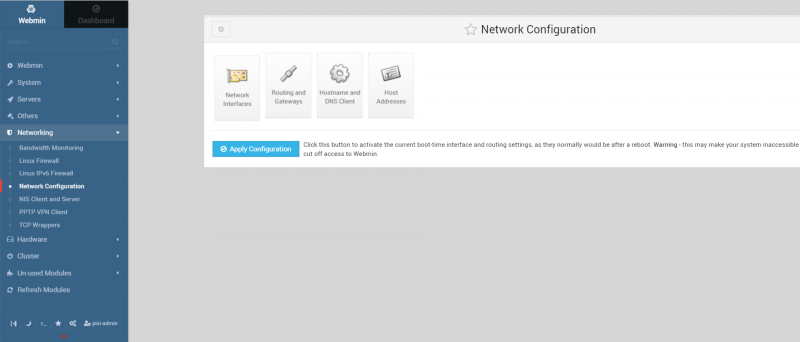
Using Webmin, select Networking/Network configuration/Network interfaces
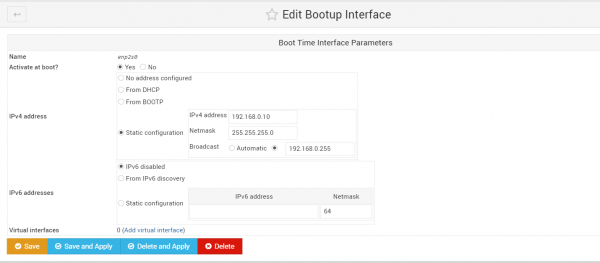
Click the activated at boot tab and double-click the network interface to bring up the edit window.
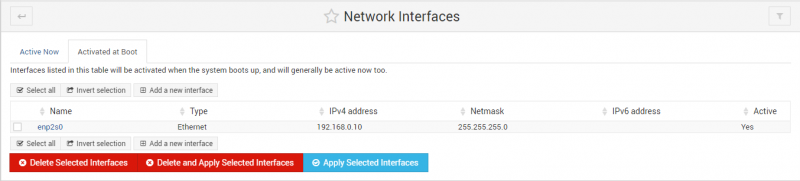
Enter you servers new IP address, netmask and broadcast address. Click save.
Edit the Gateway address
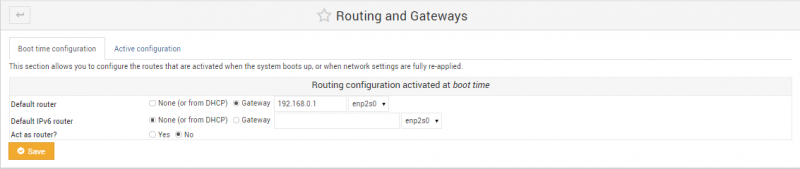
In Networking/Network Configuration, click the Routing and Gateways button. Enter your new gateway IP, in my case 192.168.0.1.
Click Save then return to netwok configuration.
Change DHCP subnet IP address
Log on to Webmin and select Servers/DHCP server.
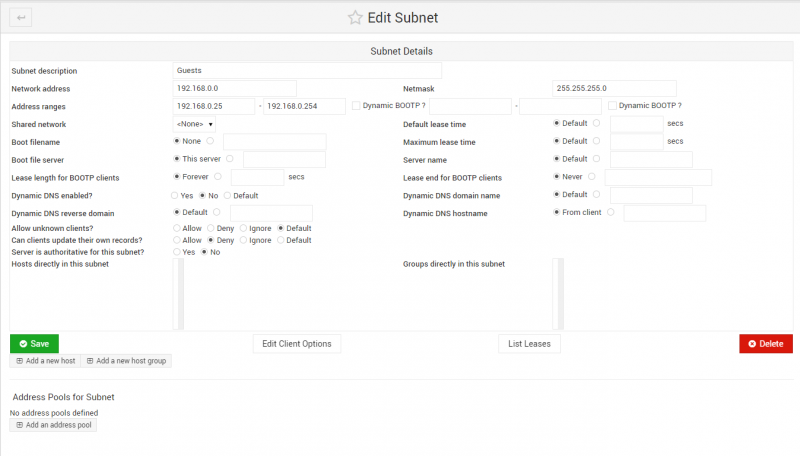
Edit the default subnet 10.2.0.0 to match your network preferences. In this case a will setup class C network with the address 192.168.0.0. I set the range to 192.168.0.25-192.168.0.254 and the netmask 255.255.255.0.
Click save.
Click the Edit the Clients Options. Enter your DHCP clients new network preferences.
Click save.
Restart the DHCP server, this can be done within Webmin by selecting Bootup and Shutdown and filter on DHCP. Select the isc-dhcp-server.service and click the restart button. Reboot any dhcp client computers.
Change the DNS records
Using Webmin, select Servers/BIND DNS Server. Click click the pixi.guide DNS master zone.
Click the Address Records button.

Double click the pixi.guide. record to open the edit window. Enter your new server IP address, in my case 192.168.0.10
Click save.

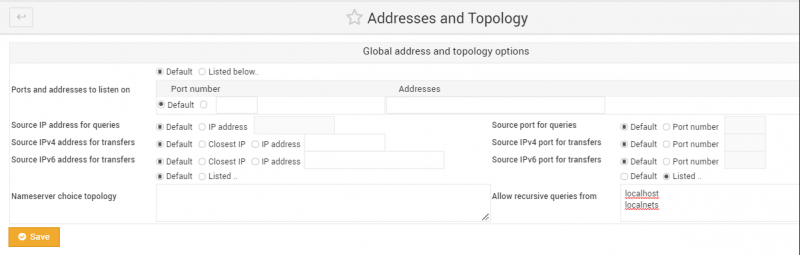
Click the Addresses and Topology settings button. Here you can either specify the IP of any subnets and local host that should be a . It is also possible to allow localhost and any localnets by enter that in the Allow recursive queries field as in my examlple.
Click save
Restart the DNS server, this can be done within Webmin by selecting Bootup and Shutdown and filter on Bind. Select the bind9.service and click the restart button.
Any issues, you may want to reboot the computer and any clients once before troubleshooting.
Viewing Logs
When things don't work as expected, valuable information can often be found in various log files. Those exist as text files on the server itself, byt can be viewed remotely through webmin.
To view a log file, select "System Logs" under "System" in the menu on the left hand side. This shows a list of log files. Click the View button (outlined in red below) to view the log file of the BLOCK Server program. It is a possible to map any log to the webmin System Logs view by clicking "Add a new system log" button and configure the path to the log file and select the message type to log.
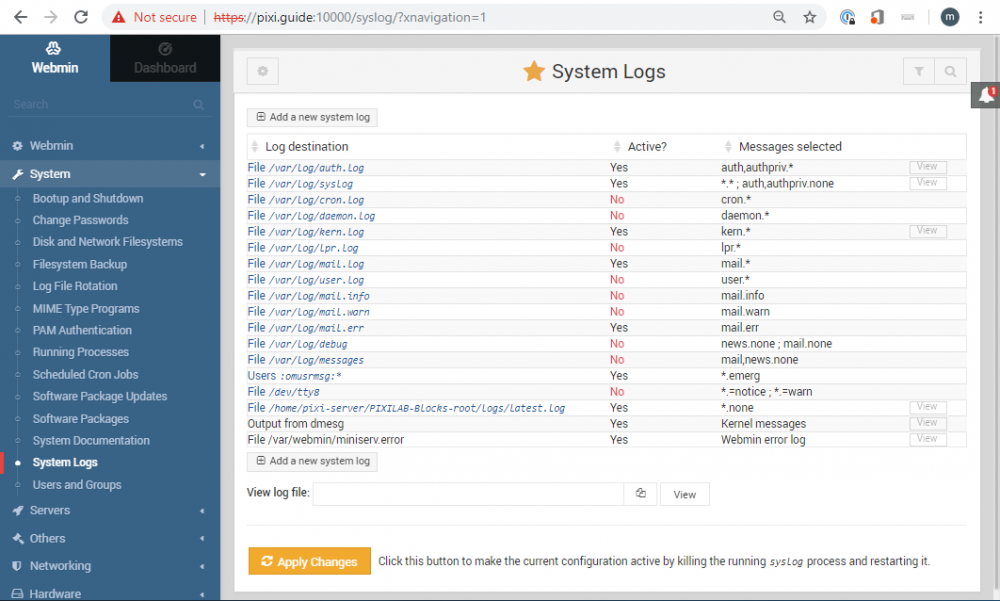
While viewing the log, you can specify that you only want to see log messages that include some specific text (such as the word ERROR), and to increase the number of lines shown.
The method described above shows only the current log file. PIXILAB Blocks also archives several old log files in its "logs" directory, which may be useful when diagnosing events that happened in the past.
For general server errors, not specific to the BLOCKS Server program, it is sometimes valuable to check the "syslog" file in the same way. For example, if you run into trouble with the DHCP or DNS server, this log may reveal why.
File Transfers and Sharing
Sometimes, you may want to copy files to/from the server. You can do so directly in webmin (under Others > File Manager). This can be useful for occasionally pulling or uploading a file from/to the server. You can, for instance, use this method to download archived log files from the server by selecting "File Manager" under "Others" in the menu on the left hand side, navigating to /home/pixi-server/PIXILAB-Blocks-root/logs and clicking the name of one of the "archived" log files. A similar method can be used to upload files to the server.
However, it's often more convenient to connect to the server by mounting it as a network volume on your own laptop, rather than copying files back and forth. This makes the server files directly accessible, without having to copy them.
Configuring File Sharing
To configure file sharing, select "Samba Windows File Sharing" under "Servers" in the menu on the left hand side.
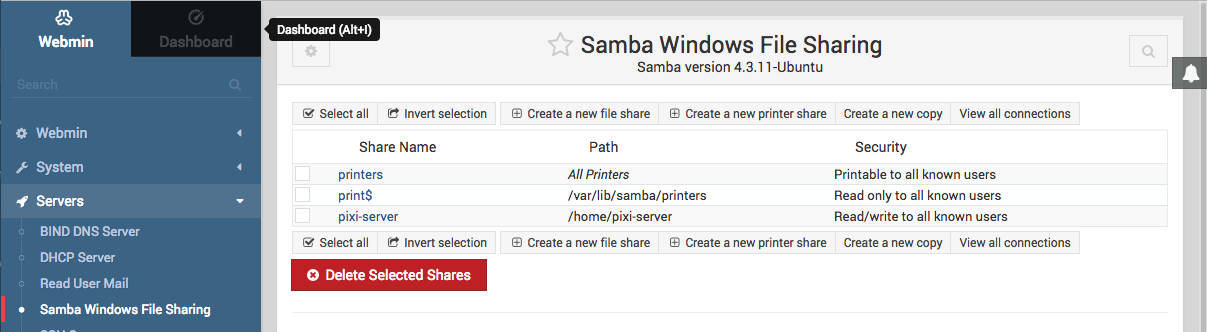
There is one pre-configured share:
- "pixi-server" provides direct access to the BLOCK Server files for authenticated users.
File Sharing Users
The users that can access File Sharing are specified and configured separately. Even though the preconfigured users have the same names as the Linux OS users, they do not share their passwords. To configure the File Sharing users, click the "Samba users" button on the "Samba Windows File Sharing" page. Doing so reveals a list of users. Click each user in turn to configure its password. The illustration below shows how to change the password for the pre-configured "pixi-server" user.
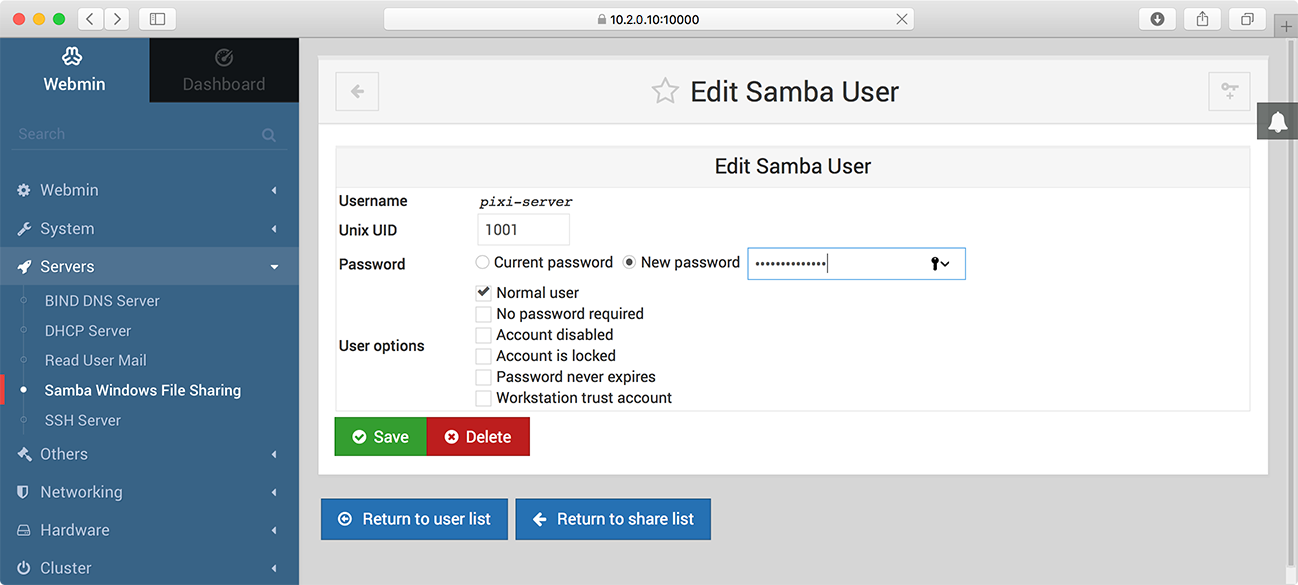
You must change the password for all active File Sharing users before you start File Sharing. Leaving those passwords unchanged allows anyone who knows the default passwords and has access your network to access your files.
After changing user settings, click the green Save button. If you don't want to keep a pre-configured user, click the "Delete" button instead. You may also add other users with their own names and passwords, if desired.
Enabling and Starting the File Sharing Server
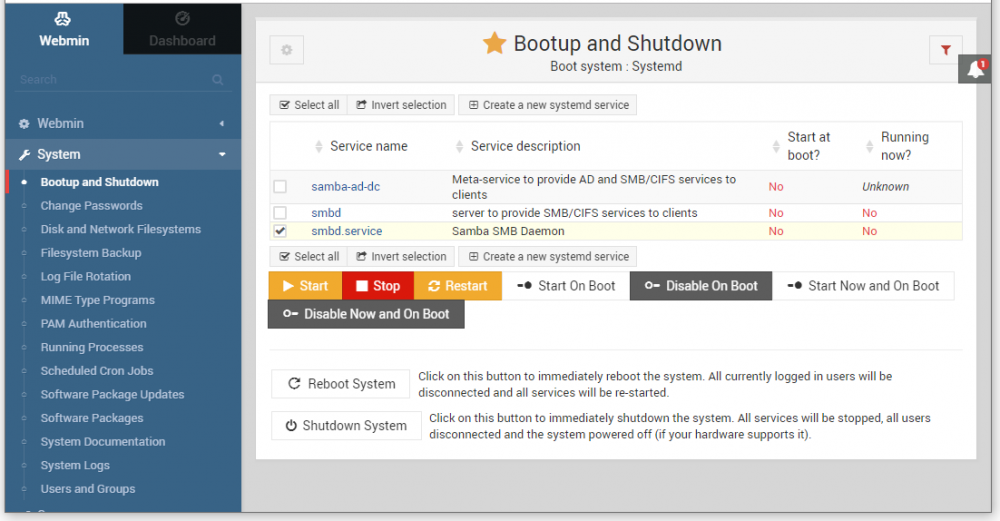
To start File Sharing, and to make sure that it will start automatically if the server is restarted, select "Bootup and Shutdown" under System in the menu on the left hand side. Once the list of services appear, type "smb" into the filter field in the top right hand corner to see the relevant services. Check "smbd.service", as shown below, then click "Start Now and on Boot".
Verifying File Sharing
Connect to the server using file sharing from a separate computer connected to the same network. Examples here show how to do so from a Mac, with the procedure from a Windows computer being similar.
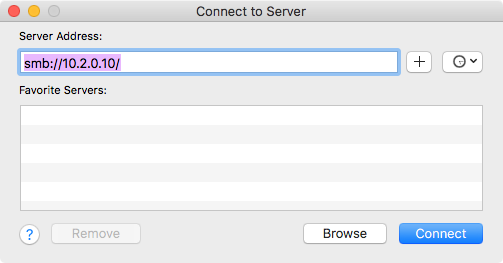
First open the "Connect to Server" window and type in the IP address of the server (if you have a configured DNS pointing to the server, you can use its assigned name instead of the IP address. Default IP is 10.2.0.10 in Linux images dated 2019-07-01 or later).
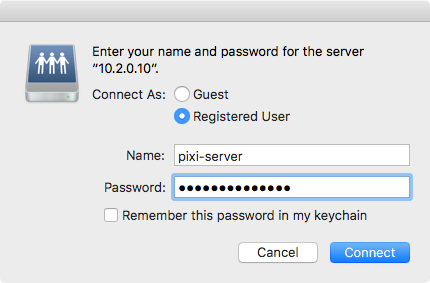
Type in the user name and password (as specified above under "File Sharing Users"). then press Connect.
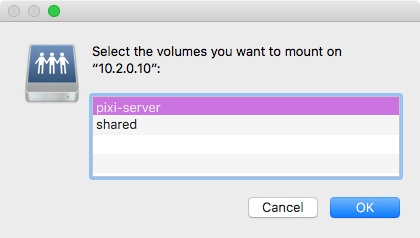
Select the desired volume (e.g., "pixi-server" to access the BLOCKS Server's files).
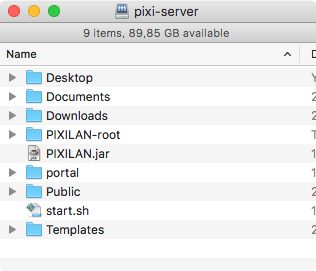
Finally, the content of the "pixi-server" user's home directory appear, allowing you to directly access its files.
Here are some things to check if you don't get the expected response:
- Ensure that your separate computer is connected to the same network as the server (open a terminal window and type "ping 10.2.0.10" (or the IP of your particular server IP) to verify that it can reach the server).
- Double-check that the user name and password you specify match those configured in the server.
Desktop Sharing
Most server management can be handled either through the BLOCKS user interface or using the webmin interface. However, you may occasionally need to have desktop-level access to the server. Having a mouse and keyboard connected to the server is the simplest way to accomplish this. If your server is in a location that is hard to access, you may instead access it using Desktop Sharing, which is a way to connect remotely to the server from another computer on the same network.
Uninterruptible Power Supply
For critical applications, we recommend the use of uninterruptible power supply (UPS) with the server. An UPS can shorten downtime and perform a controlled power down in the event of a power failure. Software for the popular APC brand of UPSes is preinstalled on server image version 191001 and later.
The software is enabled using webmin.
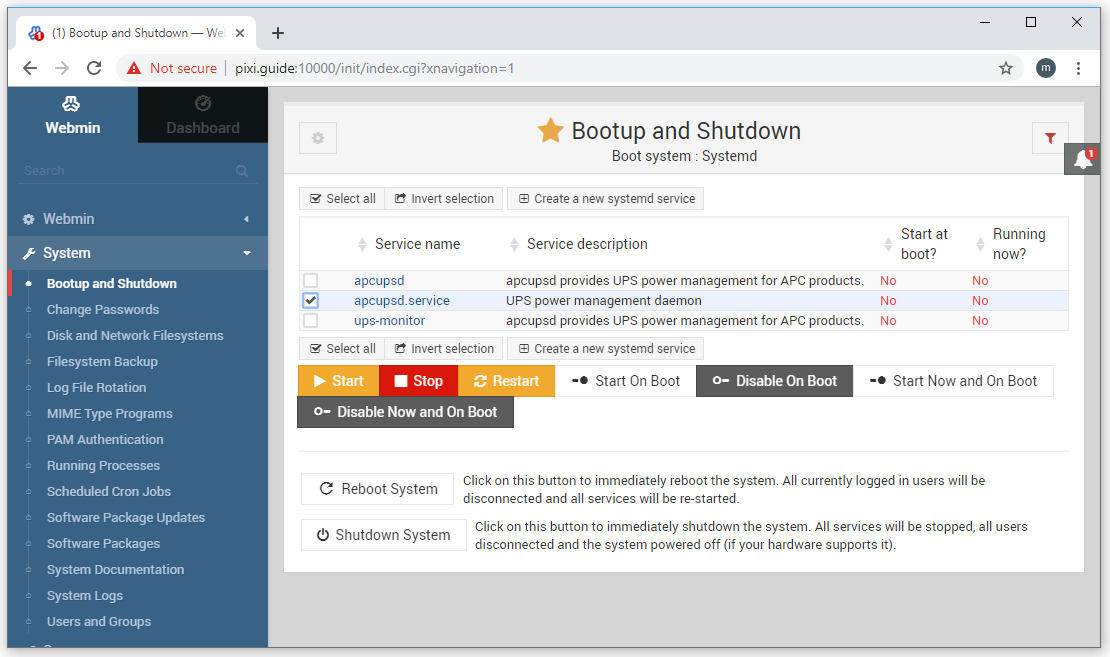
- Open webmin and select "System/Bootup and Shutdown".
- Click the filter symbol in the top right hand corner and search for apcups.
- Check the apcups.service checkbox and click "Start Now and On Boot".
The settings for the apcups is stored in a file on the server. The initial settings should work with most APC UPS devices that connect using USB. If you want to edit these settings, use webmin to open a terminal window (Alt+K), then type
nano /etc/apcupsd/apcupsd.config
This opens up the settings file using the nano text editor. Edit the settings as required. Save the file by pressing ctrl+s, or click save, then close by clicking the X button in the top right hand corner. Restart the server to apply any changes.
In the event of a longer power failure, the UPS will supply power until the remaining battery threshold is reached and then power down the computer. Once computer has beens shut down, the UPS will break the power to the computer until mains power is restored. To make the server start automatically once power returns, configure the computer to always start automatically when power is connected. This configuration is typically found in the BIOS settings.
More information on apcupsd, the program that manages the UPS, can be found here:
Next Step
In case you want to run PIXILAB Players by booting them from the server, rather than from a local disk or USB stick, you may now want to take a look at this guide to learn how to set up the server for PXE booting of players.