Take a photo, scribble on it and publish the result on a display spot
The purpose of this application note is to give an example how two other applications can be combined with each other to create a richer experience for the user.
Before starting this exercise try both the Photo and the Scribble application notes in that order.
Use the blocks root downloaded from the Scribble note as a starting point by select the Scribble-publish-root in the PIXILAB-Blocks-config.yml. If you dont know how to do that, revisit the general application note instructions.
Keep the root from the Photo application note accessible as files from there will be copied into this application.
While you should be encuraged to follow the steps here to get an understanding hot to adjust scripts and tasks a root block with the final result has been prepared and can be downloaded here.
Copy the files
Open up two file browsers, one of them at Take-photo-publish-root and the other at Scribble-publish-root.
Copy the folder /Take-photo-publish-root/public/apps/photographer to /Scribble-publish-root/public/apps/photographer. That is the custom web application.
Copy the folder /Take-photo-publish-root/public/block/VisitorsPhoto to /Scribble-publish-root/public/block/VisitorsPhoto. That is the blocks used for the photo part.
Copy the files /Take-photo-publish-root/script/user/Photo.ts and Photo.js to /Scribble-publish-root/script/user/. That is the user scripts that provide some processing and copy the photo image file to location.
Copy the file /Take-photo-publish-root/model/Task/VisitorsPhoto.json to /Scribble-publish-root/model/Task/. That is the task that updates the spot when a new photo is uploaded.
Create some blocks
Create a new blocks group and a composition block, use the same settings as I do here:
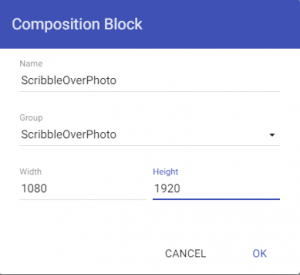
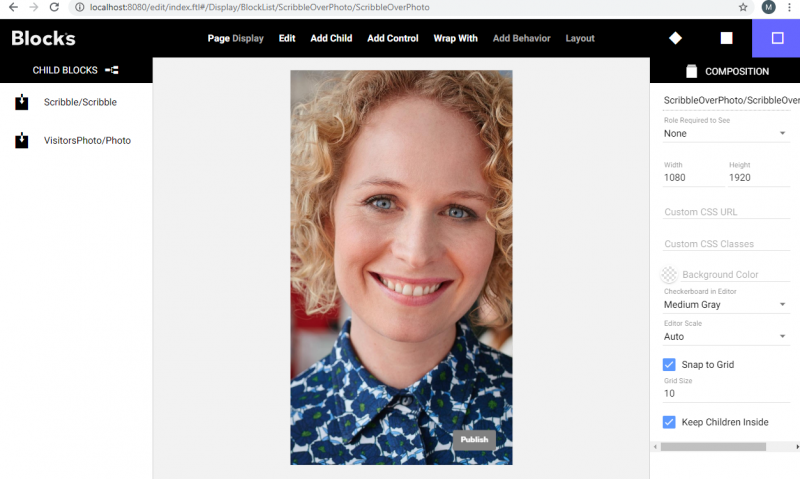
Inside the composition, add two reference blocks; one reference the VisitorsPhoto/Photo block and the other reference Scribble/Scribble. Pay attention to the layer order. The Scribble should be on top of the Photo block. This is the block used to scribble over the photo.
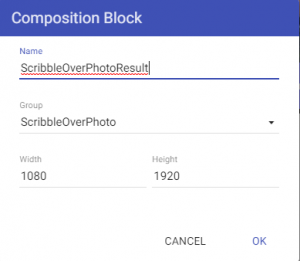
Create another block in the same block group. Use this settings:
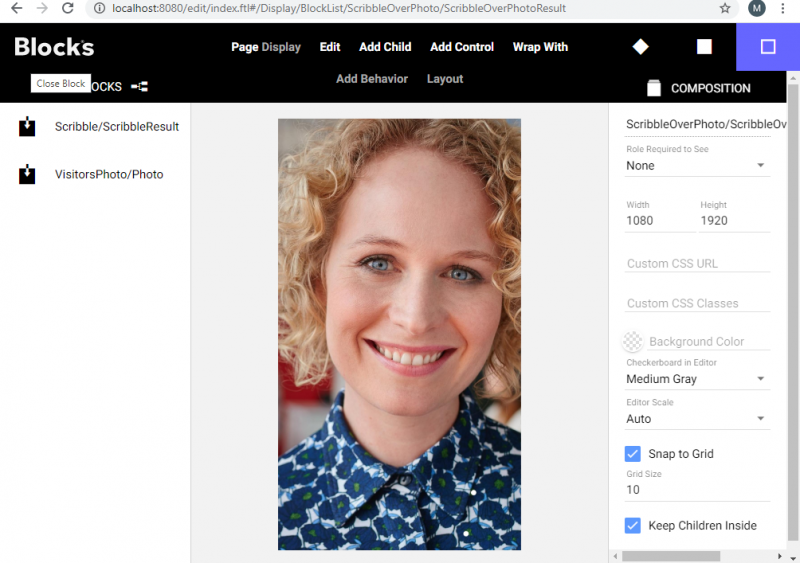
Again, add two reference block, one reference VisitorPhoto/Photo and the other Scribble/ScribbleResult. Pay attention to layer order so the photo end up behind the scribble.
Edit the Tasks
Final step to make this work is to edit the tasks that updates the block when we publish a Photo or a Scribble.
Open the Tasks page.
Select the realm VisitorsPhoto, group Photo and task OnPublish. The task is now reloading the VisitorsPhoto/Photo block on the DisplaySpot spot. Change that so the ScribbleOverPhoto/ScribbleOverPhoto spot is updated instead.
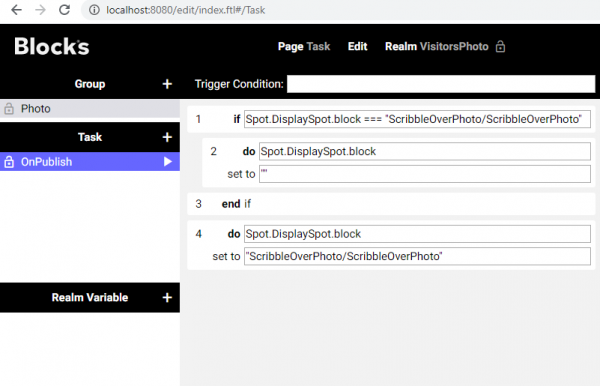
Select the realm Scribble, group Scribble and task OnPublish.
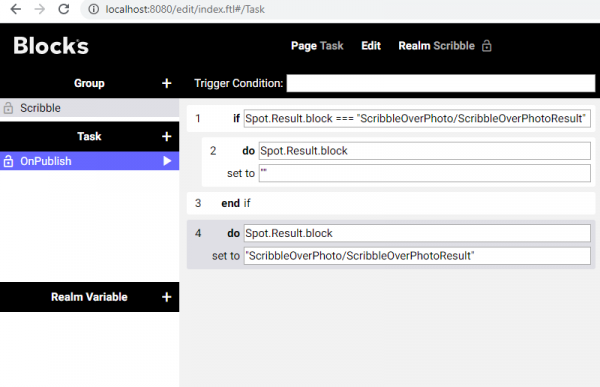
The task is now reloading the block Scribble/ScribbleResult on the spot DisplaySpot. We want to change that so it updates the Result spot using the ScribbleOverPhoto/ScribbleOverPhotoResult block.
Here is the finished task:
Add a display and open some browser windows
Open the blocks editor.
Add another display spot and name it Result. This is where the final result will be displayed.
Open three more browser windows:
Visitor spot Mob1, use the url http://localhost:8080/spot/?mobile=Mob1.
DisplaySpot spot, use http://localhost:8080/spot/.
Result spot, use http://localhost:8080/spot/?display=result.
You may have to reassign the spots.
Assign the block VisitorsPhoto/Photographer to the Mob1 visitorspot.
Assign ScribbleOverPhoto/ScribbleOverPhoto to the DisplaySpot spot.
Assign ScribbleOverPhoto/ScribbleOverPhotoResult to the Result spot.
Edit the script, supplementary self studies.
To be able to edit the typescripts files you need an editor that can compile the typescript to javascript. You may want to use a code editor for this purpose.
When done you can drag and drop the whole root folder to the code editor to open that location as a project folder.
Overview of the scribble.ts user script opened in a code editor:
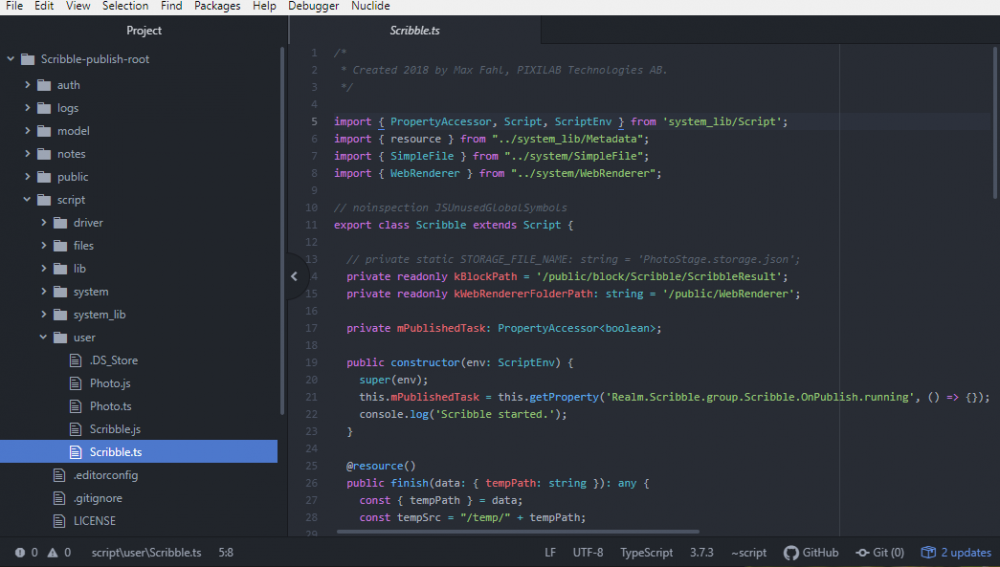
If you want to use different block names or different tasks to update the spots the Photo.ts and Scribble.ts is where you need to update the paths.