Traditional Signage Applications
While Blocks isn't a traditional digital signage platform, you may sometimes want to use it so show content with a similar look and functionality. This article provides a few pointers and examples on how this can be accomplished.
Zoned Displays
One of the more common requirements for traditional signage applications is to have a display divided into several "zones". This look can easily be created using a Composition block.

This example shows a block divided into three "zones":
- The left side shows an easily customizable message, as a looping slideshow.
- The top provides your own "Twitter-style" feed, with messages posted by employees (based on PIXILAB Moments, of course).
- The bottom shows today's weather.
Using Widgets
Various dynamic content, such as maps, weather, latest news, date/time, etc, can be easily incorporated using readily available web-widgets. The following example uses three click widgets to show the time at three different locations.

These clocks are made using the new Widget block type to include a couple of clocks available from https://www.timeanddate.com/clocks/free.html. There's a lot of similar "widgets" of all kinds available on the web – many for free. Most free ones link to the originating site, which then often shows some advertising. However, this link is only activated if you click the widget, which you typically can't do in a traditional signage application, as the screen isn't interactive.
Make sure you check the "terms and conditions" before incorporating such widgets in your design. Also keep in mind that the site providing this service may change, or even disappear, possibly rendering the widget non-functional. As usual, you "get what you pay for".
Two Types of Widgets
There are essentially two kinds of web widgets:
- Those based on an outer iframe.
- Those NOT based on an explicit iframe.
Here's an example of an iframe-based widget:
<iframe src="http://free.timeanddate.com/clock/i6b9kjpr/n1377"
frameborder="0" width="113" height="18"></iframe>
To present such a widget, do as follows:
- Create a Web block.
- Set the URL of the web block to the one specified as the src attribute of the iframe tag (make sure you take only the src attribute's value, up to its terminating double-quote).
- Apply scaling to the Web block, if required to get the desired size.
If the widget doesn't consist of an enclosing iframe with a src attribute, it is usually some other enclosing tag, such as a <div>, with a script tag somewhere inside. To use such a widget:
- Create a Widget block.
- Paste the entire widget snippet into the "code" field.
- Apply scaling to the Widget block, if required to get the desired size.
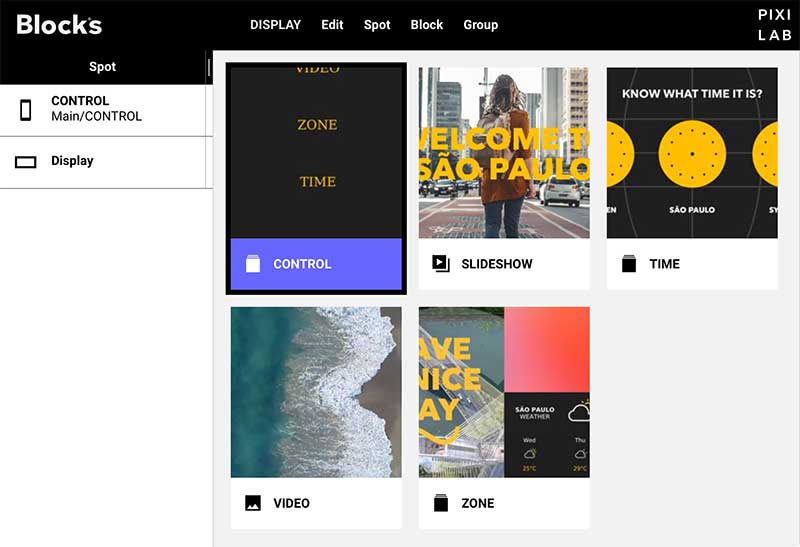
An example Blocks root folder including the content shown in this article can be found here. To use this example, do as follows:
- Download the ZIP linked above to a Blocks server.
- Make sure the Blocks server software isn't running.
- Rename your current "PIXILAB-Blocks-Root" folder to something else, allowing you to restore it later.
- Unpack the ZIP file, resulting in a "PIXILAB-Blocks-Root" folder.
- Move the unpacked "PIXILAB-Blocks-Root" into folder containing your previous (now renamed) "PIXILAB-Blocks-Root" folder.
- Start the Blocks server.
- Log into your server. Since this is example content, it uses the default user name "admin" with password "pixi".
- Remove the existing spot named "Display".
- Connect a computer (or separate browser window) to be used as a Spot to the server. It comes up as unconfigured.
- Add a Display spot, named "Display" with the ID shown on your newly connected computer/browser.
 The example "PIXILAB-Blocks-Root" folder provided assumes you're using a Linux server based on our Linux image. If you're using a Mac or Windows PC, you may need to configure the enclosed config.yml file accordingly.
You can now drag any of the blocks (except the CONTROL block) to the Display spot, showing you the examples as seen above, as well as a few other examples.
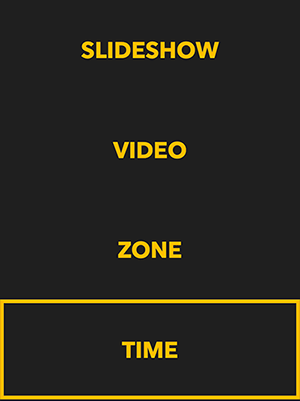
A Remote Control for your Signage Display
A separate block named CONTROL is included, acting as a remote control for your signage display. This has been assigned to the mobile spot named CONTROL. To access this remote control, point a phone/tablet browser (or yet another browser widow on your computer) to your Blocks server like this:
http://pixi.guide/spot?mobile=CONTROL
This URL assumes that your Blocks server is accessible under the name pixi.guide. If it isn't, substitute the proper name or IP address of your server here instead (possibly along with the port number, if you server configuration uses a non-standard port).
You can now switch among the various example blocks using the buttons on this remote control.