 IMPORTANT: This document is obsolete and describes an older version of out linux server. The current method is described here here.
DNS Server
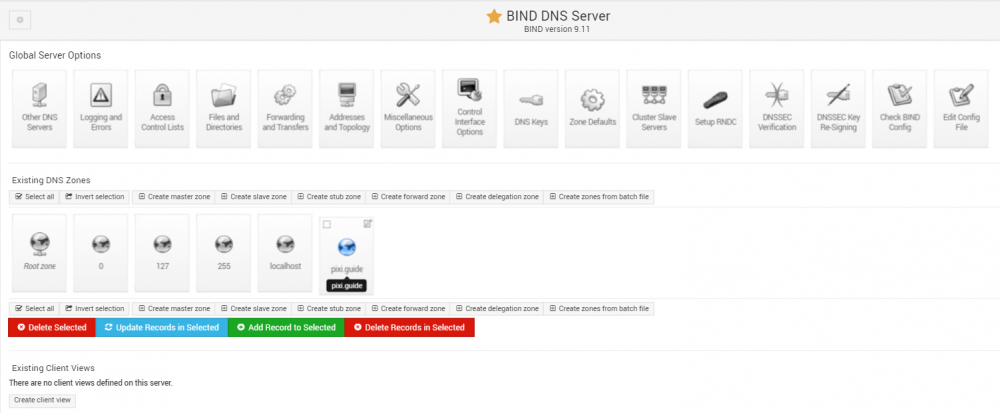
The procedure for configuring and enabling the DNS server is similar to the one used for the DHCP server above. Start by selecting "BIND DNS Server" under "Servers" in the list on the left hand side. This displays a window with a number of buttons at the top. Scroll down a bit a locate the rectangle named "pixi.guide".
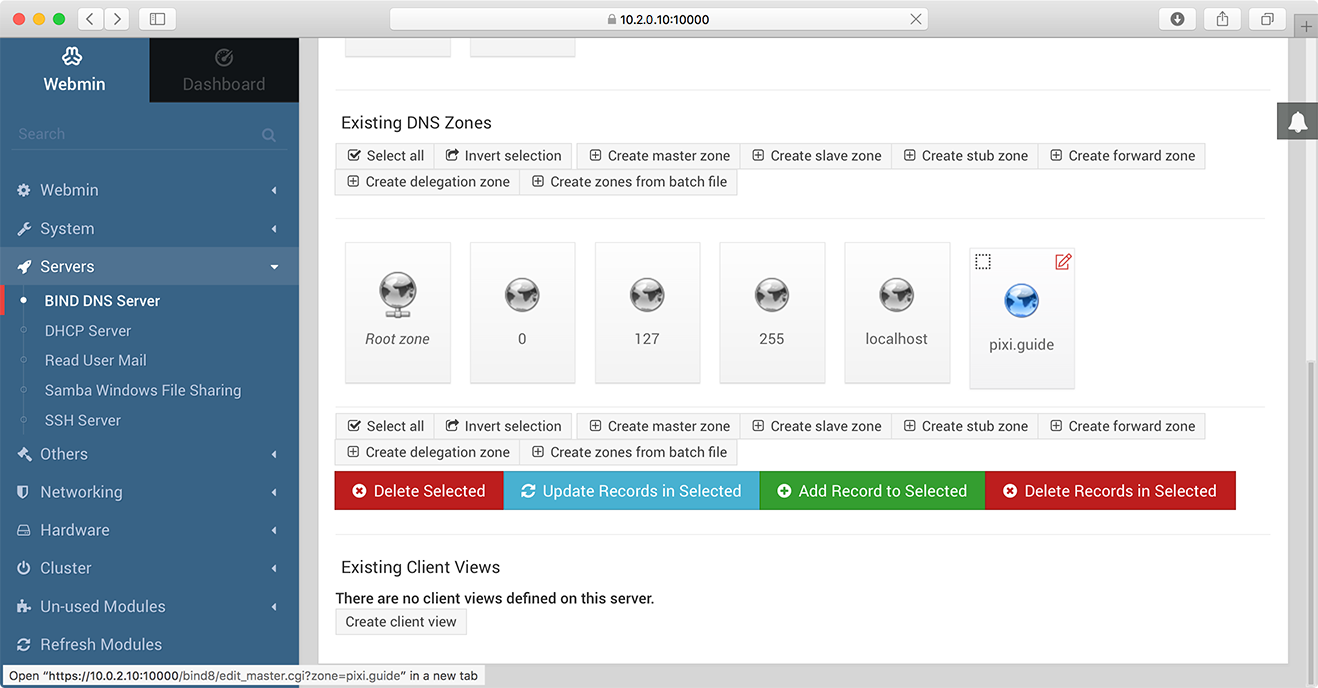
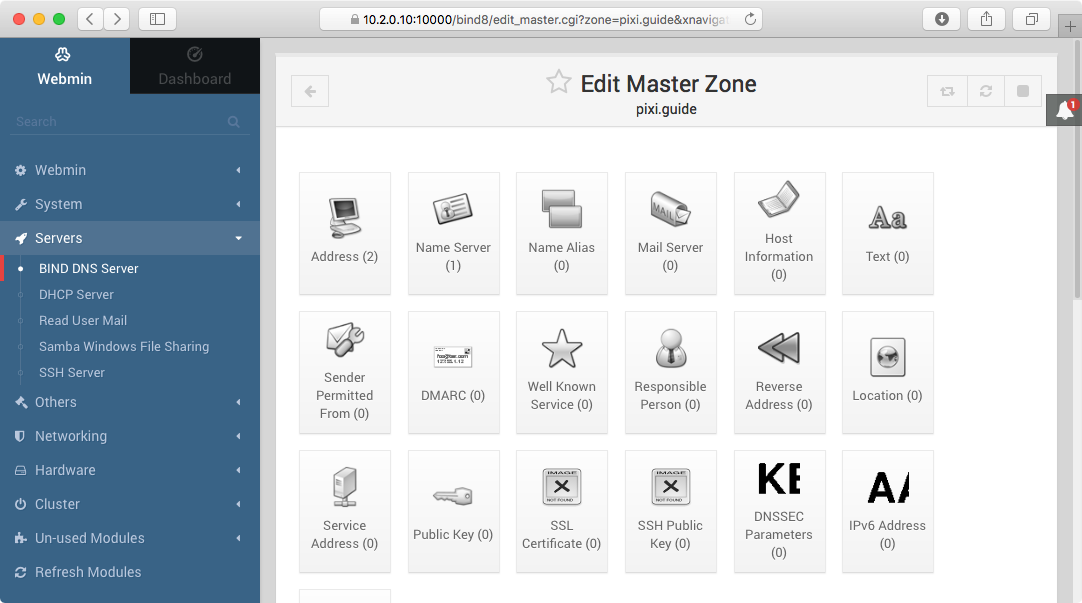
Click the red pen symbol in the top right hand corner of this rectangle. This opens the "Edit Master Zone" window shown below. Here, click the "Addresses" button.
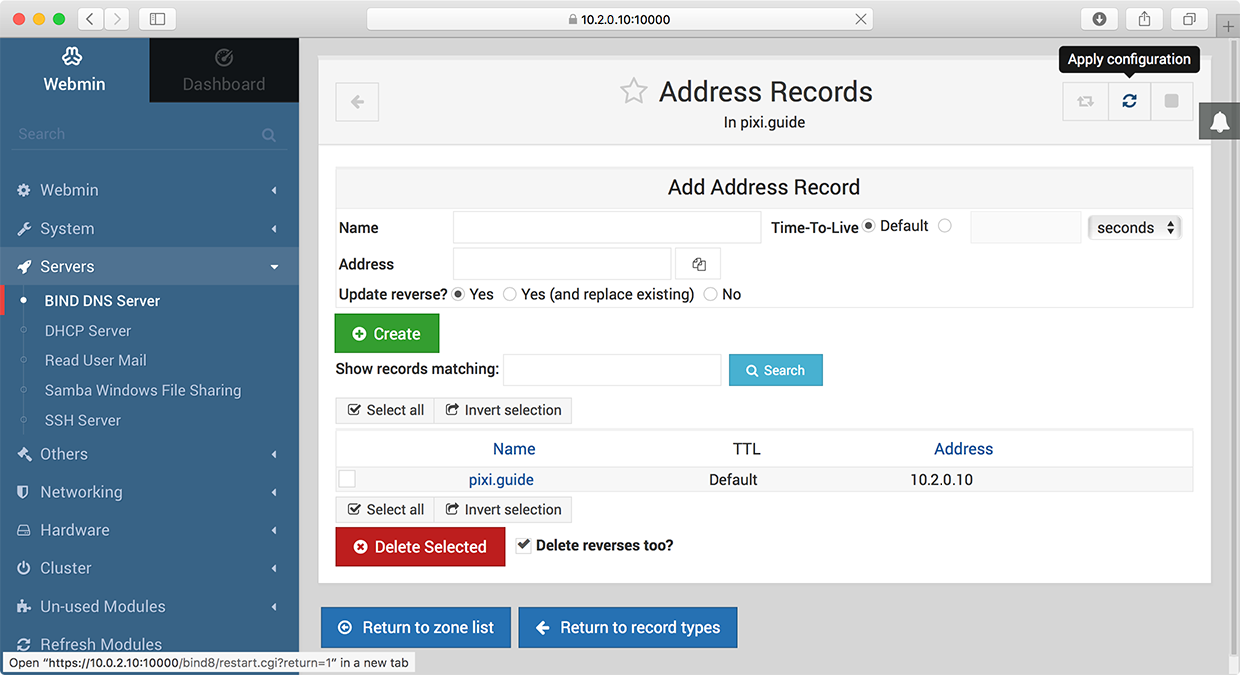
The next window lists all name-to-address bindings.
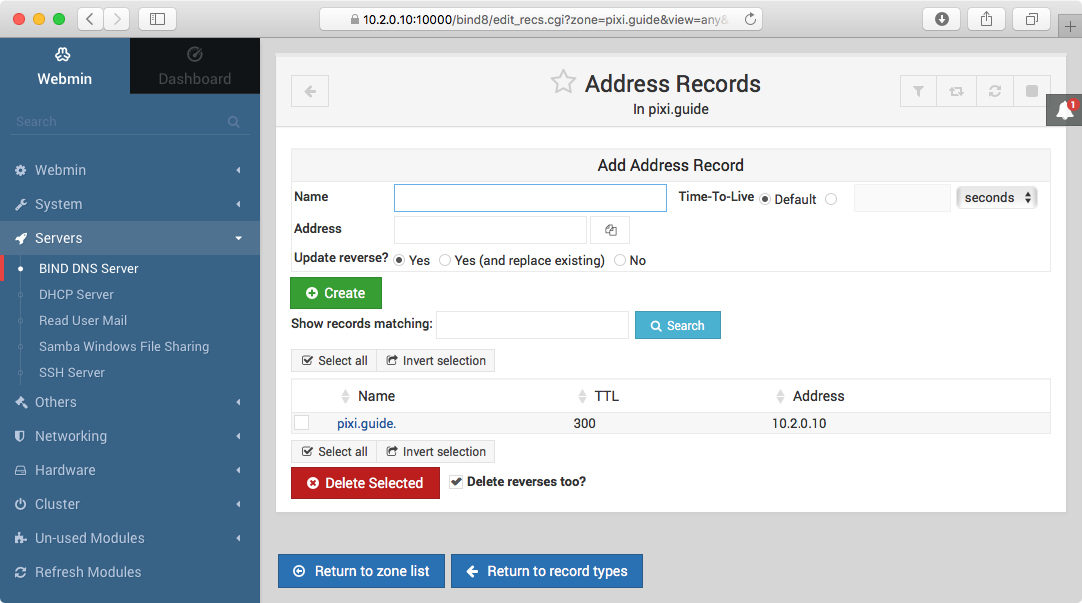
The name "pixi.guide" is pre-configured pointing to the IP address of the BLOCKS server). If you use a different address for the server on your network, it must be changed accordingly here.
There's also an alias (CNAME) record named "int.pixi.guide" that points back to "pixi.guide", which is used in some cases and should be left in place.
As a side note, the name given to the server (here "pixi.guide") is somewhat arbitrary. Since this DNS server applies only to your internal network, and isn't visible on the Internet, you can choose any valid domain name you want. However, PIXILAB recommends that you go with the "pixi.guide" name for the following reasons:
- It's the name we will use for any services and applications that need to access the server on your local network.
- It exists also as a real domain on the Internet, informing any visitors that they need to select your local wifi before they can access your mobile guide.
The second point above is important if you provide guide functionality for your visitors using their own mobile devices. Such guide functionality is then typically accessed by first choosing your local wifi network provided for this purpose, then accessing the server using an easy-to-remember name (here "pixi.guide"). If your visitors overlook the need to first choose your local wifi network, and just enter the name into their browser, they may only get a cryptic error message if there's nothing responding to that name. By also having an Internet server responding to the name, your visitors will instead get a meaningful message, telling them what to do.
If you need to change the addess of the server, click the server name (shown in blue on the previous illustration). This opens the window shown below. Here, change the address as appropriate and click Save.
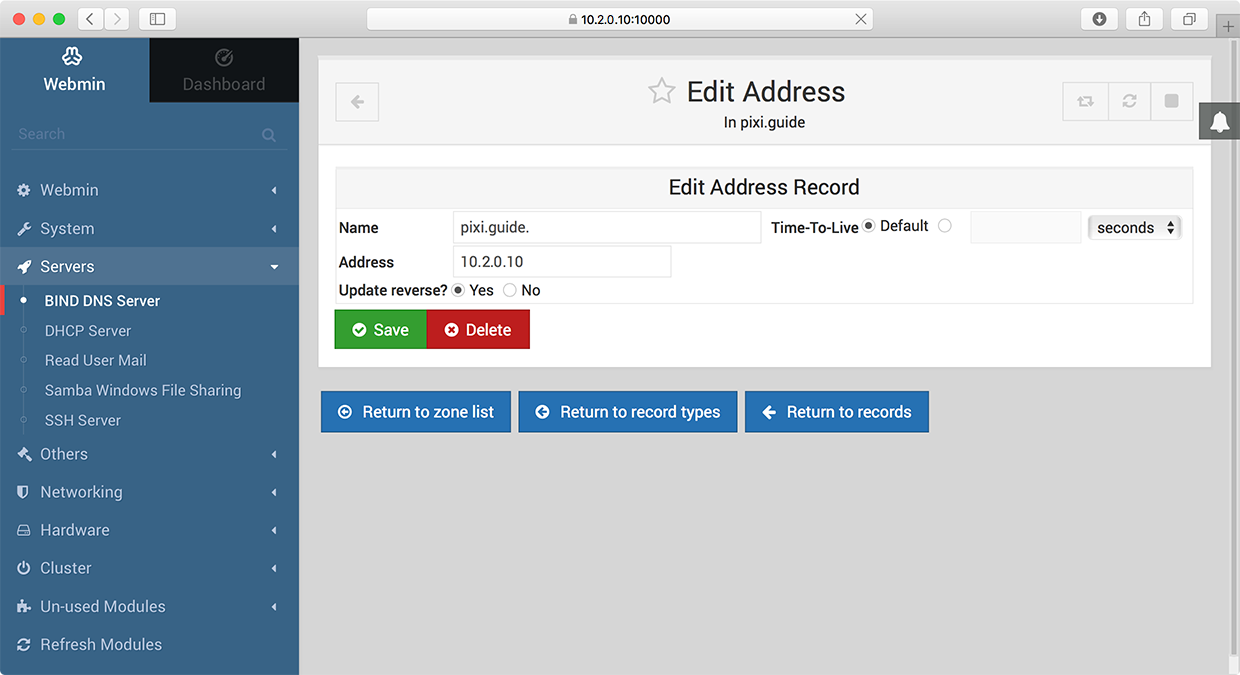
If you make any changes to the DNS server while it is running, click the "Apply Configuration" button shown in the top, right hand corner.
Enabling and Starting the DNS Server
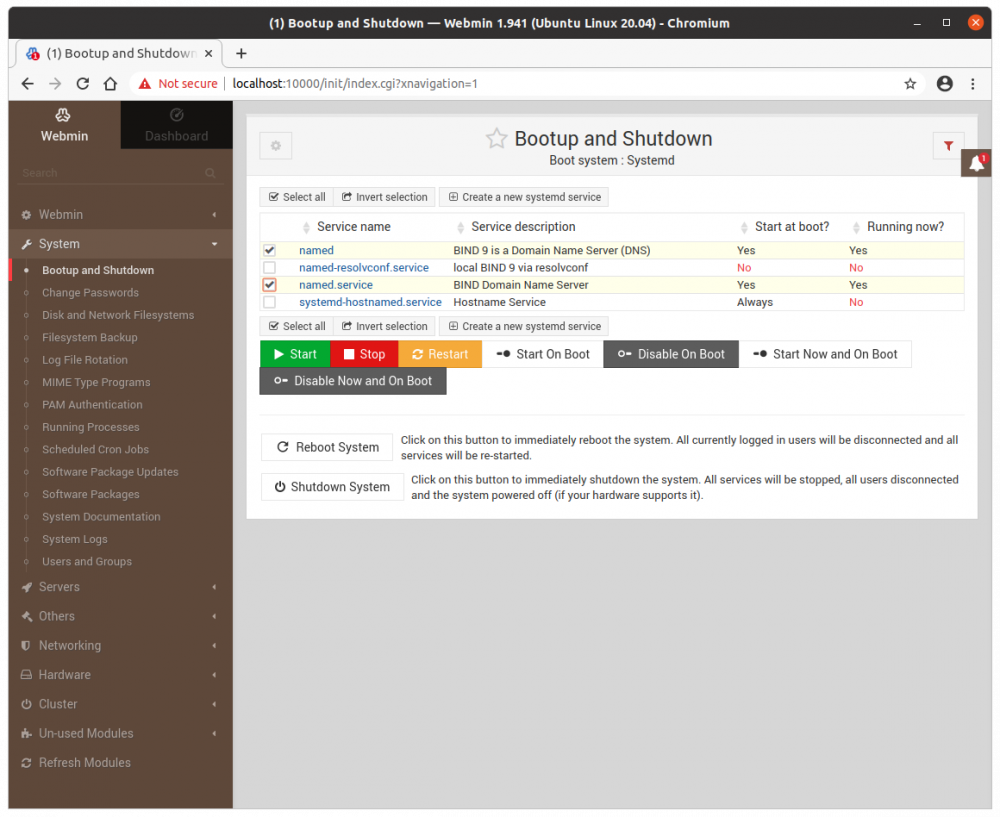
To start your DNS server, and to make sure that it will start automatically if the server is restarted, select "Bootup and Shutdown" under System in the menu on the left-hand side. Once the list of services appears, type named into the filter field in the top right hand corner to see only relevant services. Put a checkmark next to "named.service" and "named", as shown below, then click "Start Now and on Boot". Return to this page, filter on named again, and verify that both the "Start at boot" and "Running now" columns read "Yes" for the services you just enabled.
Create a new DNS Zone Master Record
This article is related to a general network topic outside the scope of blocks. We strongly recommend that you consult with a network professional for assistance in this area.
To use your own domain name, add a Zone Master Record. If visitors can use their own devices for accessing your server by this name, use a domain name that you own. You can then also publish instructions on an internet-accessible web server advising visitor to log on to the local wifi first. In this example, we'll add the “my.guide” domain, which will work alongside the default "pixi.guide" domain.
Start by logging in to webmin, by entering [your servers IP address]:10000 into the address field of your browser. If you do this from a browser on the server itself, you can type localhost:10000 into the address field. Log in as pixi-admin. Select Servers/BIND DNS Server in the left-hand menu.
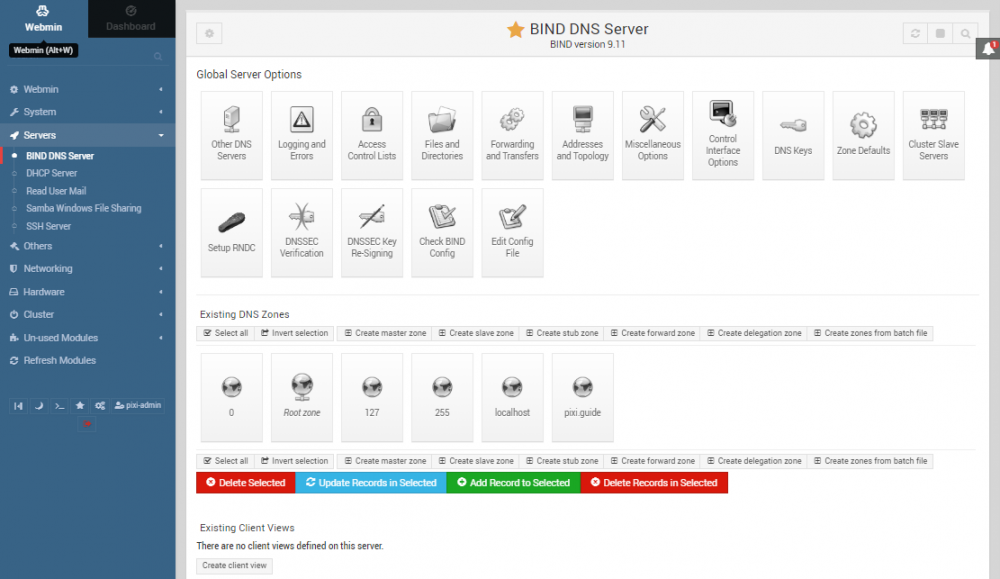
Click the Create master zone button, then enter your domain name, the server address and an email address.
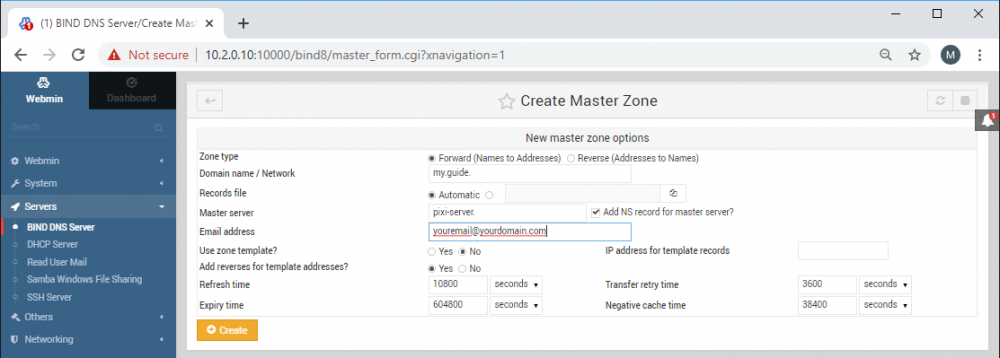
Finally, click the "Create" button. You have now created a Master Zone, now we need to add a A-record to the zone. This is done by clicking the new Master Zone Records icon, then click the Address button.
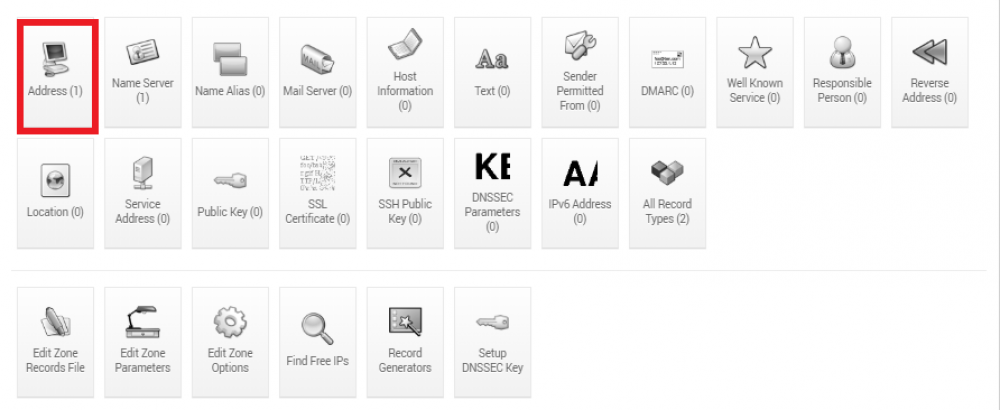
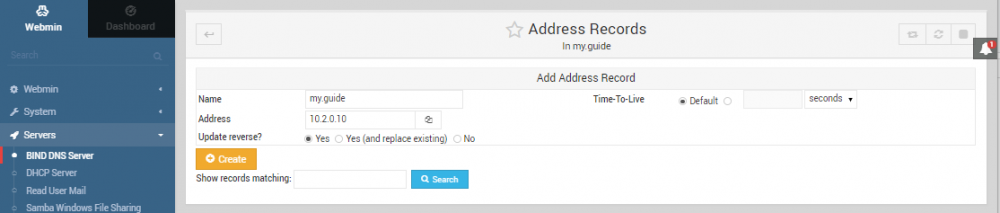
Enter your domain name and the IP address of your server and click create.
Finally, restart the DNS-server or the computer. (This can be done in webmin, System/Bootup and shutdown, search for named, select named.service and click the restart button).
Update DNS records for a new server IP address
If you change the IP address of computers on the network you wish to reach by name, you must also make the corresponding changes to the DNS records for those computers.
- Use Webmin.
- Select BIND DNS Server under the Servers heading on the left hand side.
- Click the pixi.guide zone button.
- Click the Addresses button.

- Click the pixi.guide. record to open the edit window.
- Enter the desired IP address.
- Click save.

Restart the DNS server by clicking the "rotary arrow" button in the top right hand corner of the main "BIND DNS Server" page.
Verify Operation of the DNS Server
To verify that the DNS server is running and response properly, open a terminal window on a separate computer on the same network, and type
nslookup pixi.guide
This will attempt to look up the name given to the server. If your other computer is indeed using your newly configured DNS server, it should look up the name there, and give you a result like this.
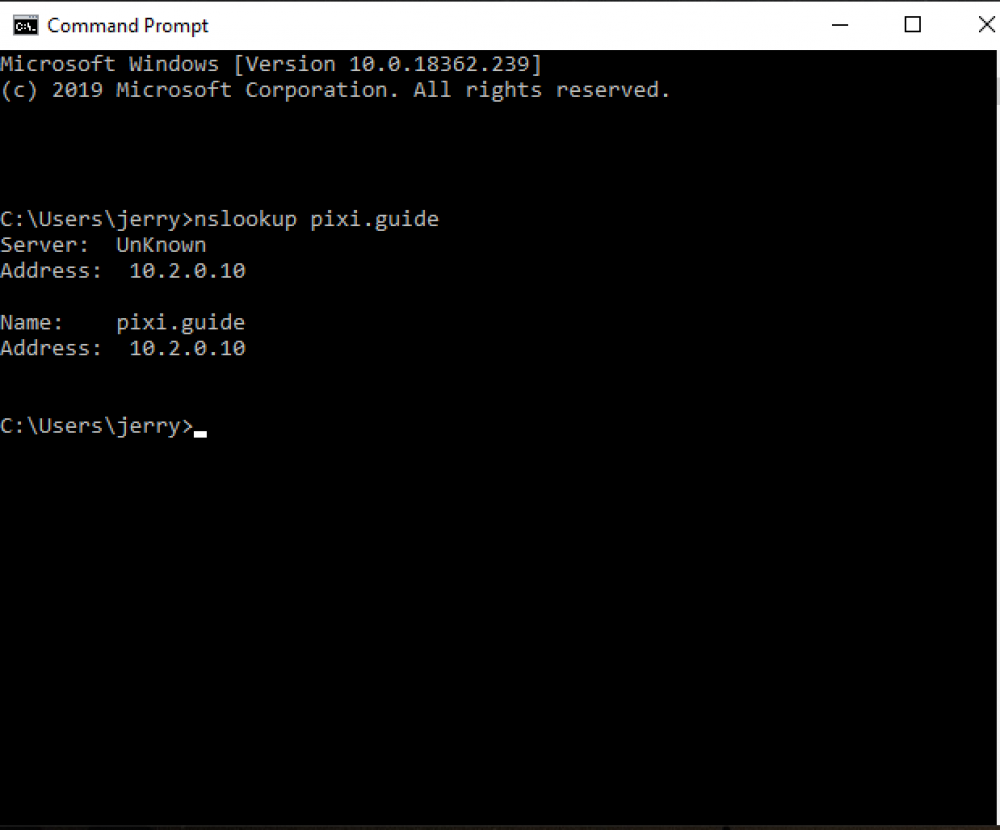
This response provides you with the following information:
- The server being used is at address 10.2.0.10 (which is the address of the BLOCKS server, now also acting as a DNS server).
- The adress being resolved for the name "pixi.guide" is 10.2.0.10 (again, the address of the BLOCKS server).
Here are some things to check if you don't get the expected response:
- Ensure that your separate computer is connected to the same network as the server (open a terminal window and type "ping 10.2.0.10" to verify that it reaches the server).
- Are you using the BLOCKS Server as the DHCP server, as described earlier in this article? If so, it should provide your separate computer with its own IP address as the DNS adress. See under Verify Operation of the DNS Server above.
- Are there other enabled network interfaces on your separate computer? If so, that network can specify another DNS which may take precedence. This will be indicated by the Server address shown not being the IP address of the local BLOCKS server. If so, disconnect that network and try again.