PIXILAB Player Advanced Setup
 IMPORTANT: The method of making PIXILAB Player described here is no longer supported. This article is kept for reference purposes only. Follow these instructions to make a player.
PIXILAB Player is free software that makes a browser-based player or interactive kiosk out of an Intel NUC or other PC-style computer, for use as a Display Spot for Blocks.
This is how it works:
- Download a small ISO image and write it to a USB stick.
- Boot the target computer from this USB stick.
- Connect the computer to the Internet to download a web browser.
- Make some choices as to how the player should operate.
- A complete operating system, including the browser, is written either to a USB stick or an internal drive.
- Restart the computer.
This guide describes in detail how you can make a player for use as a Display Spot with Blocks. We recommend using an Asus Intel NUC or similar as the player hardware. For basic applications in HD resolution, you can choose a low-cost, Celeron based model. For most applications, an i3-based model is sufficient. For demanding applications, select an i5 or i7-based model.
The player only needs CPU and a minimum of 4 GB of RAM to be installed. No hard drive/SSD is required. For 4k video playback, two matched RAM modules are recommended to optimize the memory bandwidth.
Obtaining the Installer
Start by downloading the ISO image of PIXILAB Player version 6.3. This file needs to be copied to a USB stick using Etcher. Make sure your target computer can boot from a USB stick. Download Etcher and use it to copy the ISO image onto your USB memory stick.
More details on what's changed between versions in the PIXILAB Player release notes.
Starting the Installer
Connect the USB stick to the player computer, and turn on power. Press the designated key for entering BIOS or to choose the startup device (often F10, F2, F8, DEL or similar, as indicated on screen during startup). Choose the USB stick as the boot device. Turn off the Secure Boot option if applicable.
Since the browser isn't included in the ISO, you must connect the player computer to a network that has Internet access. Preferably, this network should support automatic network configuration (DHCP) to simplify the setup.
Installation Settings
Once the installer ISO has started, you should see a screen like this one.
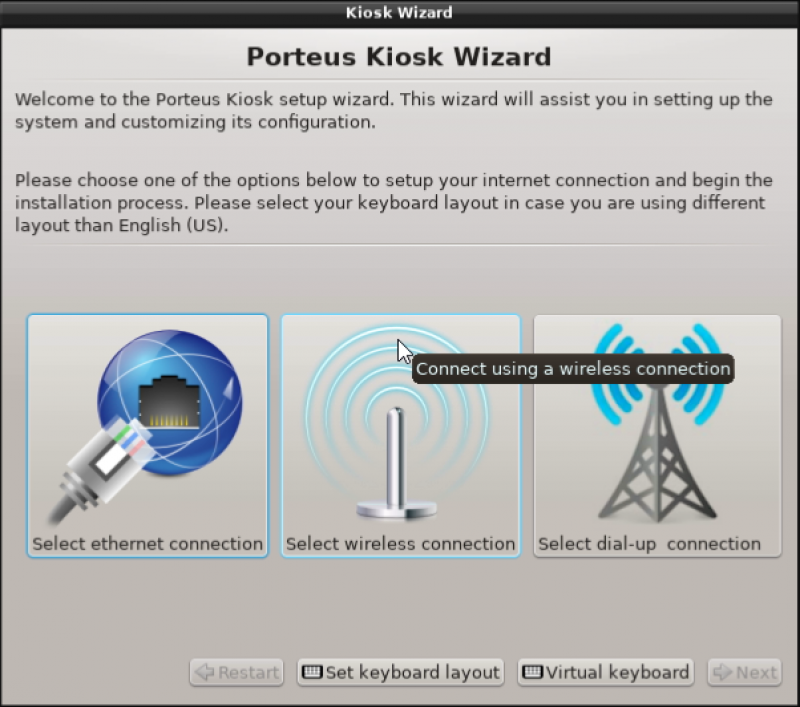
Assuming you're using a wired Ethernet connection, click the leftmost button.
Next, choose "Configure using DHCP". This assumes your network supports automatic client configuration. If not, you need to configure the network manually here instead.

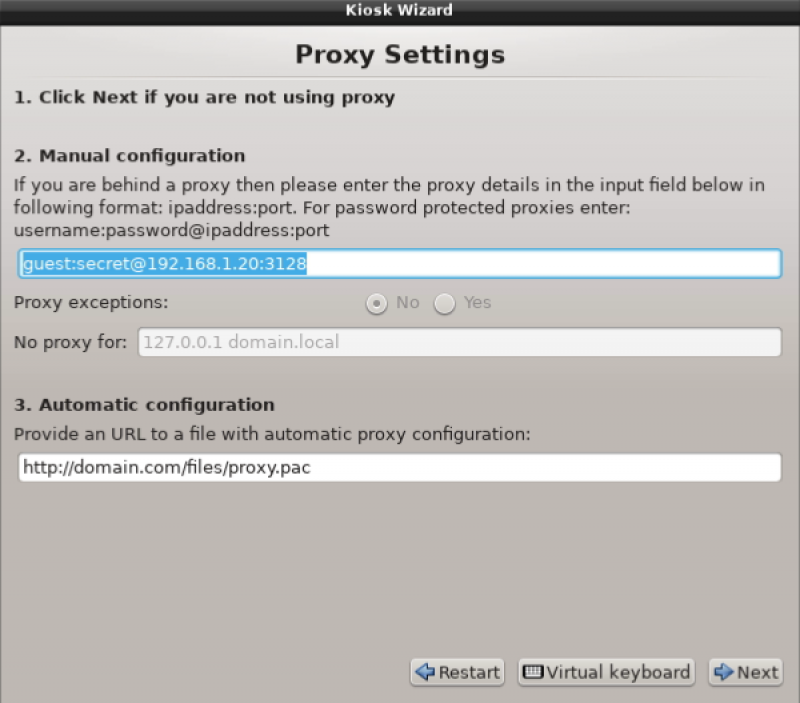
Click "Next" if not using a proxy.
Select which browser to use. We strongly recommend that you select Google Chrome. Some features in Blocks require Chrome to work properly.
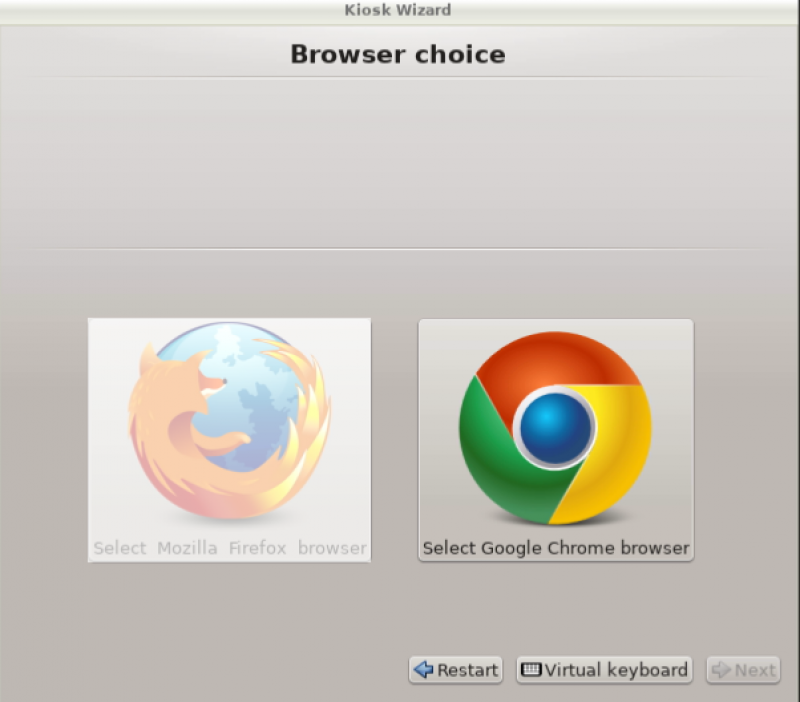
A network connection will be established (this may take some time). If a license agreement is presented, read and agree to it. Your browser of choice will be downloaded.
On the next page, you have the choice of either doing all settings manually or loading them in from a text file on a USB stick. The text file method is faster, while the manual method allows for greater flexibility in choosing the options you want.
Automatic Configuration
If you want to use the text file method (recommended), copy the text shown below to another FAT32-formatted USB stick. Put it at the root level of the USB stick, naming it to something you will recognize, i.e. kiosk-config.txt.
Config to use with Blocks from version 6 with pixilab player from version 6
connection=wired
dhcp=yes
browser=chrome
homepage=http://pixi.guide/spot
homepage_check=PIXILAB Blocks Server can't be reached. Please check your network connection.
hide_mouse=yes
disable_navigation_bar=yes
disable_private_mode=yes
wake_on_lan=yes
disable_zoom_controls=yes
additional_components=uefi.zip initrdpxe.xz
persistence=session
timezone=Factory
#If you experience graphic issues or hangups on older hardware, please change the gpu_driver parameter from "modesetting" to "default"
gpu_driver=modesetting
primary_keyboard_layout=us
kernel_parameters=panic=10
Config to use to enable Offline/Block caching mode of the Pixilab Player.
Requires Blocks version 6 and Pixilab player version 6 or newer.
connection=wired
dhcp=yes
browser=chrome
homepage=http://pixi.guide/spot
hide_mouse=yes
disable_navigation_bar=yes
disable_private_mode=yes
wake_on_lan=yes
disable_zoom_controls=yes
additional_components=uefi.zip initrdpxe.xz
persistence=full
timezone=Factory
primary_keyboard_layout=us
kernel_parameters=panic=10
Config to use with legacy versions prior to version 6:
connection=wired
dhcp=yes
browser=chrome
homepage_append=mac
homepage=http://pixi.guide/spot
hide_mouse=yes
disable_navigation_bar=yes
disable_private_mode=yes
homepage_check=PIXILAB Blocks Server can't be reached. Please check your network connection.
wake_on_lan=yes
disable_zoom_controls=yes
additional_components=uefi.zip initrdpxe.xz
persistence=session
timezone=Factory
primary_keyboard_layout=us
kernel_parameters=panic=10
Choose "Load configuration from removable media". When prompted to do so (not before!), insert the USB stick containing the kiosk-config.txt file, and load it. Adjust options as needed before proceeding.
If you need to use wifi instead of wired connection (not recommended), replace the "connection" line above with the following:
connection=wifi
wifi_encryption=wpa
ssid_name=MyWifiNetwork
wpa_password=$uperSecret
Replace MyWifiNetwork and $uperSecret with your wifi network name and password. Note that when using wifi, you may not be able to turn your player on from Blocks, since that mechanism uses Wake-on-LAN, which is rarely supported over wifi.
To use a physical keyboard with the player, specify the desired layout using the primary_keyboard_layout parameter, specifying one of these constants.
If you need to have an accurate time and date on your player – for example to show any time-related information on screen – set the value of the timezone parameter to your local zone, chosing one of these constants. Finally, in case you need to configure a custom network time (NTP) server, add an ntp_server parameter. If not specified, the default pool.ntp.org server will be used, which is generally OK provided that the player can reach the internet. If not, change the value of ntp_server to the server or pool you prefer.
ntp_server=server.org
Disable Automatic Fixes
Choose "Disable Porteus kiosk automatic fixes" to avoid updating to the player automatically, as doing so may interfere with normal operation.
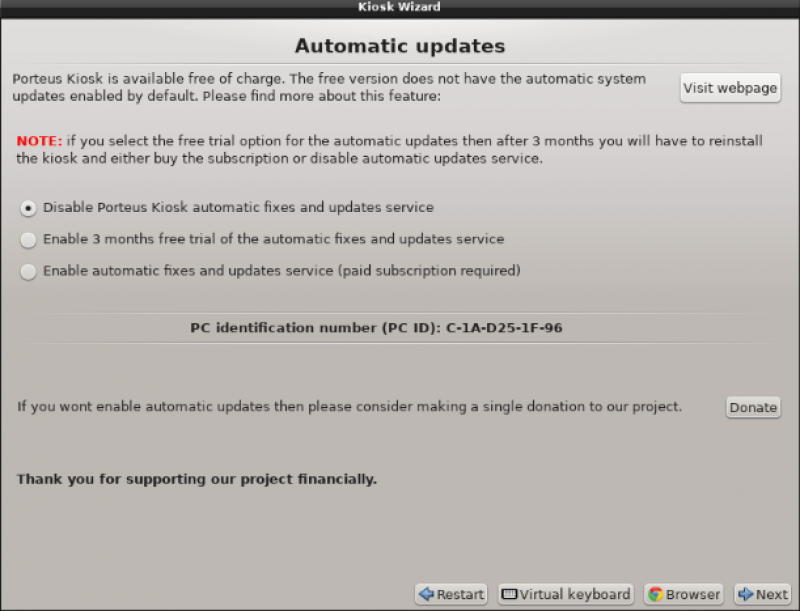
Then click Next to proceed.
Specifying Installation Drive
Choose "Quick Format" and select target storage device in the list. This can be the device you're installing from, which will then be overwritten. Alternatively, it can be another USB memory stick or internal storage device, such as a hard drive or an SSD.
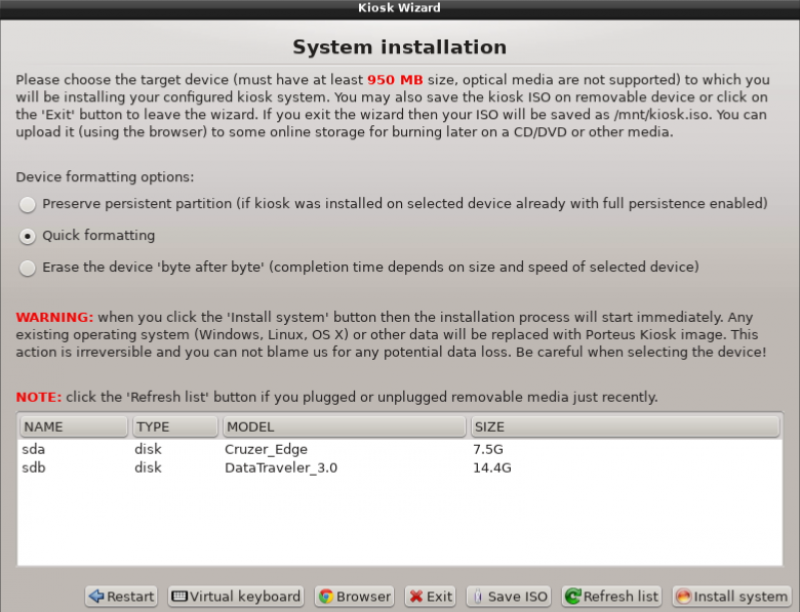
Click "Install System".
Making multiple players
While the above step is sufficient for installing PIXILAB Player onto one bootable device, it can be quite tedious to repeat this procedure if you want the same configuration on numerous players. To install the system onto multiple players, click the "Save ISO" button instead of the "Install System" button shown on the image above.
Once the new dialog appears, insert a removable, FAT32-formatted, USB drive. You will get a message saying something along the lines of "Removable device /dev/sda1 mounted under /media folder". Once you've seen this message, click "Save ISO" at the bottom of the dialog.
An ISO file will be placed at the root level of the USB drive. Use Etcher on another computer to flash any USB drive with the ISO, as described above.
Using Etcher you can flash several USB drives at the same time.
Manage Pixilab Player Chrome Policies from the Blocks server
This section applies to Pixilab player versions < 5.2. From version 5.2 this is handled automatically for the servers homepage.
In some cases, when using the Chrome browser with PIXILAB Player, you may want to override the browser's policies. This can be done by storing a text file named chrome-policies.txt in the directory <your-blocks-root>/public/PIXILAB_Player (where "<your-block-root>" is the location of your Blocks root directory).The path to this file is then be specified in the kiosk-config.txt file used when creating the player the, as described above. This example assumes the default domain name pixi.guide (which in your case may be another domain name, or a hardcoded IP address).
browser_preferences=http://pixi.guide/public/PIXILAB_Player/chrome-policies.txt
The "chrome-policies.txt" file must contain the following policies (for live video capture to work). Replace pixi.guide below with your domain name or hardcoded IP address:
"VideoCaptureAllowed": true, "VideoCaptureAllowedUrls": [ "http://pixi.guide/", "https://pixi.guide/" ], "AudioCaptureAllowed": true, "AudioCaptureAllowedUrls": [ "http://pixi.guide/", "https://pixi.guide/" ], "OverrideSecurityRestrictionsOnInsecureOrigin": [ "http://pixi.guide/", "https://pixi.guide/" ],
More information on Chrome policies and syntax can be found here.
Create a developers version of the Pixilab Player
Follow this guide if you want to create a player with ssh and chrome developer tools enabled.