Linux Server Improvements
PIXILAB regularly revisits and improves the Linux server image, resulting in newer releases. The release is indicated by the date shown as part of the filename. However, for a running installation, it's not practical to re-image the server regularly. Instead, we provide important notes here on what you can do to keep up to date with the state of the art, keeping your server working as well as possible.
 IMPORTANT: This article applies to previous server images based on Ubuntu 16.04. If you're using server image version 190528 or later (based on Ubuntu 18.04 or 20.04) all this has already been taken care of. As version 190528 and later are based on a newer Ubuntu version, some features work differently, and are not compatible with what's stated below.
Linux Operating System Updates
System components are updated regularly. Most updates are not related to Blocks at all, and make no difference. But occasionally, there are security or performance improvements that may be worthwhile to incorporate.
To update your server:
- Make sure the server has Internet access (test by opening the pre-installed Firefox browser and going to a web address).
- Switch to the pixi-admin user.
- Click the orange "suitcase" icon in the toolbar on the left hand side, titled "Ubuntu Software".
- Select the "Updates" tab.
- If you see "OS updates", click the "Install" button next to it.

Finally, restart the server to make the updates take effect.
While most updates are for the better (or at least neutral), they may occasionally cause problems. Make sure to test all important system functions after updating your server.
Updating Blocks
To update the Blocks program itself, follow the instructions given here.
Installing the Chromium Browser
In preparation for Blocks 3, we're strongly recommending you install the Chromium browser (or Google Chrome if you prefer). In Blocks 3, Chromium (or Chrome) will be used to render previews, which solves a problem that in some cases could cause Blocks to crash under Linux.
To install Chromium on your Linux-based Blocks server:
- Switch to the pixi-admin user.
- Open a terminal window.
- Install Chromium using the following commands:
sudo apt install chromium-browser
sudo apt install chromium-codecs-ffmpeg
If you plan on using the browser installed on your server to edit content in Blocks, you need to install Google Chrome instead of Chromium. However, we don't recommend using the server for editing purposes.
You can now remove Firefox, as Chrome/Chromium has been installed instead. While still running as the pixi-admin user, type the following into the terminal:
sudo apt-get remove --purge firefox
After finishing installing/uninstalling browsers, proceed as follows if you want to use Chromium as your default browser:
- Switch back to the pixi-server user.
- Launch Chromium/Chrome by clicking the icon located in the top left hand corner of the desktop, type chrom and click the Chromium/Chrome icon.
- Once it appears in the launcher (dock) on the side, right-click the icon and chose "Lock to launcher".
Installing Chromium Offline
If your Blocks server doesn't have an internet access, the above method won't work as it attempts to download the required packages while installing them. If this case, you can instead download the packages ahead of time and bring them along on a USB stick. Download the two required packages from here:
https://packages.ubuntu.com/xenial/amd64/chromium-browser/download https://packages.ubuntu.com/xenial/amd64/chromium-codecs-ffmpeg/download
Store those two ".deb" files on a USB stick. Those packages can then be installed as follows:
- Switch to the pixi-admin user.
- Insert the USB stick.
- Open a Terminal window.
- Type sudo dpkg -i followed by a space character.
- Drag the DEB file beginning with chromium-codecs-ffmpeg into the teminal window to obtain its path.
- Press Enter and then the pixi-admin user's password if requested.
- Repeat from sudo dpkg -i above, but now chose the other ".deb" file beginning with chromium-browser.
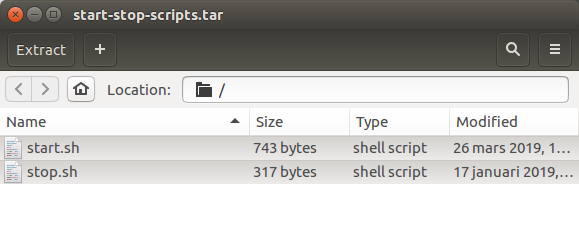
Updating the Start and Stop scripts
The way the Blocks server is started and stopped has been enhanced a few times. This is done by two scripts located in the home folder of the "pixi-server" user. To update those files, do as follows:
- Download this TAR file.
- Move the TAR file to your Linux Blocks server.
- Double click the TAR file on the Linux server.
- Select both files and drag them to the home folder of the pixi-server user.
To use these scripts to start and stop the server, you must be running Blocks 2.3 or later.
Once installed, you can start and stop Blocks in either of the following ways:
- By restarting the server, which always launches Blocks.
- Start using the PIXILAB Blocks icon in the task bar on the left hand side.
- Stop the server by clicking the Quit button in the Blocks window (not available if started from a non-GUI session – see below).
- Using the start.sh and stop.sh shell scripts from a terminal or SSH session.
The advantage with the last option is that you can start/stop the server without using the GUI. This is often useful when accessing the server remotely, e.g. over a VPN connection or similar.
No Blocks window will appear on screen when started from a non-GUI session, such as over SSH. You can check whether the server is running by attempting to log in to it using a web browser. In this case, you must use the stop.sh script to terminate the server.
Reducing the Wear on the SSD
During normal operation of Blocks, most disk accesses will be READ operations used to serve media and other data to the display spots. However, due to the default behavior of most Unix-based operating systems, such accesses may still incur a write operation to update the "last accessed" timestamp associated with each file. While this is normal behavior for the operating system, it does incur additional wear on the SSD.
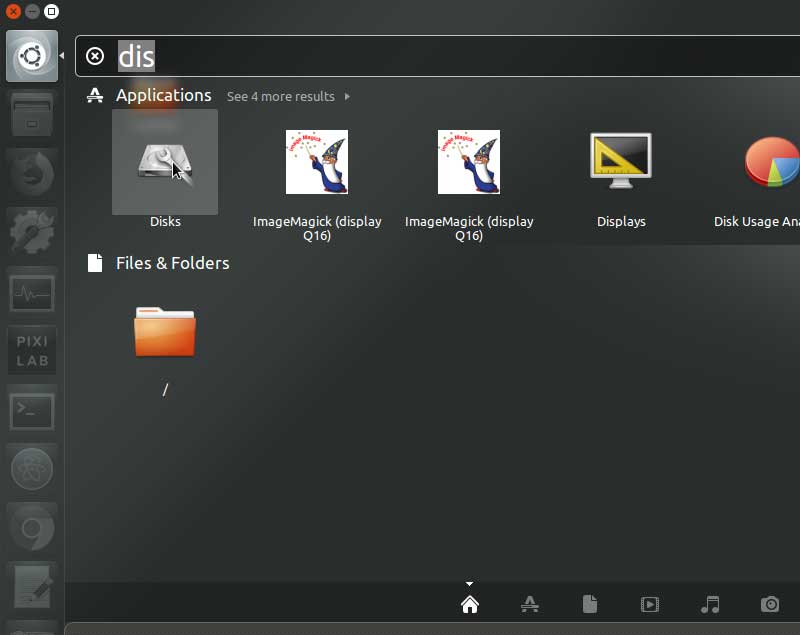
Fortunately, this behavior can be turned off, thereby minimizing the wear on the SSD. To do so, log into your Blocks server as the pixi-server user, then click the icon in the top left hand corner, and type disks.
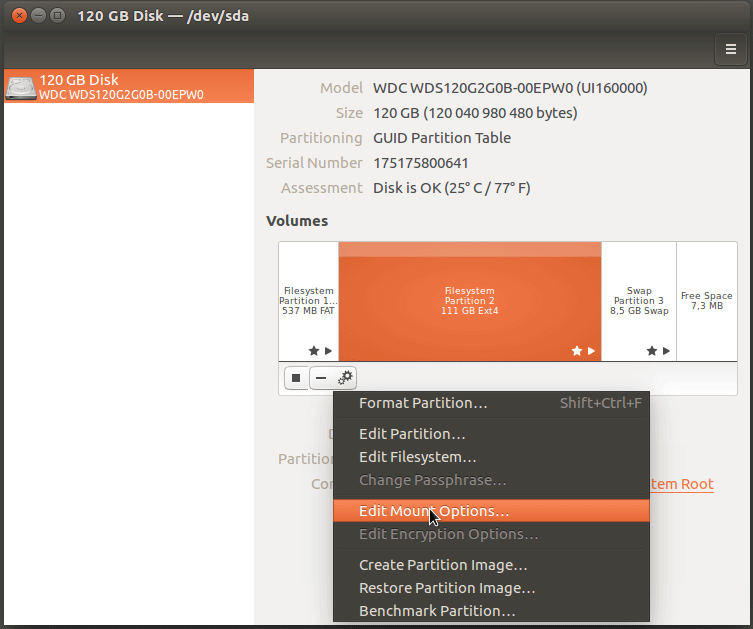
Click the Disks icon, opening a window like the one shown below. Click the large center partition of the disk to select it. Then choose "Edit Mount Options…" on the cogwheel menu below the partitions.
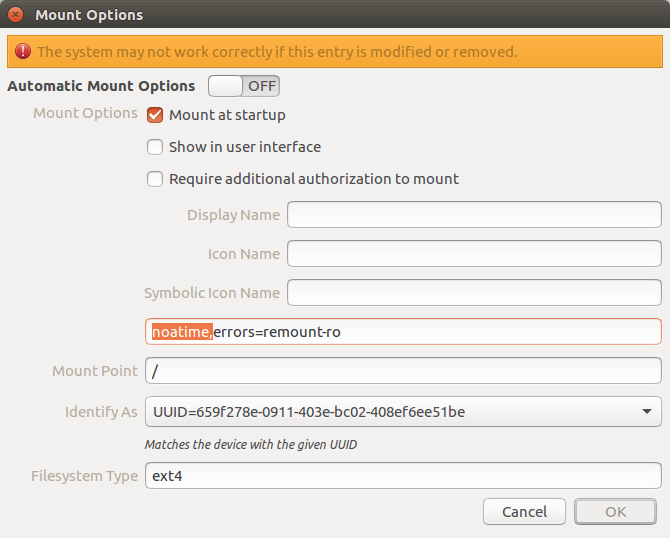
At the beginning of the "mount options" field, type
noatime,
IMPORTANT: Note that there must be a comma separating the word noatime from the word errors that was already there.
The result will look like this screenshot.
Click OK to save your changes, then restart the server to make your changes take effect.