Network Configuration of Ubuntu 16.04

Connect a network cable to the server. Connect the other end of the cable to a network switch. If connecting to an existing network, you need to obtain a suitable network address from your systems administrator. The remainder of this article assumes a new network is being established, where you're free to chose the addresses and other network parameters shown.

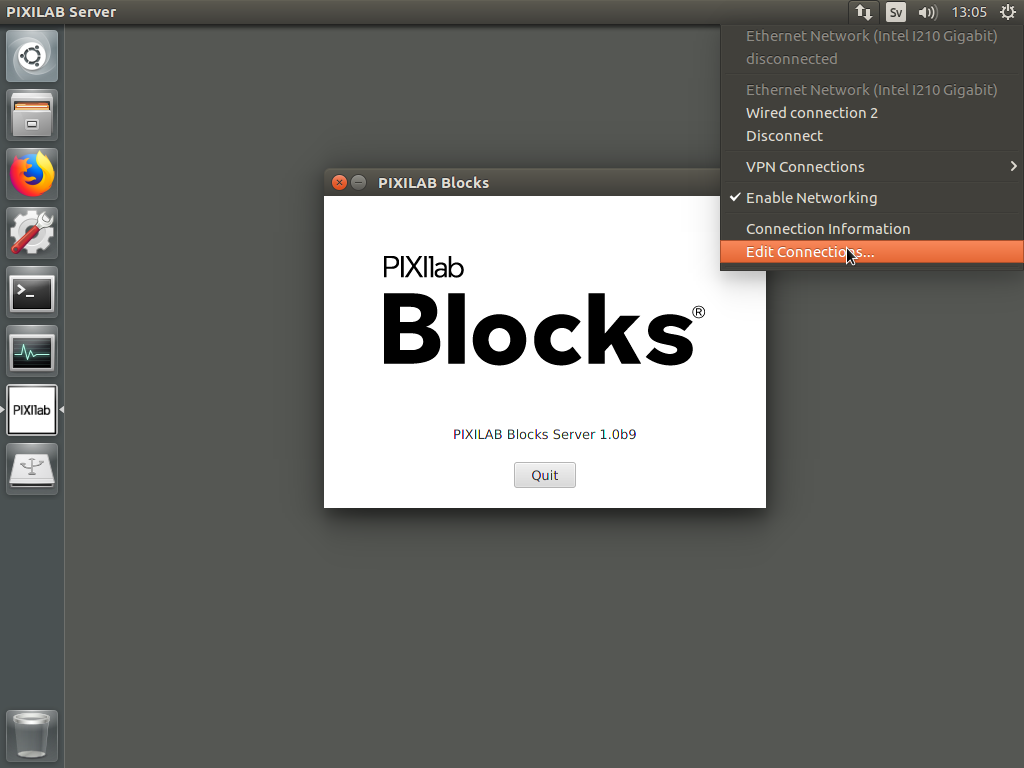
Locate the Network menu in the menu bar at the top of the screen and select "Edit Connections", as shown below.

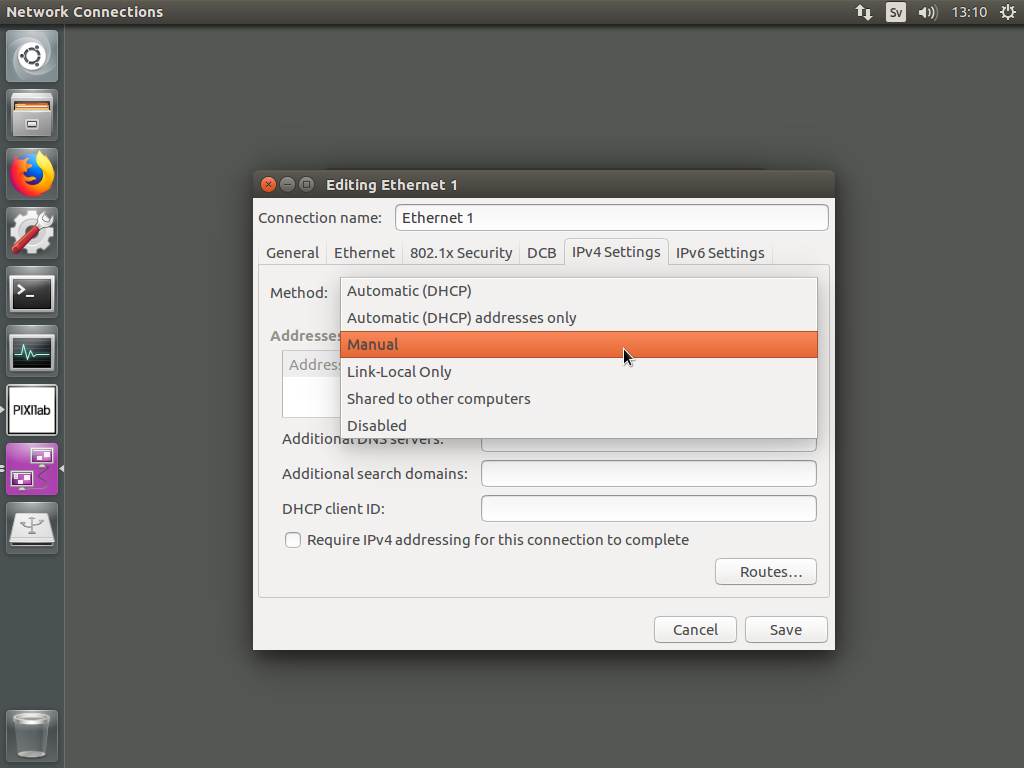
Select any already existing connections under the Ethernet heading in turn, and click Delete to remove each one. If prompted for a password, enter the password you assigned to the pixi-admin user above. Once you have deleted all Ethernet connections, close the window, and choose "Auto Ethernet" on the Network menu. This adds the appropriate network connection, matching your hardware. Select "Edit Connections" on the Network menu again, as shown above. There should now be a single network listed under the Ethernet heading. Select this entry, (usually named "Auto Ethernet") and click Edit, to open the settings of this connection. Change the "Connection name" field to read "Ethernet 1". Click the "IPv4 Settings" tab and change "Method" to "Manual", as shown below.

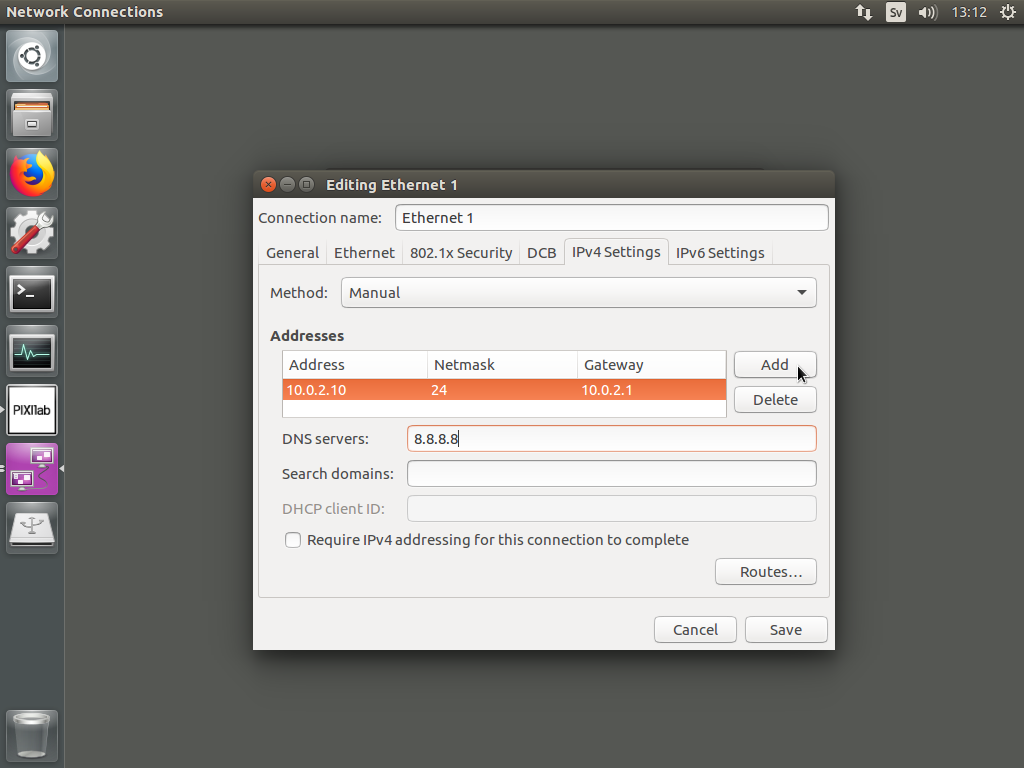
Click the "Add" button then type the desired Address, Netmask, Gateway and DNS server into the appropriate fields. The example shown below assumes you're setting up a new network, and can chose whatever addresses you want. If not, contact your system administrator for suitable settings.

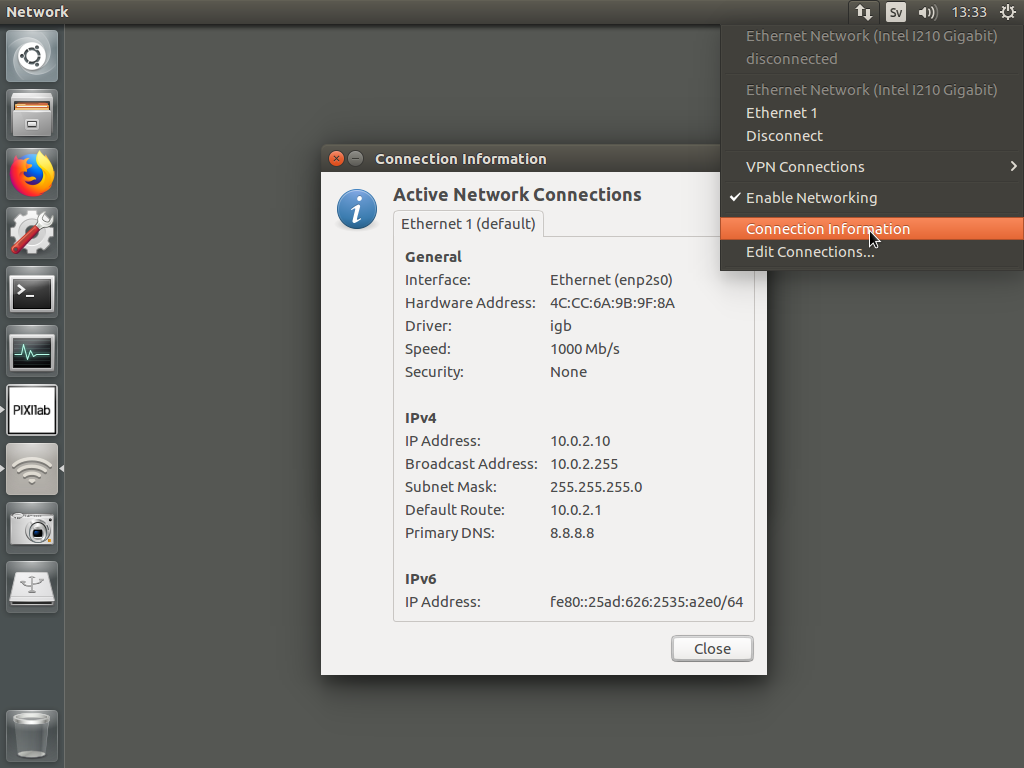
Click Save to close the window. Unplug the Network cable and wait until a "Disconnected" message appears in the top right hand corner of the screen. Then plug the cable back into the same connector again and wait for the "Connected" message. Finally, chose "Connection Information" on the Network menu to verify that the desired settings are in effect, as shown below.
