File Transfers and Sharing
Sometimes, you may want to copy files to/from the server. You can do so directly in webmin (under Others > File Manager). This can be useful for occasionally pulling or uploading a file from/to the server. You can, for instance, use this method to download archived log files from the server by selecting "File Manager" under "Others" in the menu on the left hand side, navigating to /home/pixi-server/PIXILAB-BLOCKS-root/logs and clicking the name of one of the "archived" log files. A similar method can be used to upload files to the server.
However, it's often more convenient to connect to the server by mounting it as a network volume on your own laptop, rather than copying files back and forth. This makes the server files directly accessible, without having to copy them.
Configuring File Sharing
To configure file sharing, select "Samba Windows File Sharing" under "Servers" in the menu on the left hand side.
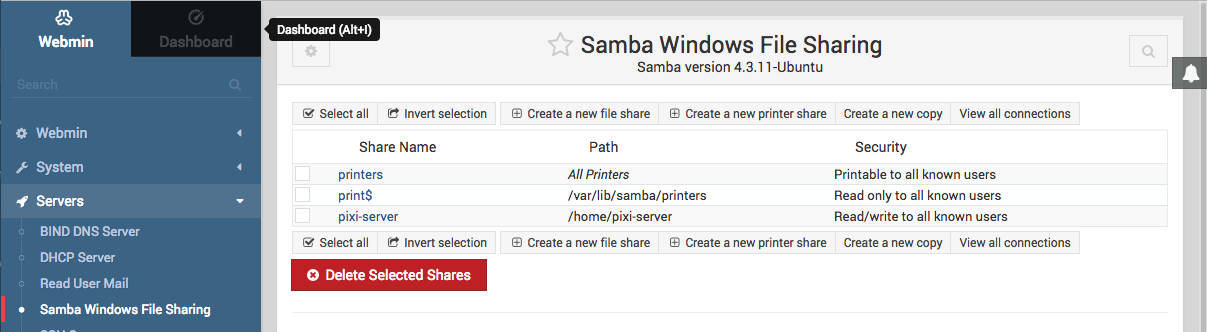
There is one pre-configured share:
- "pixi-server" provides direct access to the BLOCK Server files for authenticated users.
File Sharing Users
The users that can access File Sharing are specified and configured separately. Even though the preconfigured users have the same names as the Linux OS users, they do not share their passwords. To configure the File Sharing users, click the "Samba users" button on the "Samba Windows File Sharing" page. Doing so reveals a list of users. Click each user in turn to configure its password. The illustration below shows how to change the password for the pre-configured "pixi-server" user.
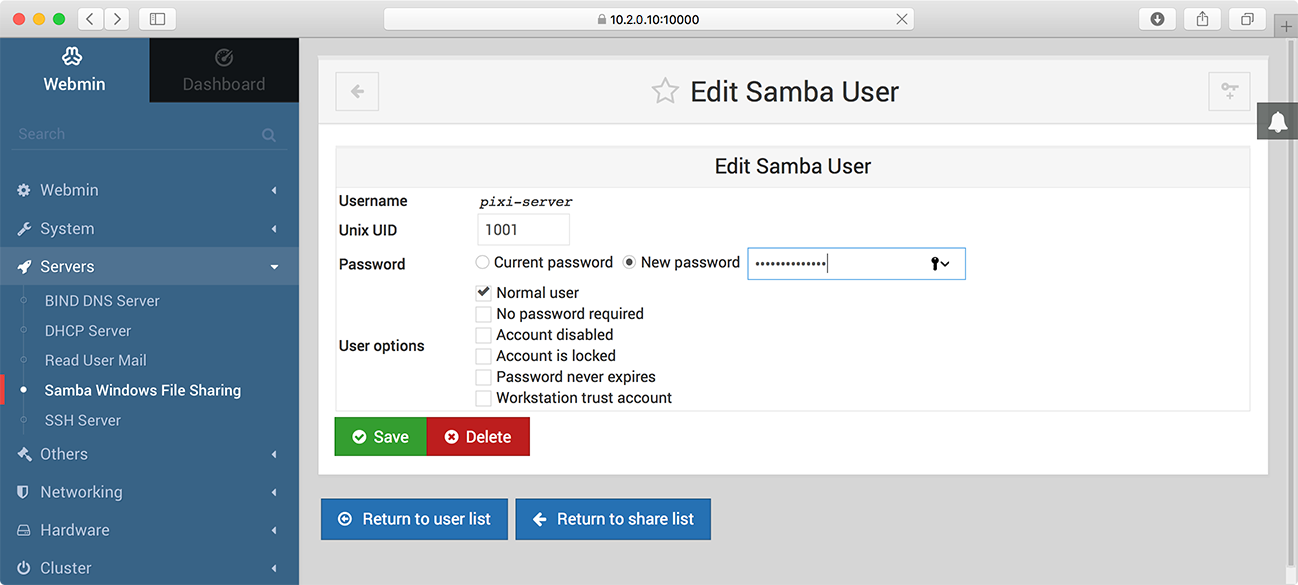
 You must change the password for all active File Sharing users before you start File Sharing. Leaving those passwords unchanged allows anyone who knows the default passwords and has access your network to access your files.
After changing user settings, click the green Save button. If you don't want to keep a pre-configured user, click the "Delete" button instead. You may also add other users with their own names and passwords, if desired.
Enabling and Starting the File Sharing Server
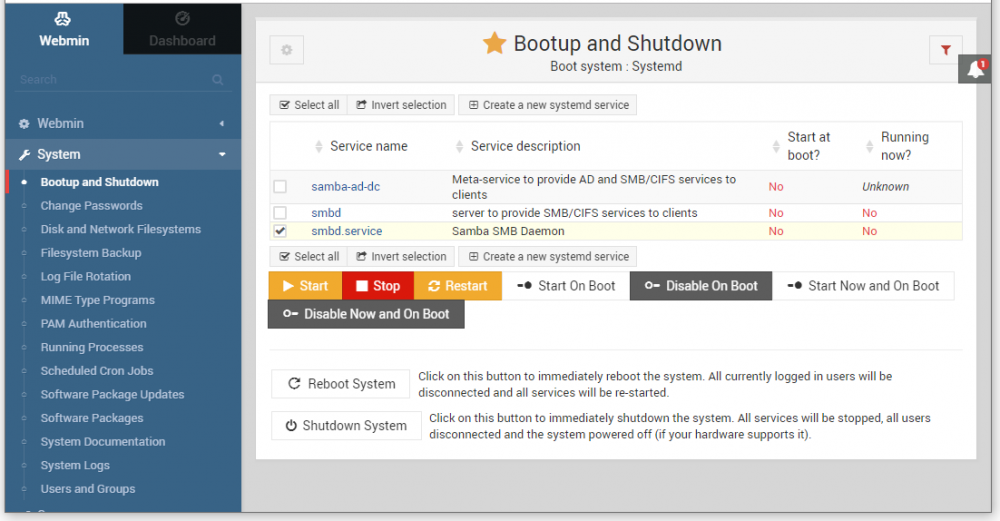
To start File Sharing, and to make sure that it will start automatically if the server is restarted, select "Bootup and Shutdown" under System in the menu on the left hand side. Once the list of services appear, type "smb" into the filter field in the top right hand corner to see the relevant services. Check "smbd.service", as shown below, then click "Start Now and on Boot".
Verifying File Sharing
Connect to the server using file sharing from a separate computer connected to the same network. Here's how to do so from a Mac
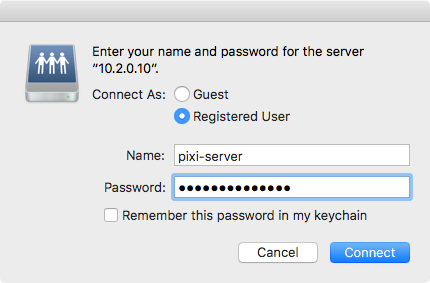
First open the "Connect to Server" window and type in the IP address of the server (if you have a configured DNS pointing to the server, you can use its assigned name instead of the IP address. Default IP is 10.2.0.10 in Linux images dated 2019-07-01 or later).
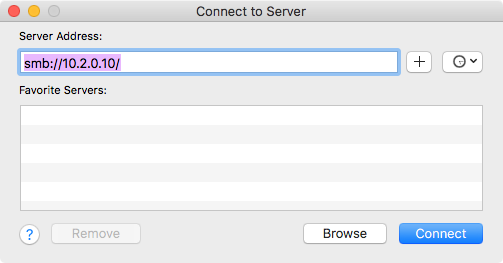
Type in the user name and password (as specified above under "File Sharing Users"). then press Connect.
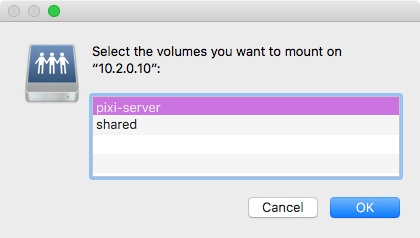
Select the desired volume (e.g., "pixi-server" to access the BLOCKS Server's files).
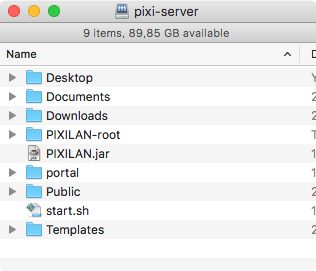
Finally, the content of the "pixi-server" user's home directory appear, allowing you to directly access its files.
If you're using a Windows computer, use the "Map Network Drive" Explorer command, then specify the network path like this (using the appropriate IP address of your Blocks server):
\\10.2.0.10\pixi-server
Here are some things to check if you don't get the expected response:
- Ensure that your separate computer is connected to the same network as the server (open a terminal window and type "ping 10.2.0.10" (or the IP of your particular server IP) to verify that it can reach the server).
- Double-check that the user name and password you specify match those configured in the server.