This is an old revision of the document!
List spots and blocks on a remote control
This application note shows an basic example how child replication can be used together with feed scripts to automatically list display spots and blocks in order to create a remote control user interface where it is possible to select a spot and then select block to play.
Installation
You need a computer with a running blocks server and a web browser to use this application note.
We have prepared a PIXILAB-blocks-root folder containing everything you need to run the examples.
Download this ZIP file and unpack it
If you don't know how to do this, read the instructions in the general setup section.
If you have done the general setup, copied the files and pointed to this application notes root block, follow the next steps to run this application on your computer.
- Start Blocks.
- Open the editor using the Admin button.
- Log in using the name admin and the password pixi.
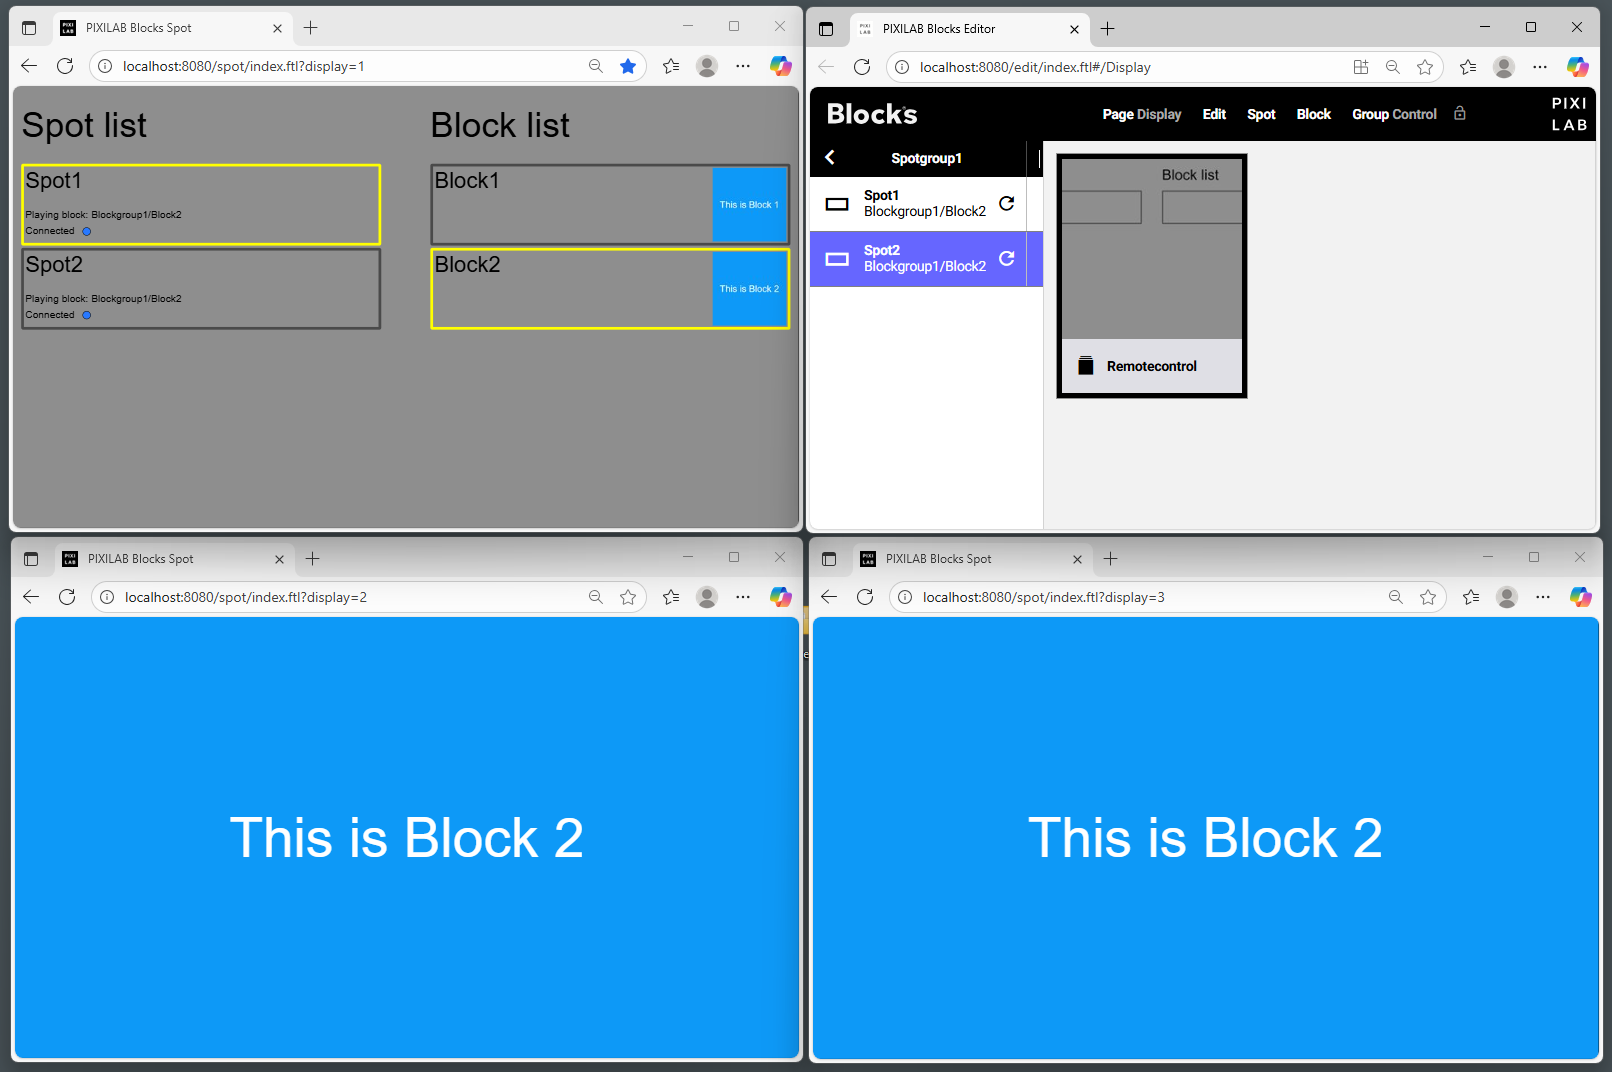
- Open a second browser window and type in the URL: http://localhost:8080/spot?display=1 this is where you will see the control interface. Assign the Remote_Control spot to this window from the display spot settings.
- Open a third browser window and type in the URL: http://localhost:8080/spot?display=2 assign this to one of the spots in Spotgroup1
- Open a third browser window and type in the URL: http://localhost:8080/spot?display=3 assign this to the other spot in Spotgroup1
Use the control panel
In the left column all the display spots in the Spotgroup1 is listed. In the right column all the Blocks in block group Blockgroup1 is listed. Select a spot by clicking on it, the border becomes yellow to indicate that it is currently selected. Select which block to assign to the selected spot by click on the wanted block.
If spots or blocks are added in the blocks editor the page must be reloaded to to update.
How it works
This example uses two separate feed scripts. They are both stored in /PIXILAB-Blocks-root/script/feed/ Blocks.js and Spots.js. Source code is in Blocks.ts and Spots.ts. Blocks feedscript creates a feed per Blockgroup and spots feed script creates a feed per spot group existing on the server. Those feeds are used by the child replication feature to expose the lists in the user interface.
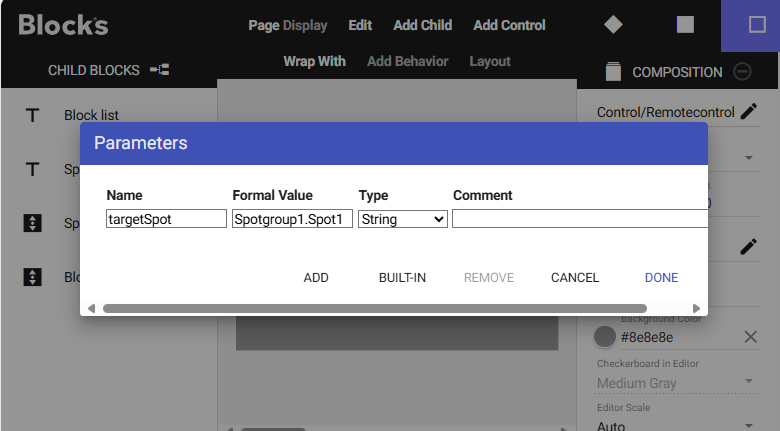
When the user selects a spot in the left column, the path to the selected spot is written as a string value to a local parameter named targetSpot. Parameters can be listed by clicking Edit/Edit parameters in the top menu of the editor. To be able to program buttons using parameters to parametrise the property paths one must have a formal value that matches the path to one of the spots existing on the system as in this screen shot.
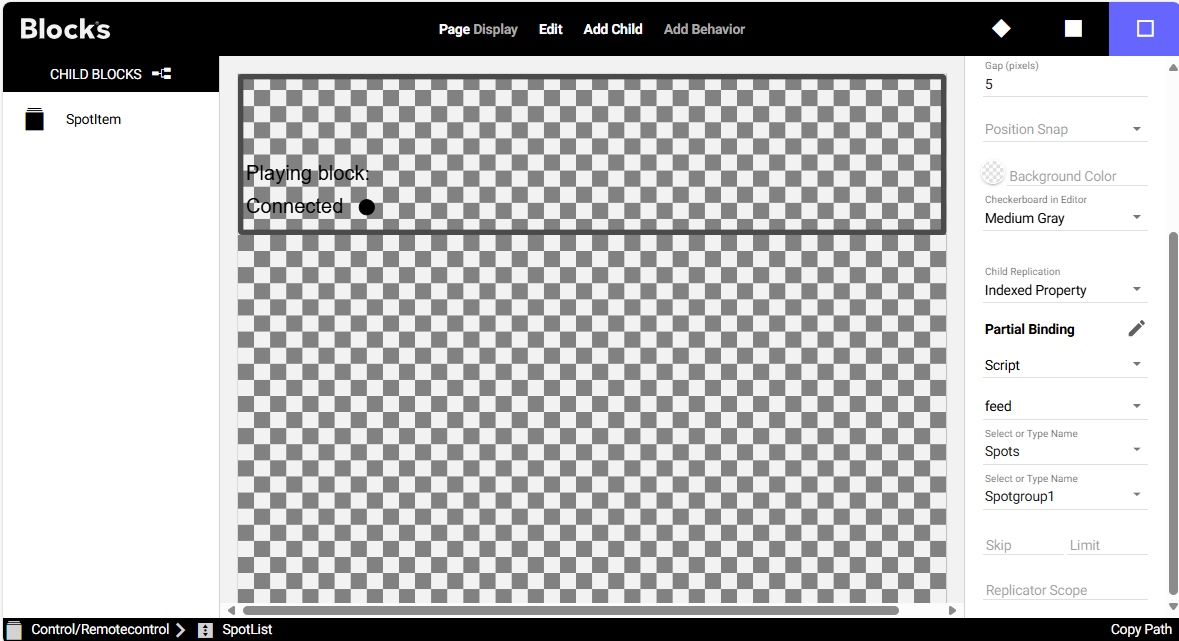
To view the child replication binding, edit the Control/RemoteControl block and open the SpotList scroller block. In the property panel of the scroller, you can see the source of the child replication. In this case, it is bound to the indexed property Script.feed.Spots.Spotgroup1.
Items in the list
For every item in the indexed property provided by the feed script, a SpotItem child is replicated. This acts as the layout template.
The layout can use various properties relative to the spot and the feed. In this example, it shows the spot name from the feed, and the connection and block property from the spot itself.
The block name is provided by a text element bound to Relative/spotName.
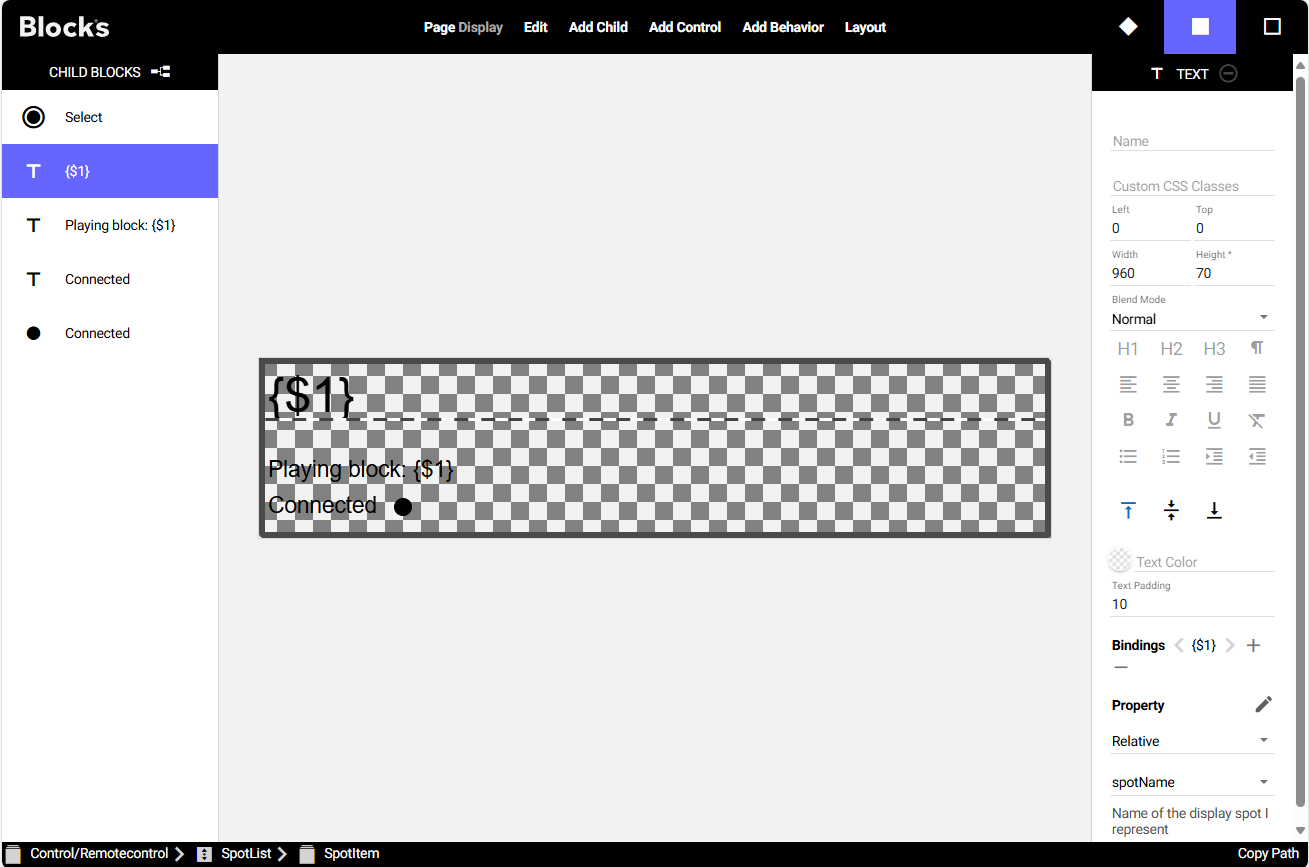
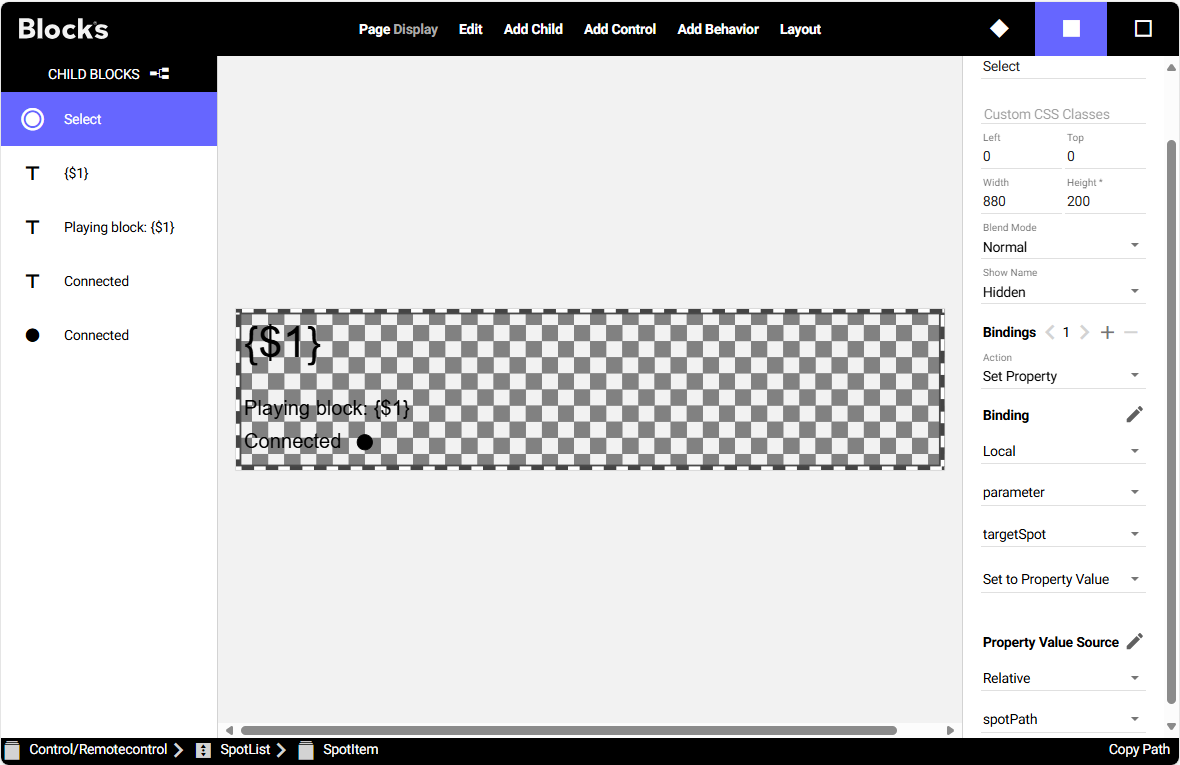
The Select button sets the local parameter Local/parameter/targetSpot to the value of Relative/spotPath. All Relative property paths are evaluated in the context of the current item in the list.
Custom property path
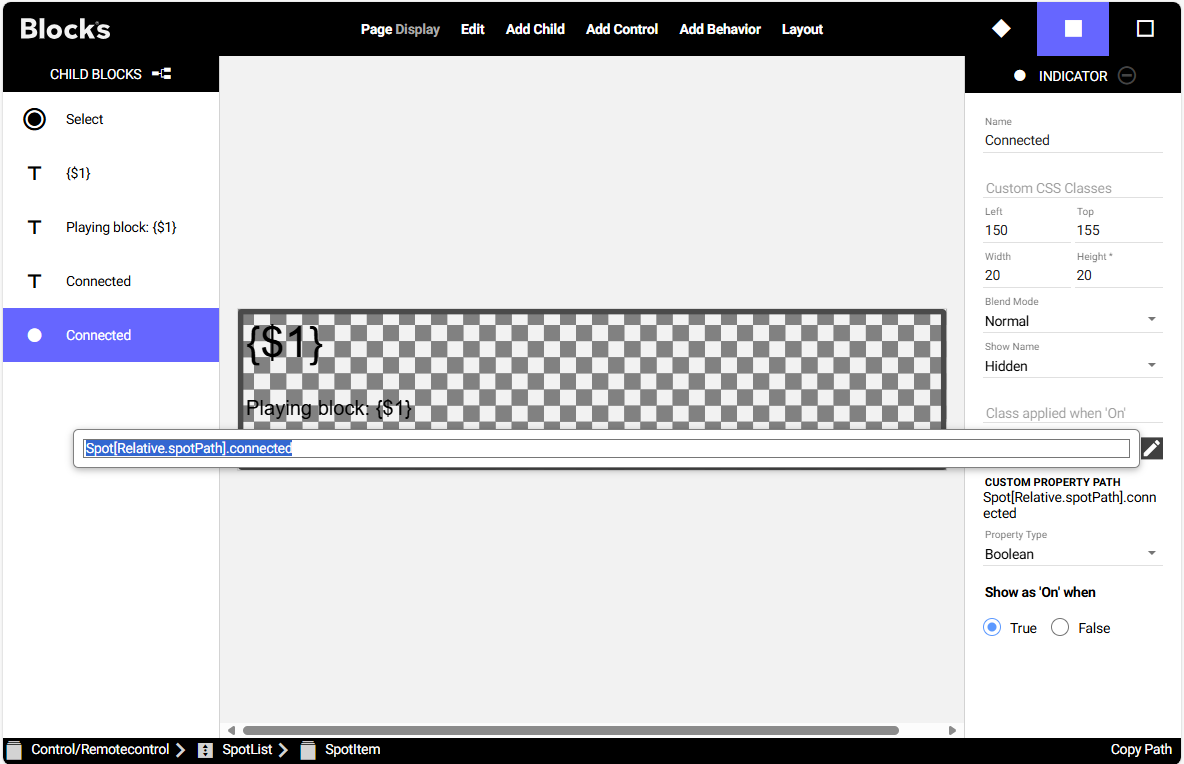
For the connected indicator and the spot’s playing block, custom property paths must be used to get values relative to the spot list item. This feature is not currently supported by the property path picker, so the paths must be written manually using bracket notation.
For example: Spot[Relative.spotPath].connected
Here, the value of Relative.spotPath is substituted into the path to reference the correct property.
To enter a custom property path, click the pen icon next to the property picker in the property panel.
.
