Deep Zoom
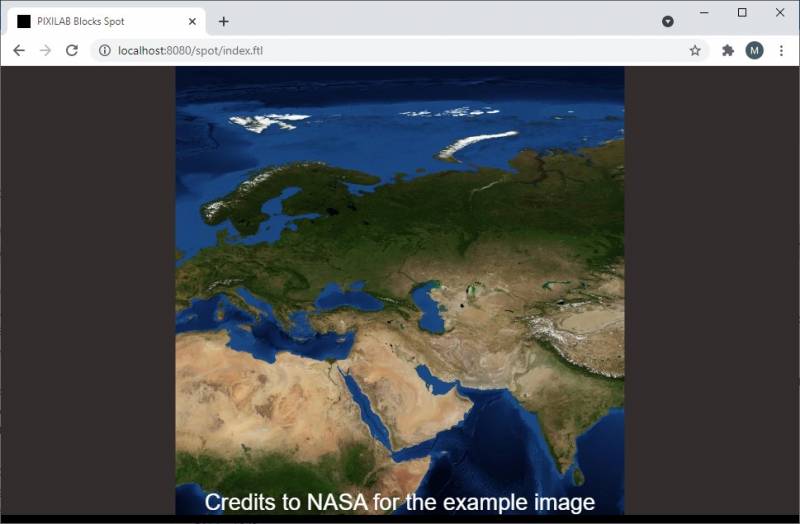
The term "deep zoom" refers to the ability of displaying extremely high resolution images in a way that allows you to zoom into the image using pinch and pan gestures on a touch screen. This can be used to show, for example, a large map where you can zoom in to read fine print or see other details. It's based on a pyramid representation of the original image, dividing it up into multiple layers of increasing resolution. This arrangement makes it possible to handle images that are too large to be managed as is.
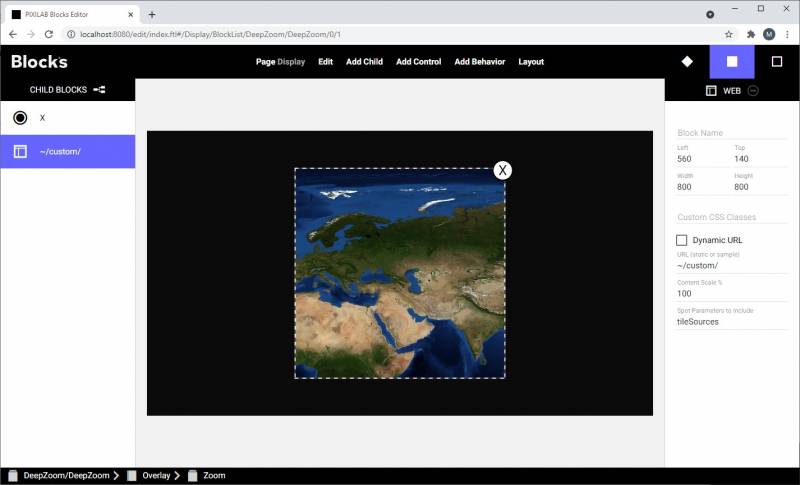
This application note shows how a Web Block can be used to present such deep zoom images. It's based on a small amount of custom html and an image that has been preprocessed using a command line program to create a pyramid representation. This is all embedded into the block itself, as a self contained unit that can be imported to any Blocks server
Using the deep zoom block
To try out a deep zoom image on your own Blocks server, do as follows:
- Download this block (but do not unpack the ZIP file).
- Import it into your Blocks server using the Import Block. command on the Block meny.
- Drag the resulting block onto a Display Spot, preferably one connected to a touch screen (for testing, you can also use a mouse with a scroll wheel).
- Pinch (or use the scroll wheel) to zoom into the image.
Here's another similar block, optimized for use on a mobile device in vertical orientation. Import it as described above, then drag it onto a Visitor Spot, accessed using a mobile phone.
Inside the deep zoom
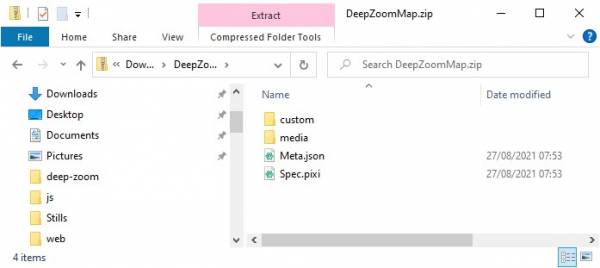
The two blocks mentioned above bundles a custom web page with the pyramidal representation of the image. Normally, you wouldn't open a ZIP file intended to be imported into Blocks. But if you want to learn more about how this block is structured, go ahead and unzip the deepzoommap.zip file downloaded above. This is what you'll find inside:
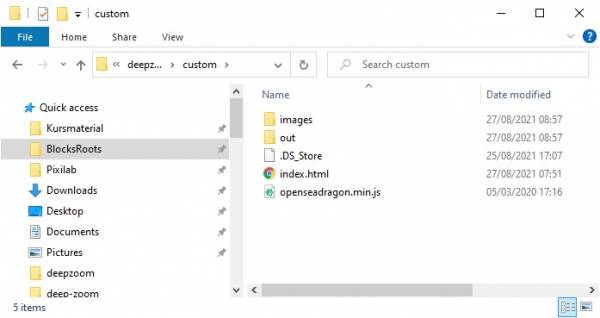
The Spec.pixi and Meta,json files as well as the media directory are standard Blocks stuff, while the custom directory contains the additional pieces used to render the deep zoom image using a Web Block. This is what's inside:
The index.html file is the HTML code used by the Web Block. The web block references this HTML code using a relative URL, beginning with a '~' character. This lets HTML content (as well as custom CSS files) to be embedded inside the block itself, allowing the block and its custom parts to be distributed and imported as a single unit.
Looking more closely at the files in the custom directory, you'll see an openseadragon.min.js file, which is the javascript that presents and manages the deep zoom image. The image folder contains images used to show navigation buttons, if enabled – not the deep zoom images. Those are inside the out folder.
Inside the out folder, you'll find a ".dzi" file containing various internal information describing the deep zoom image, as well as a directory containing the pyramid representation of the deep zoom image. Note that both the ".dzi" file and the directory are prefixed with the name of the deep zoom image, here "hr". The method used to create the content of the out directory is covered below.
In case you're interested in the inner workings of the web page used to show the deep zoom image, take a look in the index.html file:
<!DOCTYPE html>
<html lang="en">
  <head>
    <meta charset="UTF-8">
    <title>Title</title>
    <style>
      html, body {
        margin:0;
        padding: 0;
      }
      #openseadragon1 {
        width: 1920px; height: 1080px;
      }
    </style>
  </head>
  <body>
    <div id="openseadragon1"></div>
    <script src="openseadragon.min.js"></script>
    <script type="text/javascript">
      var viewer = OpenSeadragon({

        id: "openseadragon1",
        prefixUrl: "images/",
        tileSources: "out/hr.dzi",
        showNavigationControl: false

      });
    </script>
  </body>
</html>
Most of it is just standard HTML stuff, along with with some CSS inside the style tags. The size of the deep zoom image viewer is specified inside the #openseadragon1 CSS selector shown above.
The small amount of javascript code inside the script tag initializes the viewer, passing it various options, such as tileSources indicating where the image pyramid data is to be found and showNavigationControl, here set to false to not show navigation control buttons.
If you have access to the file system of your Blocks server (e.g., you're running Blocks locally on your laptop), you can locate these files under public/block/<group-name>/deepzoommap/custom/index.html, in case you want to try any other options. Just open the index.html file with a plain text editor and hack away. Reload the page showing the deep zoom block in your browser to see the changes. OpenSeadragon is the open source project that powers this deep zoom function.
Preparing high resolution images for deep zoom
A Java-based program is used to preprocess for deep zoom use. This program requires a recent version of Java installed on your computer. If you're not sure if this is available, do as follows:
- Open a terminal window.
- Type java -version and press enter.
If this command isn't recognized, you need to download and install Java before proceeding. If a version number is shown, make sure it's version 8 or later. You should also make sure the JAVA_HOME enviroment variable is set on the computer (at least on windows). If it is not you cannot just type java in the terminal, you will have to use the full path to java everytime you use it. Use google to see how to do that.
Then go ahead and download this program. This is an open source (public domain) command line program, kindly provided by the National Institute of Standards and Technology. More details can be found here.
Extract the pyramiddzitool.zip file. Inside, you'll find a high resolution example file. The tool supports JPEG and PNG image files containing 8-bit-per-component RGB data. If you run into trouble processing an image of your own, you may need to open, convery and re-save the image using an image editing program such as Photoshop or Gimp.
Two script files are included, showing how to use the command line program; process.bat for Windows and process.sh for MacOS and Linux. These scripts are just one-liners containing the command for processing the example hr.jpg file, generating the pyramid image data in the out folder. Run the script from a command line window, after navigating to its location, to start the process. Alternatively, copy the content of the script file and run it as is in the terminal. This is what's inside the scripts:
java -Xms1G -jar pyramidio-cli.jar --tileSize 510 -i hr.jpg -o out
Be patient, it takes a minute or so. You will se this message in the terminal while the process is running:
INFO: Making directory archiver for out
To process another image, just copy the file to the same directory as the tool and change hr.jpg in the command to the name of your new file. The result will end up in the out directory, prefixed with the source image file name. Avoid using spaces or non-ASCII characters in the file name.
Copy the resulting file and folder from inside the out directory into your deep zoom block's custom/out directory.
The file name of your new ".dzi" file must be specified in the custom blocks' index.html file. Find the line specifying the tileSource and change it accordingly.
Using multiple deep zoom images
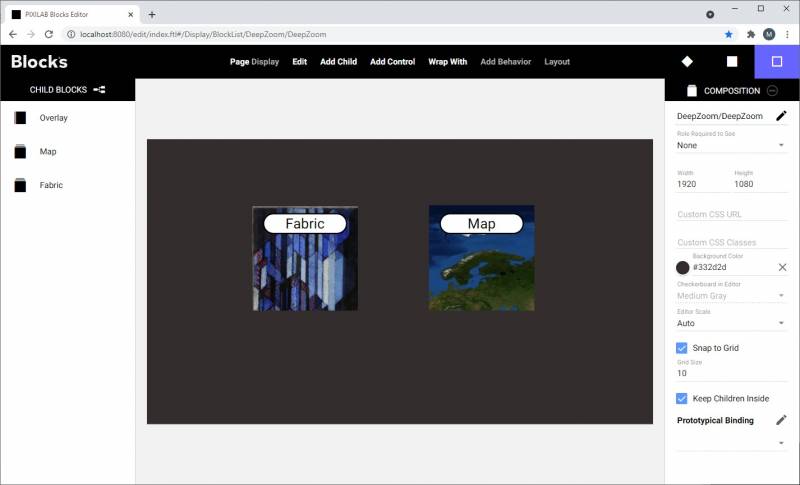
The next example block uses a slightly modified version of the index.html file accepting query parameters controlling the tileSource option in the script. The block structure used here is as follows:
- A Composition at the top-level.
- A number of smaller Compositions for building a simple menu.
- A Book for showing the image selected on the menu.
The menu buttons each have two actions; one setting a Spot Parameter subsequently used to control the tileSource, the other locating page2 in the Book, exposing a Web Block showing the deep zoom content. The close button returns to the menu.
The Web Block uses feature allowing you to pass Spot Parameters to a custom web page as query parameters. Here we pass the tileSource parameter set by the buttons. Multiple Spot Parameters can be passed along by listing their names, comma separated.
Using query parameters from custom HTML content
Below you can see how you can use query parameters from within custom HTML code. This is similar to the example shown earlier, but adds some code to extract and use query parameters, here for setting a number of deep zoom options. Additional options can be added as query parameters, as needed.
<!DOCTYPE html>
<html lang="en">
  <head>
    <meta charset="UTF-8">
    <title>Title</title>
    <style>
      html, body {
        margin:0;
        padding: 0;
      }
      #openseadragon1 {
        width: 800px; height: 800px;
      }
    </style>
  </head>
  <body>
    <div id="openseadragon1"></div>
    <script src="openseadragon.min.js"></script>
    <script type="text/javascript">

      /**
         Get the set of query params specified in URL, building it if not yet done.
         Returned as a dictionary with key/value pairs.
       */
      function getQueryParams() {
        if (!queryParams) {
          const query = window.location.search.substring(1);
          const vars = query.split("&");
          const qParams = {};
          if (vars.length > 0 && vars[0].length > 0) {  // Got some fish
            for (var i = 0; i < vars.length; i++) {
              const pair = vars[i].split('=');
              var value = pair[1];
              value = value.split('?')[0];  // Discard any garbage added by SSSP v2
              qParams[pair[0]] = value;
            }
          }
          queryParams = qParams;
        }
        return queryParams;
      }
      var queryParams;  // Query params cached here by getQueryParams


      var viewer = OpenSeadragon({
        id: "openseadragon1",
        prefixUrl: "images/",
        tileSources: getQueryParams()['tileSources'] || "out/hr.dzi",
        minZoomLevel: getQueryParams()['minZoomLevel'],
        maxZoomLevel: getQueryParams()['maxZoomLevel'],
        minZoomImageRatio: getQueryParams()['minZoomImageRatio'] || 1,
        maxZoomPixelRatio: getQueryParams()['maxZoomPixelRatio'] || 1,
        visibilityRatio: getQueryParams()['visibilityRatio'] || 1,
        showNavigationControl: false
      });

    </script>
  </body>
</html>
