Using Anydesk
Anydesk is a handy remote access program, similar to VNC and TeamViewer. It comes pre-installed on our Linux image version 200701 and later. It can be used to remotely manage a Blocks server in various ways:
- Accessing the desktop of the server, seeing what the local user sees.
- Connecting to the remote Blocks server using a web browser.
- Accessing the file system of the remote Blocks server, either through Anydesk's file browser or by directly accessing the Blocks server's SMB file sharing feature from your laptop.
 In order to access a Blocks server remotely, the Blocks server must have internet access. You don't need to open any ports to the server for access from the internet, but the server must be able to reach the internet. E.g., you must be able to access websites using a browser running on the Blocks server.
Getting Anydesk
Download Anydesk software from the Downloads page under https://anydesk.com/en. If you're installing on Linux, you'll get a DEB file which you then install as follows:
NOTE: If you want to use Anydesk on your Block server and you have installed our Linux image, version 200701 (or later), you can skip this section as Anydesk is already pre-installed.
- Log in to the Linux computer. If this is a Blocks server, log in as the pixi-admin user.
- Copy the anydesk DEB file to the server using a USB stick (or download it directly to the server).
- Open a terminal window and type the following commands, replacing <path-to-deb-file> with the full path to the DEB file, entering pixi-admin's password when requested.
sudo apt install <path-to-deb-file>
sudo apt-get install --fix-missing
HINT: You can enter the full path by dragging the file into the terminal window after typing the partial command, before pressing Enter.
The second command line above is sometimes required for installing missing dependencies of AnyDesk. If prompted to accept the suggested installation files, type Y then press Enter.
Starting Anydesk
Anydesk needs to be running both on your Blocks server and on the remote computer used to access it. Do as follows to start it on your Blocks server.
- After installing it, as described above, switch to the pixi-server user.
- Click Activities in the top left hand corner.
- Type anydesk into the search field.
- Click the red AnyDesk icon to start the program.
HINT: To speed up subsequent usage, right-click the AnyDesk icon that now appears in the dock and select "Add to Favorites", making it stick in the dock. If you installed our Linux image, version 200701 (or later), the AnyDesk icon is already present in the dock.
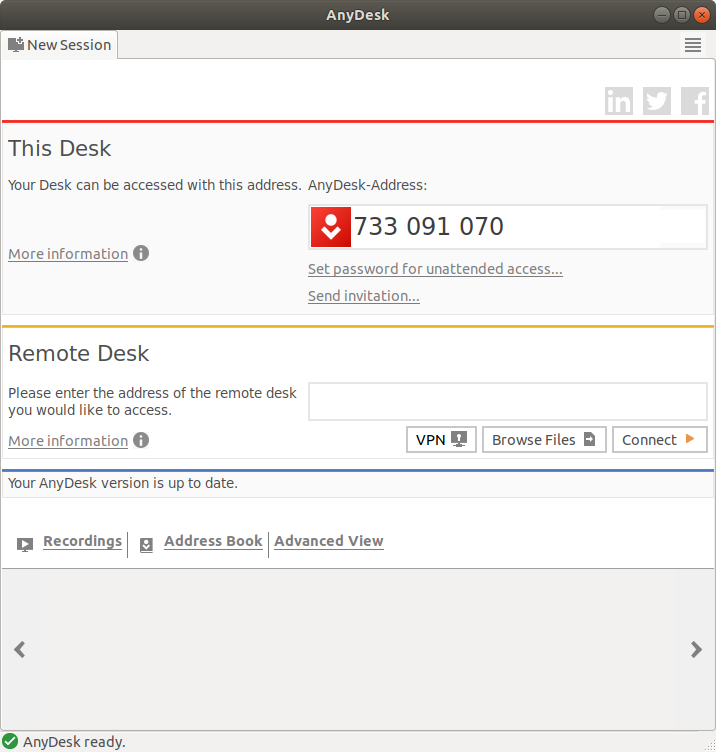
Take note of the 9 digit ID number appearing in the AnyDesk window (733 091 070 in the example shown above), as you'll need this to connect from your remote laptop.
Connecting from your Computer
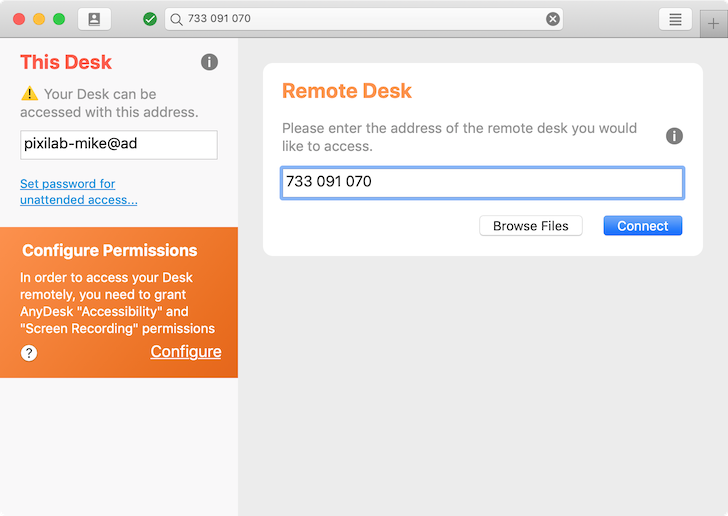
To connect to the Blocks server remotely, do as follows from your own computer:
- Start AnyDesk.
- Type the 9 digit ID mentioned above into the "Remote Desk" field.
- Click the Connect button.
As you attempt to connect, a window will pop up on the Blocks server's screen, where a person with physical access to the Blocks server will need to grant access.
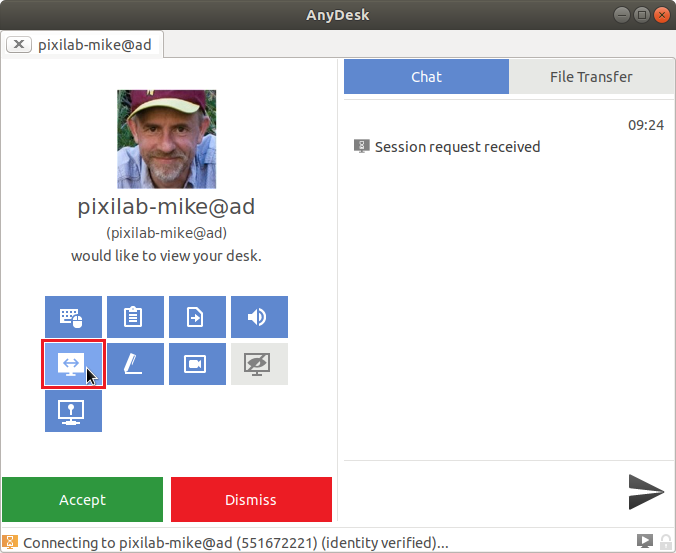
Before pressing Accept, the user at the Blocks server may chose to grant additional permissions. Once such permission that may be useful during the session is the "TCP Tunnel", highlighted with a red border in the illustration above (more on this later).
Once the connection is established, you can now view the screen of the Blocks server, and operate it as if you were on site. There's also a File Manager that can be used to copy files to/from the Blocks server.
Enabling Unattended Access
The method outlined above assumes there's a person on site starting Anydesk and accepting the access request. As an alternative, it is possible to set up Anydesk for unattended access, allowing it to be accessed remotely without any manual, on site action required. Follow these steps to do so.
- Open the terminal.
- Change user to pixi-admin
su pixi-admin
- Enter your pixi-admin password.
- Enable the AnyDesk service at boot (where the –now option also start the service immidiately).
sudo systemctl enable --now anydesk.service
- Open AnydDesk on the server by clicking the AnyDesk icon.
- Open Anydesk's Settings menu (a "hamburger menu" in the top left corner).
- Select the Security settings.
- Click Unlock Security settings.
- Type in the admin password.
- Check the Enable unattended access.
- Set a password for unattended access.
- Under interactive access, change to "Never show incoming session requests" If this is not done the incoming request still must be confirmed by on premise by a uses. (Seem to be a bug but with version 6.3.1 on Linux this seem to be the case.
Read more about this option here.
CAUTION: Enabling unattended access is less secure, since no manual intervention is required on the server side.
Finally, Anydesk will not work properly unless a monitor (or something seen as a monitor) is connected to the computer.
Using TCP Tunnels
A TCP tunnel can be used to access the Blocks server in more ways:
- Directly connecting to Blocks using a browser running on your laptop, rather than through the remote desktop. This allows you to drag media file directly from your laptop into Blocks, as if you were connected to Blocks on the local network.
- Connecting to file sharing on the Blocks server, providing direct access to its files from your laptop rather than by copying files back and forth, as described above.
The file sharing option requires that file sharing is enabled on the Blocks server, and is particularly useful if you need to directly access and edit files – such as user script – on the server.
To use TCP Tunnels, the person accepting your connection request must explicitly allow
the "TCP Tunnel", highlighted with a red border in the illustration shown above.
Establishing the TCP Tunnels
A separate tunnel needs to be provided for each service you need to access on the Blocks server. The TCP tunnels are configured on your remote computer, not on the Blocks server. Configure the tunnels by clicking the menu button next to the remote computer in the RECENT SESSIONS list.
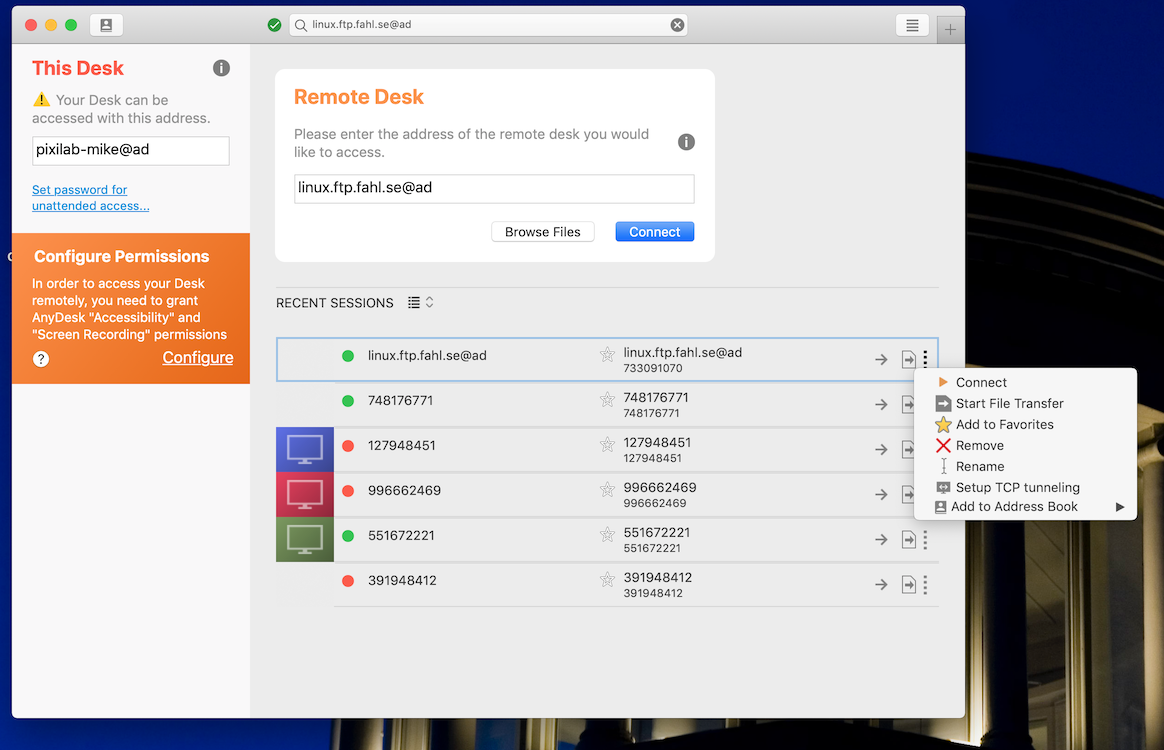
The session is typically named by its 9-digit client ID, but may alternatively be named by an alias assigned to the client, as shown in the illustration above. An alias provides a name that's easier to remember.
Create a separate tunnel for each service you need to access on the Blocks server. The next illustration shows tunnels created for browser access (remote port 80) and file sharing (remote port 139).
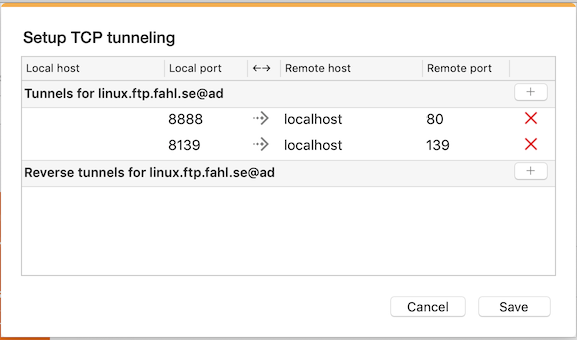
The remote ports need to be bound to a local port that's free and available to the AnyDesk program running on your local laptop. In the example shown above, I used port 8888 for browser access and port 8139 for file sharing.
Browser Access
Once the tunnel has been configured, open a web browser on your laptop and enter the following URL:
http://localhost:8888/edit
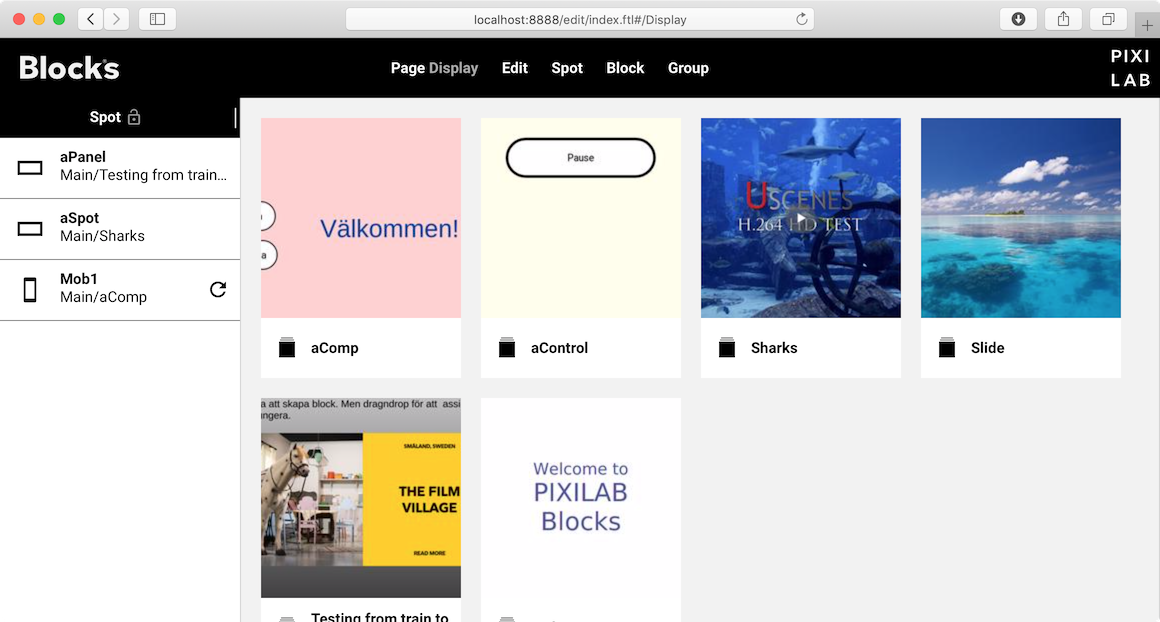
The port number specified after the colon must match the local port number assigned to the tunnel in the previous step above (here 8888). Note that you access the remote Blocks server through localhost on your laptop, which is somewhat counter intuitive. This is because a secure tunnel has been established by AnyDesk from a port on your local laptop to the Blocks server. This is similar to a VPN tunnel in many ways, except this kind of tunnel only supports TCP connections (which is all we need here).
File Sharing Access
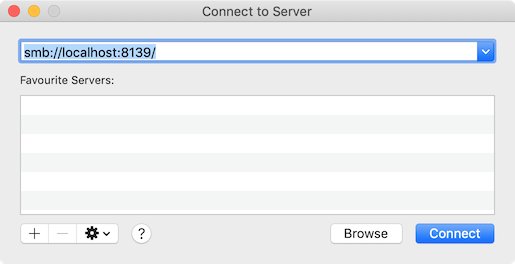
Assuming you also created a TCP tunnel to port 139 on the Blocks server, and that file sharing is enabled on the Blocks server, you can now also mount the Blocks server's home directory on your laptop, providing direct access to its files without the need for copying them back and forth.
The following examples shows how to access the file share from a Mac. Windows also provides similar functionality.
- In the Finder, press Command-K to bring up the "Connect to Server" window.
- Type the following URL into the dialog
smb://localhost:8139/
In the subsequent window, enter the user name pixi-server and the password assigned to that user on your Blocks server (the default password is "PixiServer!").
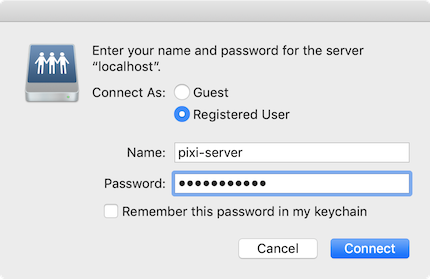
Press Connect to mount the file share, making it appear on your local computer. If you have desktop icons enabled, it appears as a remote disk drive on your desktop. You can now directly access files on the remote Blocks server, for example to edit drivers and scripts using a code editor.