Using an Android Device as a Spot
There's a wide variety of cost-effective devices running the Android operating system, which can be used as Spots. There are two ways an Android device can be used:
- Temporarily, as a Mobile Spot. This allows visitors to use their Android or iOS mobile devices as mobile guides on a local wifi network.
- As a Display Spot, either for display-only purposes or as an interactive kiosk.
This document describes how to set up an Android device as a Display Spot. Refer to the Blocks Manual for details on using it as a Mobile Spot.

When using an Android device as a Display Spot, you generally want it to be locked to this function only. This may be problematic with Android devices that have user-accessible buttons or on-screen "soft" buttons. A "kiosk" app can be used to avoid these problems, converting your Android device into a locked down kiosk.
If you for any reason want to use a plain browser instead of a kiosk app, make sure you enable autoplay in order to play audio and video without requiring user interaction. This behavior is applied automatically by the Fully Kiosk app.
The best kiosk app we've found is "Fully Kiosk Browser & App Lockdown". This is available in a free, basic version and a paid "plus" version. Depending on your application, and what kind of Android device you're using, either of those versions may be appropriate. Start with the free version to see if it's sufficient. If not, you can enable "plus" features even in the free version to try them out (this shows a watermark on screen).
The kiosk app has numerous settings to configure the lock-down as well as many other options. These settings can either be configured manually, or loaded from a file. The latter method is useful if you need to set up numerous devices, as you then only must go through the options once. The settings file can be stored on a memory card, which can then be loaded into the other devices.
There's a sample settings file you can use as a starting point. To use this file, do as follows:
- Download the zip file.
Fully has changed the file format, we will update this soon. Meanwhile make a manual config.
- Unpack the zip.
- Transfer the resulting single file named "fully-settings.dat" to a memory card suitable for your devices.
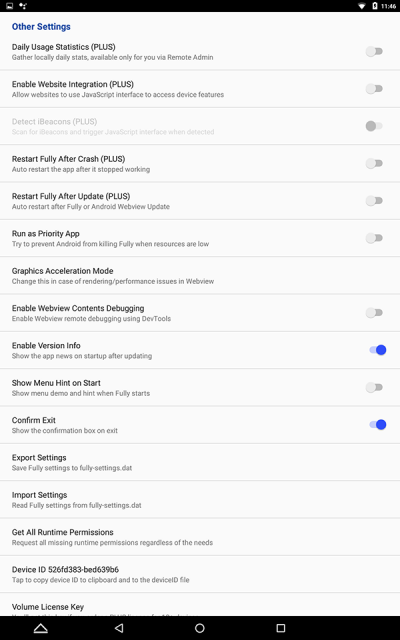
- Insert the card into the device, and use the "Import Settings" command found under "Other Settings" in the kiosk apps settings menu shown below. The settings menu is accessed by swiping in from the left hand side of the screen.
You may want to change some settings after loading the settings file, such as the URL of your Blocks server. Here's an overview of some of the settings you may want to change.
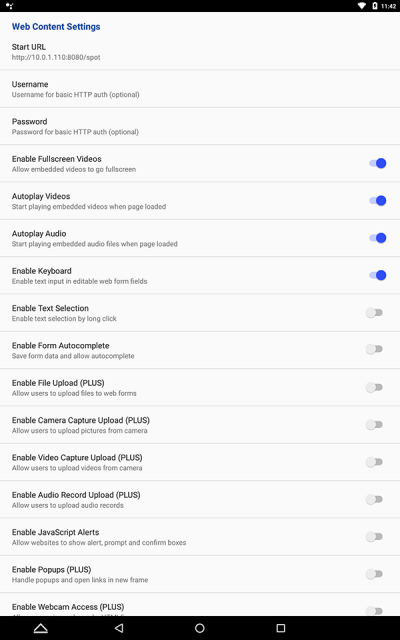
Set the "Start URL" parameter to point at your Blocks server. if you have a DNS set up to provide a server name (such as "pixi.guide", enter that instead of the IP address. The ":8080" part is the port number. You can leave this out if the server is running on the default port 80 (which is the case for our Linux based Blocks server configuration).
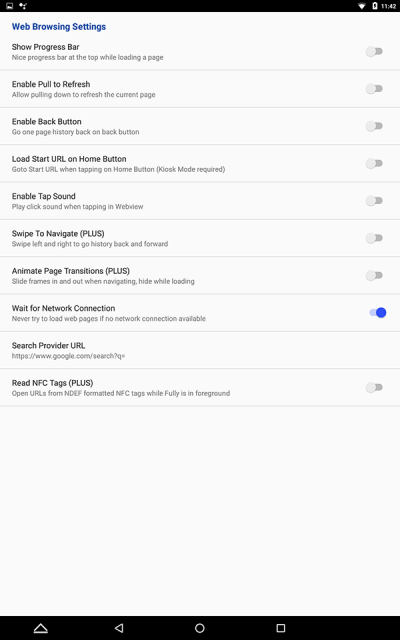
The "Wait for Network Connection" makes sure the kiosk will not attempt to load the page unless the network is available.
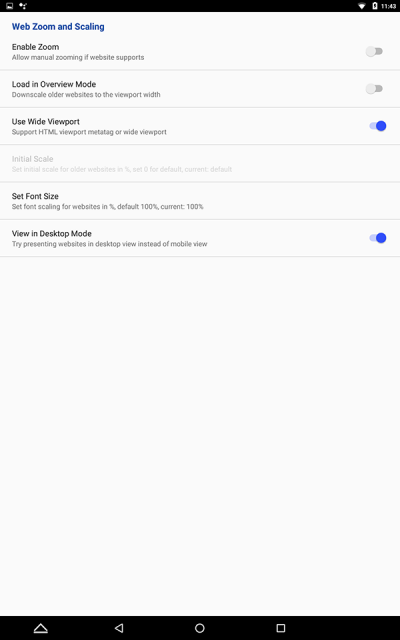
Disable "pinch to zoom", and allow the spot to use the full display width.
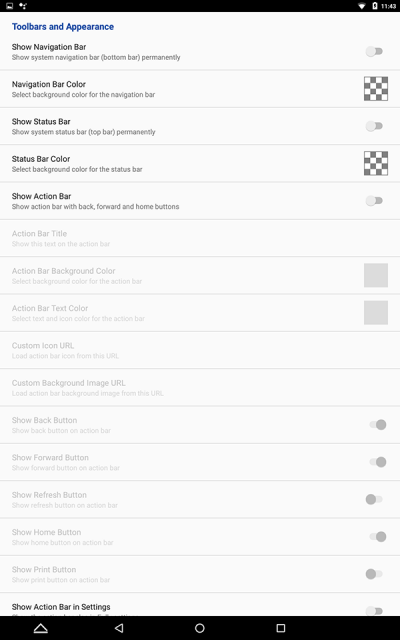
Hide all navigation and status bars, making sure the Display Spot controls the full screen area.
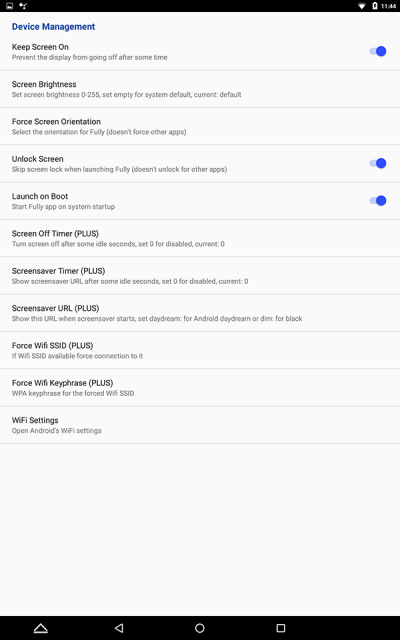
Go straight into the kiosk app if the device is restarted.
The "Kiosk Mode" settings page contains numerous handy lock-down functions, including password protection, making the "plus"-version app well worth its modest cost. More details found here:
