Table of Contents
Countdown timer
This application note describes the use of a countdown script inside a Block, including the following functions:
- Controlling the timer from task.
- Setting the start time.
- Pausing the countdown timer
- Controlling the timer from a spot with button and text inputs.
- Triggering something when the counter reaches zero.
Installation
First follow this general setup. Use this PIXILAB-Blocks-root, which contains all you need for this application note. Once that is done, follow these steps:
- Start Blocks.
- Open the editor using the Admin button.
- Log in using the name admin and the password pixi.
- Open a second browser window and type in the URL: http://localhost:8080/spot/. If this fails you may be using a different port on your system. Check the URL bar of the editor window opened before to find the correct port number.
- Locate the main display in the editor, double-click it and and reassign it to the ID shown in the test spot window opened in the previus step.
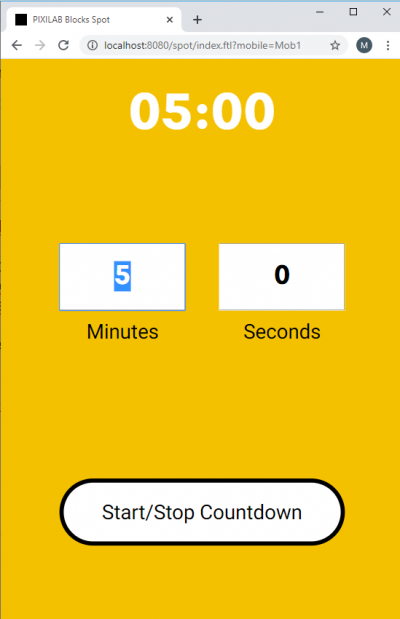
- Open a third browser window and type in the URL: http://localhost:8080/spot/index.ftl?mobile=Mob1. This window can control the timer.
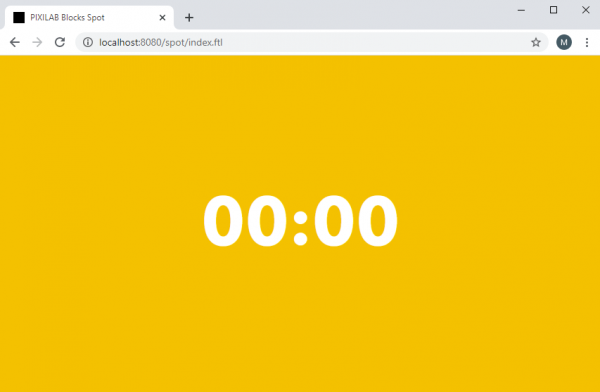
You should now see the countdown clock on the display spot.
And another panel in the Mob1 visitor spot.
How does it work
The countdown is managed by a user script located at script/user/countdown.js in the blocks root folder. All controls and tasks communicate with this script to control it and interact with its properties. Read this article to learn more about user scripts.
Using tasks
Open the Task page in the editor to examine the tasks and variables involved. Select the CountDown Realm. There are three tasks and two variables.
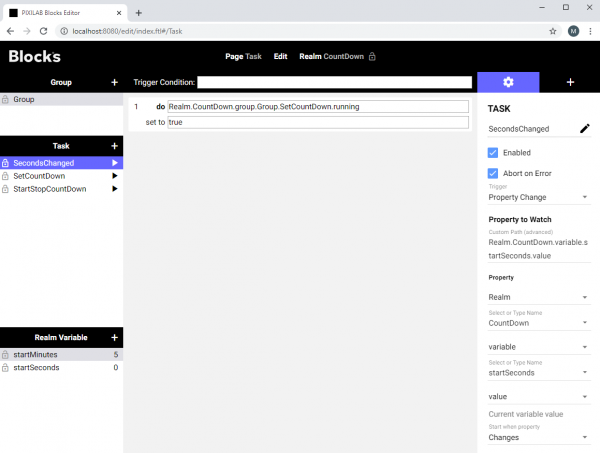
startMinutes and startSeconds holds the numeric values used to set the starting time in the countdown script. startMinutes has 5 set as its default value just to give an initial value.
The SetCountDown task passes the time values to the script by calling Script.user.Countdown.start. This task is triggered every time someone changes the value in the startMinutes variable. Unless the property Script.user.Countdown.start is set to false in the script the countdown will start counting automatically. This task also has a trigger that runs it as soon as the startMinutes.value changes.
SecondsChanged task is just used to run the SetCountDown task if startSeconds.value changes. As it is only possible to trig a task from one single trigger this is the method to be able to listen to multiple triggers.
StartStopCountDown task is there just to illustrate that you can start and stop the countdown from a task using the Script.user.Countdown.running property of the script. In this case we just toggle the running property when clicking the little play button.
Take a moment and try out the play buttons next to each task while watching the spots.
Blocks, bindings and controls
Now let us take a look inside the block running on the display spot.
Select the Page Display (ctrl+1) from the menu in the top of the editor. Double click the CountDownIndex block to open it for editing.
Select the text child to see its bindings. In this case we use two bindings. {$1} for minutes and {$2} for seconds.
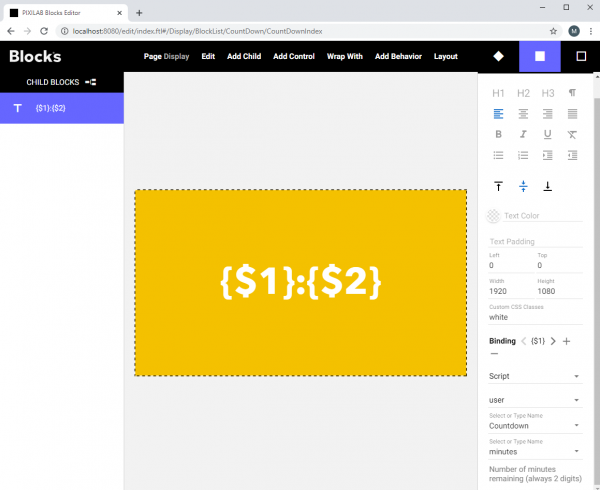
If you want to add some text next to the bindings, just double click the text and type something.
Let’s close this one by clicking the Blocks logo and open the CountdownControlIndex block for editing instead.
Select the Seconds text input control.
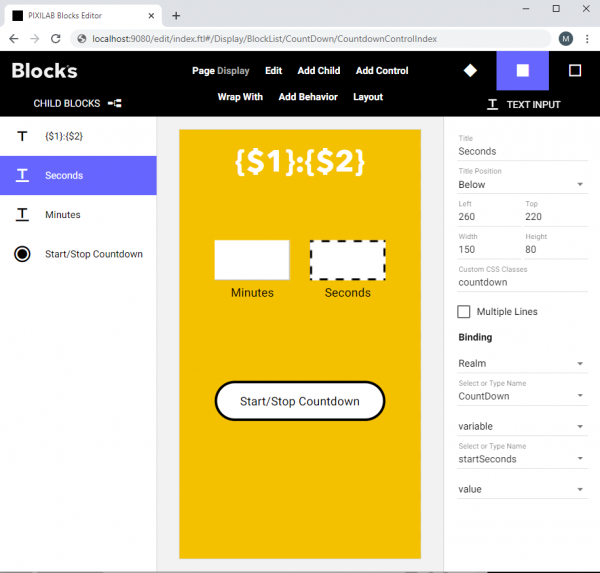
As you can see this one has a binding to the startSeconds variable. If you remember from the task section earlier, the task that communicates with the script is triggered from any change to either the startSeconds or the startMinutes variable so any new or changed input here will reset the counter to the new value automatically.
Finally, let's select the Start/Stop Countdown button control so take a look at its binding.
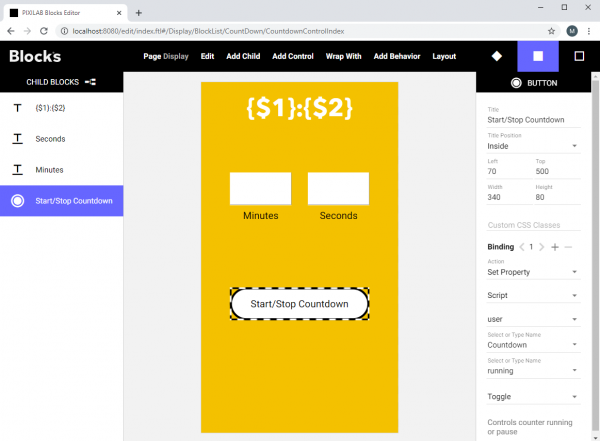
This one binds directly to the running property of the Countdown user script. This makes the button follow the state of the property at all times.
The zero property
There is a one more feature in this script that is often useful. Go back to the Task page to make a task like like the AtZero examle.
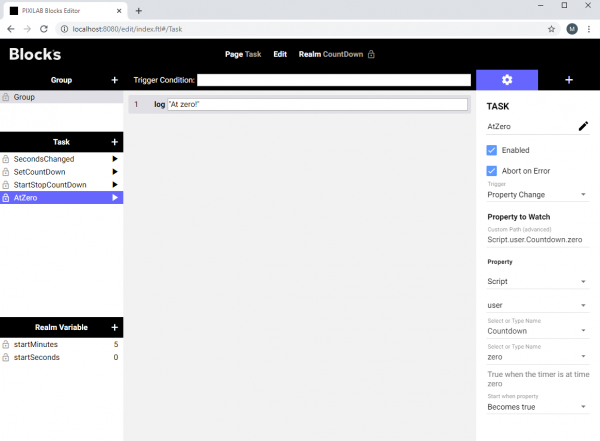
This can be used to make something happen when countdown reaches zero. In our example, this just logs a message.