This is an old revision of the document!
Connecting Google Web Designer to Blocks
This article explains how to set and subscribe to Blocks properties from Google Web Designer using a custom component available for download on this page. It is assumed that the reader is familiar with Google Web Designer.
Installing the PIXILAB Blocks Property custom component
To install the PIXILAB Blocks Property custom component, download this ZIP file and install it according to the official installation instructions.
Using the PIXILAB Blocks Property custom component
TODO: DESCRIBE HOW TO SET THE WEBSOCKET ADDRESS
When placed in a Google Web Designer document, the PIXILAB Blocks Property component provides a set of events and actions for getting and setting the value of a specific Blocks property. The "Property changes", "Property becomes true" and "Property becomes false" events can be used to react to property changes, and the "Set property value" action can be used to set the value of the property.
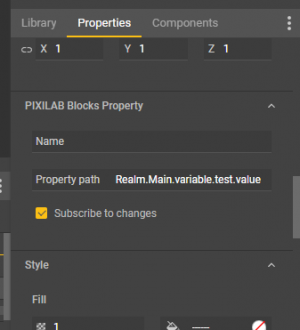
The component must be configured before it can be used: Select the component, open the Properties tab and scroll down to the "PIXILAB Blocks Property" section. Set the property path and choose whether to subscribe to property changes or not:
 PIXILAB Blocks Property components are visible in the Google Web Designer editor, but will not be visible in the final result.
Example: Run a Task by clicking a button
- On the Tasks page in the Blocks editor, create a group named "test" in the Main realm, then create a Task named "test". Add a log statement with a message of your choice.
- In a Google Web Designer project, add a new PIXILAB Blocks Property component to the document.
- Set the Property path to "Realm.Main.group.test.test.running" and uncheck "Subscribe to changes".
- Add a new Button component to the document.
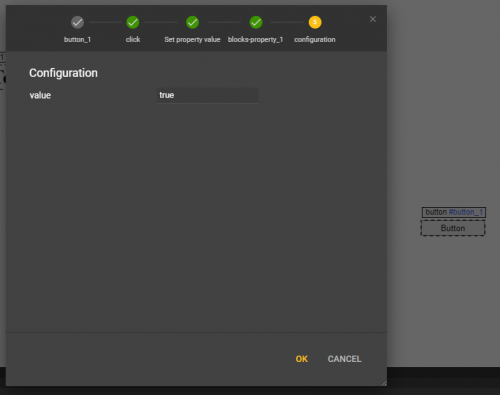
- Create a new click event with the previously added button as the target.
- Select the "PIXILAB Blocks Property - Set property value" action.
- Select the previously added PIXILAB Blocks Property component as the receiver.
- Set the property value to "true":
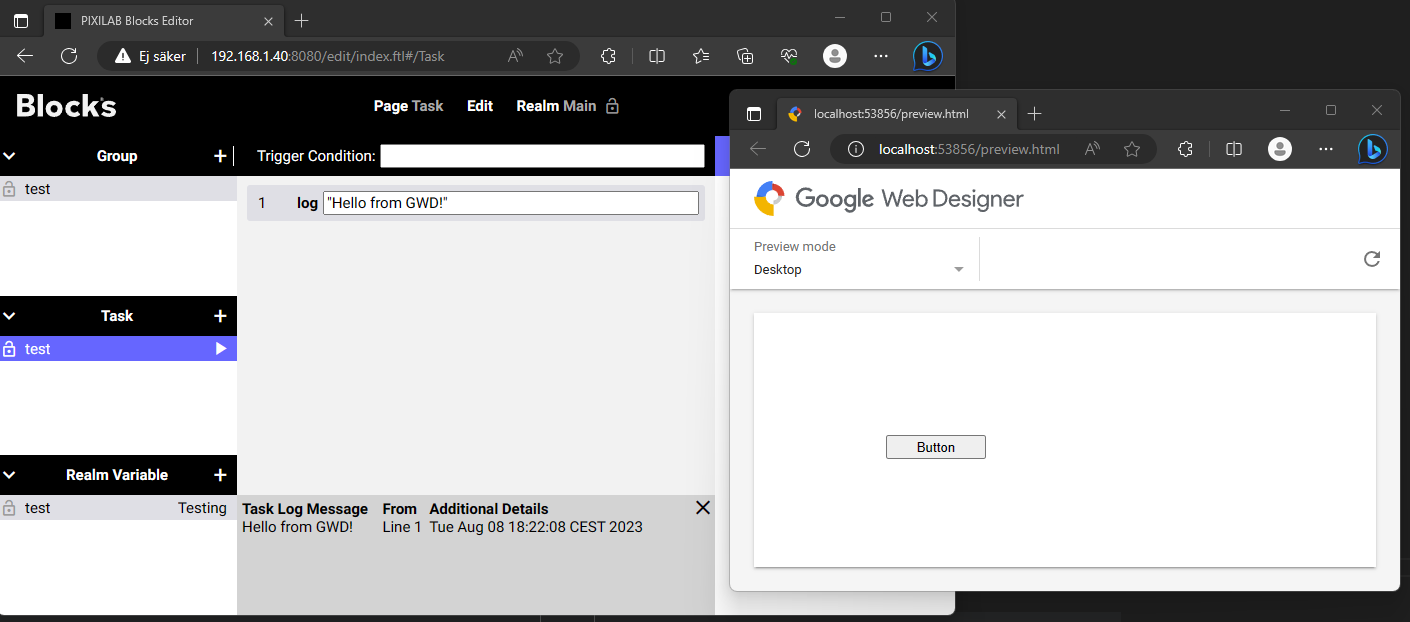
Launch the Preview and click the button. Go to the Task page in Blocks. The log statement shows that the "test" Task was executed:
Example: "Bind" a text to a Blocks property
- On the Tasks page in the Blocks editor, create a string realm variable named "test" in the Main realm. Give it a default value of your choice.
- In a Google Web Designer project, add a new PIXILAB Blocks Property component to the document.
- Set the Property path to "Realm.Main.variable.test.value" and make sure "Subscribe to changes" is checked.
- Add a new text element to the document. (The text content does not matter.)
- Set the ID of the text element to "test".
- Create a new event with the previously added PIXILAB Blocks Property component as the target.
- Select the "PIXILAB Blocks Property - Property changes" event type.
- Select "Custom action".
- Give the action a name and enter the following custom code:
document.getElementById("test").textContent = event.detail.value;
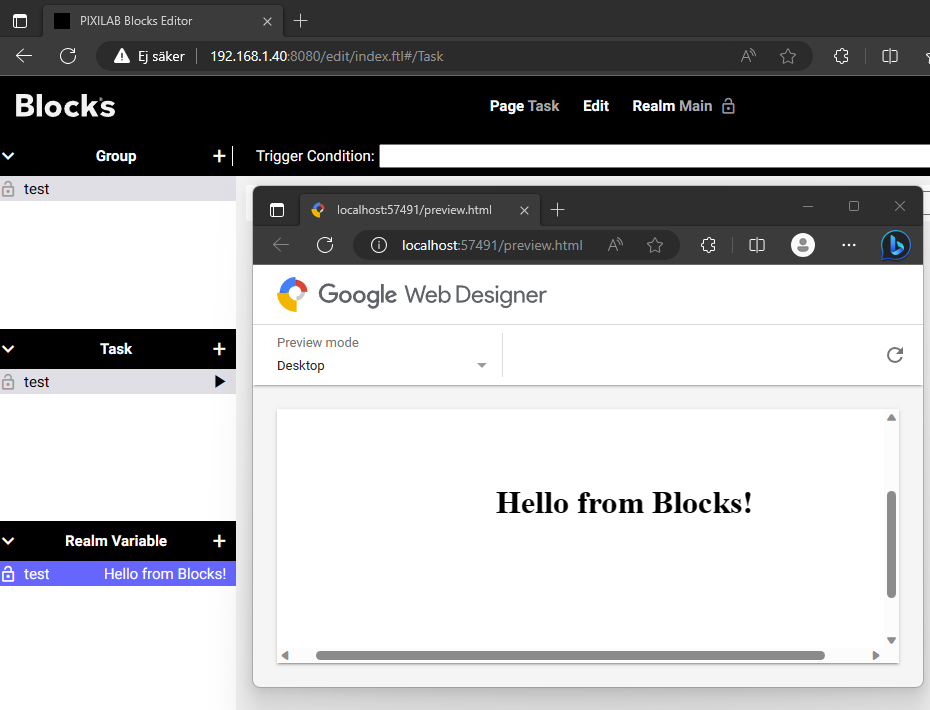
Launch the Preview. The text now shows the value of the "test" Realm variable. If the "test" Realm variable changes, a "Property changes" event will be fired, and the custom action will update the text.